I’ve found that designing a kitchen today goes way beyond cooking; it’s really about how you use the space on a day-to-day basis.
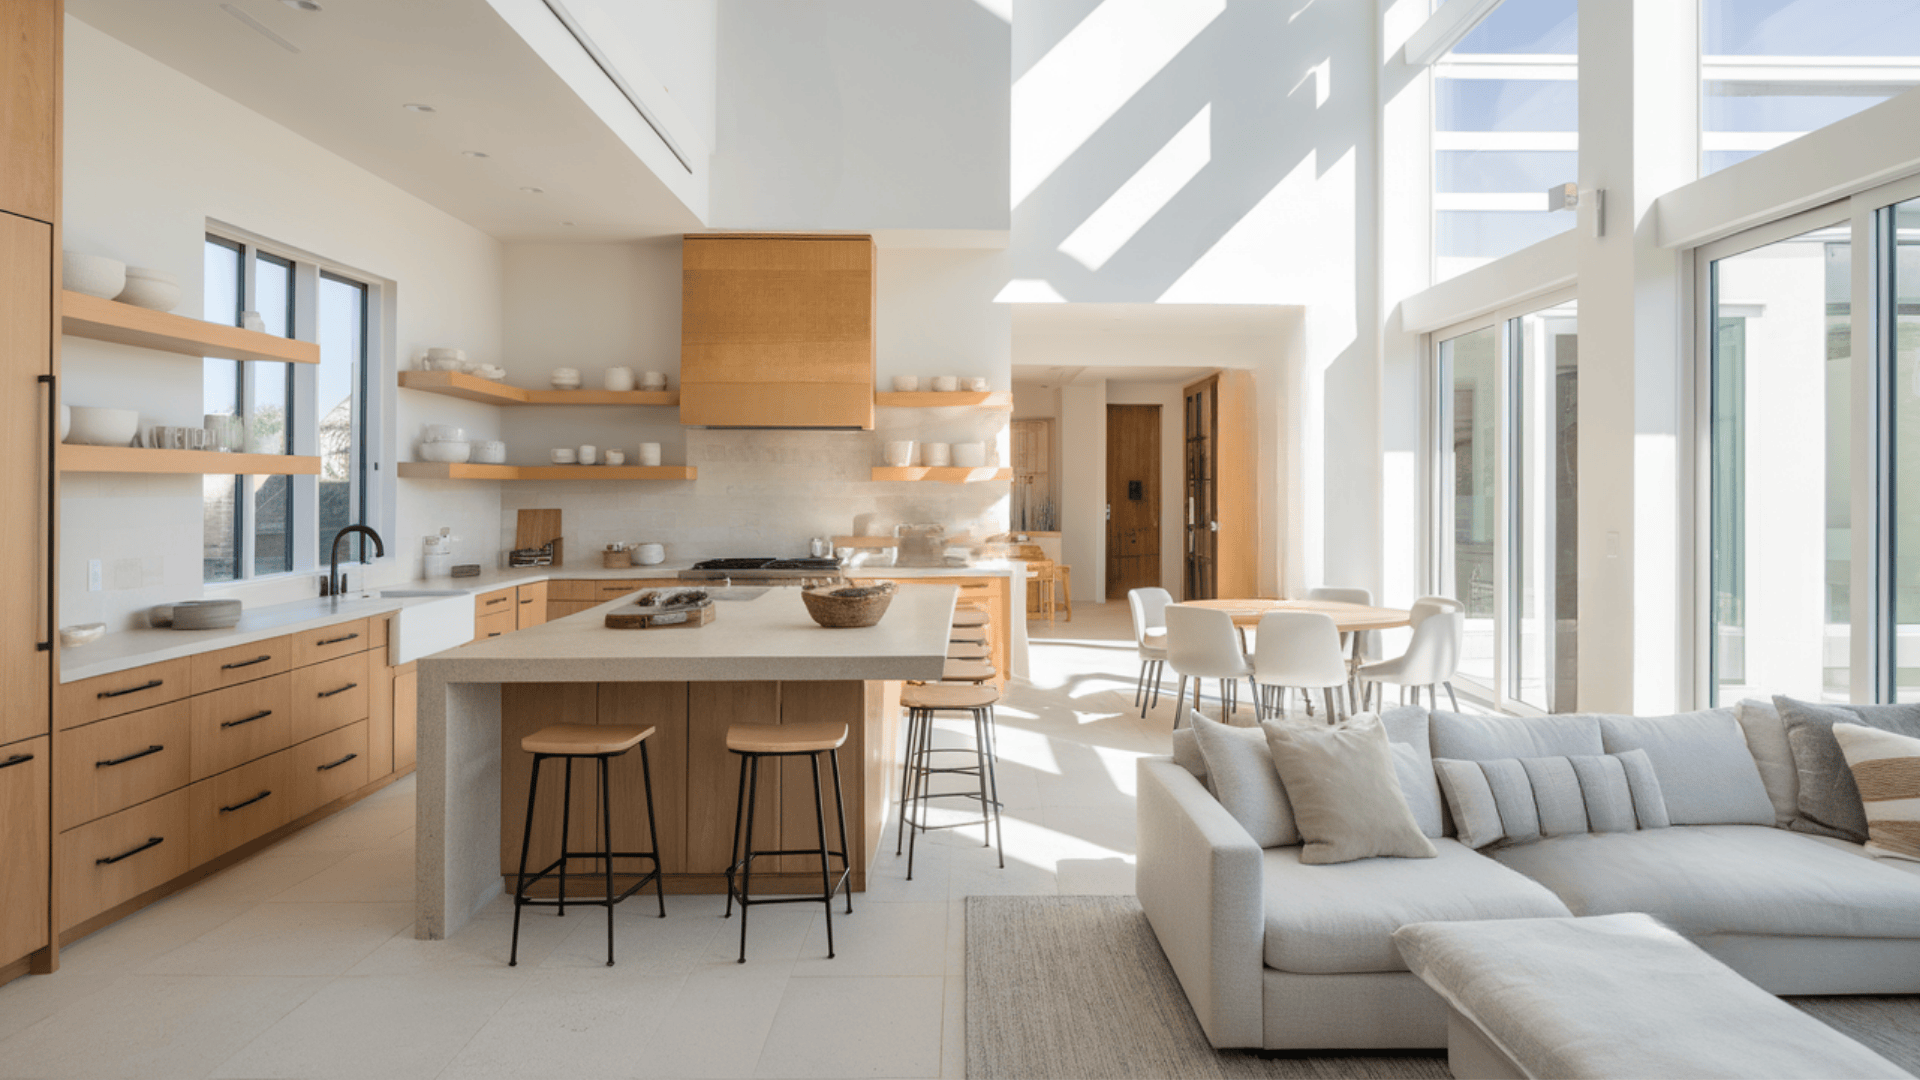
When you opt for an open kitchen design, you’re blending cooking, dining, and socializing into one area. I like how it removes barriers and instantly makes a home feel brighter and more welcoming.
But an open kitchen isn’t just about tearing down walls. You’ll want a smart layout, clever storage, and choices that feel balanced so the space actually works for you.
Before making any changes, let’s discuss what an open kitchen truly means and how it differs from a closed layout.
What is an Open Kitchen Design?
An open kitchen design is a layout where the kitchen connects directly to other living areas. Instead of being closed off by walls or doors, it flows into spaces like the dining or living room.
One common feature is the kitchen island, which often doubles as both a workspace and a place to gather. Many open kitchens also have dining areas built right into the same zone, making it easier to cook and serve meals in one shared space. Another key element is the clear sightlines, allowing you to see from the kitchen into the living or dining areas without any obstruction.
Unlike closed kitchens, which separate cooking from the rest of the home, open kitchens keep everything connected. This makes the space feel larger, brighter, and more social.
Open Kitchen Design Ideas
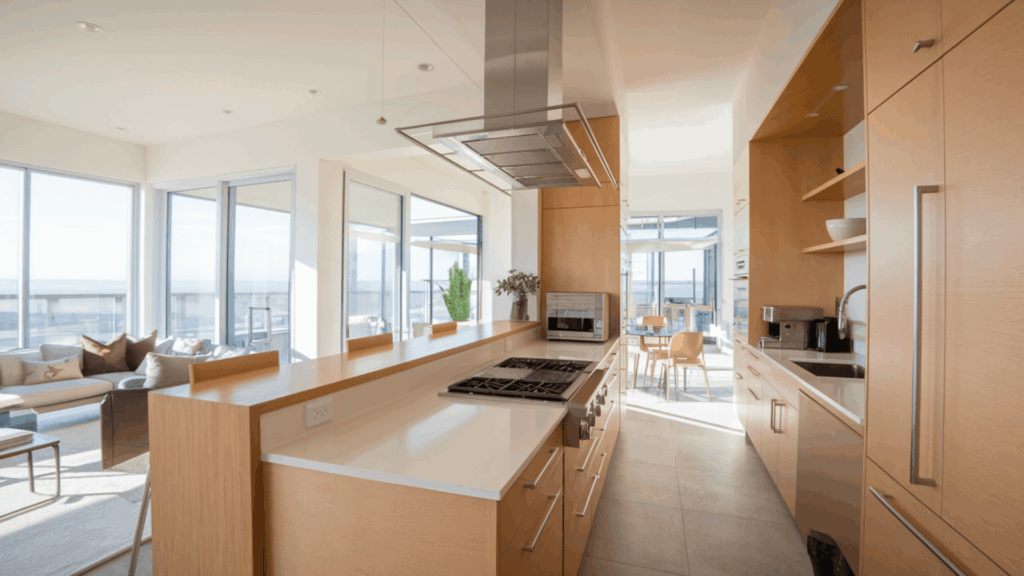
Single-Wall & Linear Concepts
Use a single-wall open kitchen with a long island to create flow. This design keeps everything along one wall, making the space efficient and clean. The island adds extra prep space and doubles as a spot for casual dining.
Keep the layout linear to maximize space in narrow rooms. A straight-line setup works well in apartments or smaller homes. It creates an open look without crowding the room.
Create a galley-style kitchen that opens at both ends. This setup connects two living areas and improves traffic flow. It also allows more natural light to enter the kitchen.
Extend the kitchen along two adjacent walls for openness. An L-like setup creates more counter space while keeping the design open. It is great for families who cook and gather together.
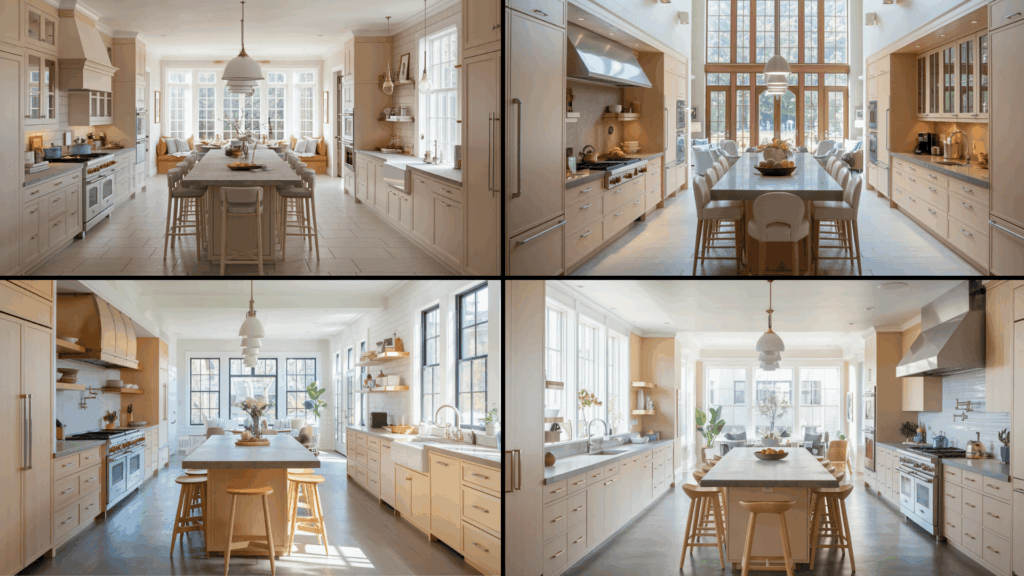
Place the dining table adjacent to the island for continuity. This arrangement links prep and dining areas in one line. It makes serving meals quicker and keeps conversation flowing.
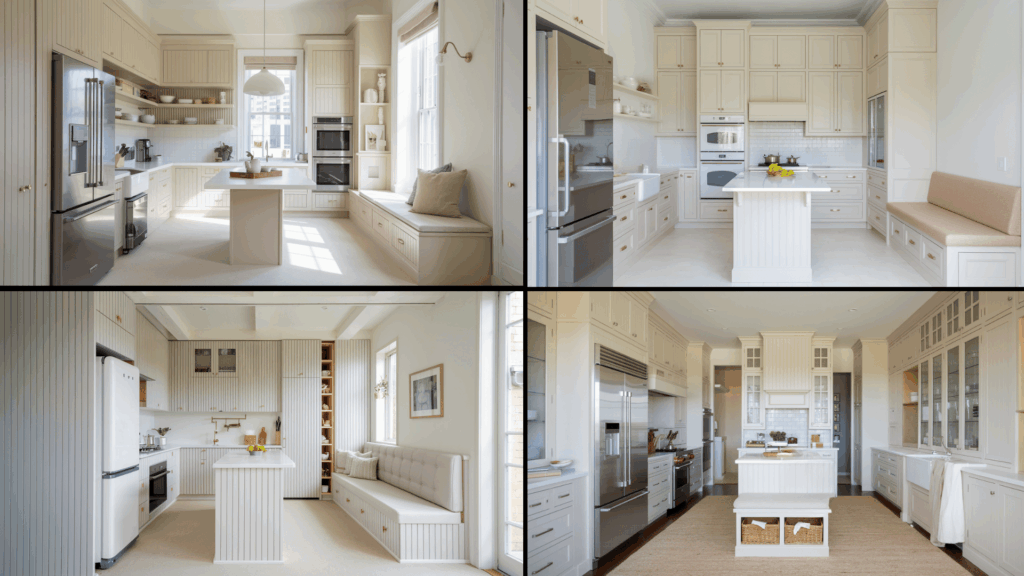
L-Shaped & U-Shaped Layouts
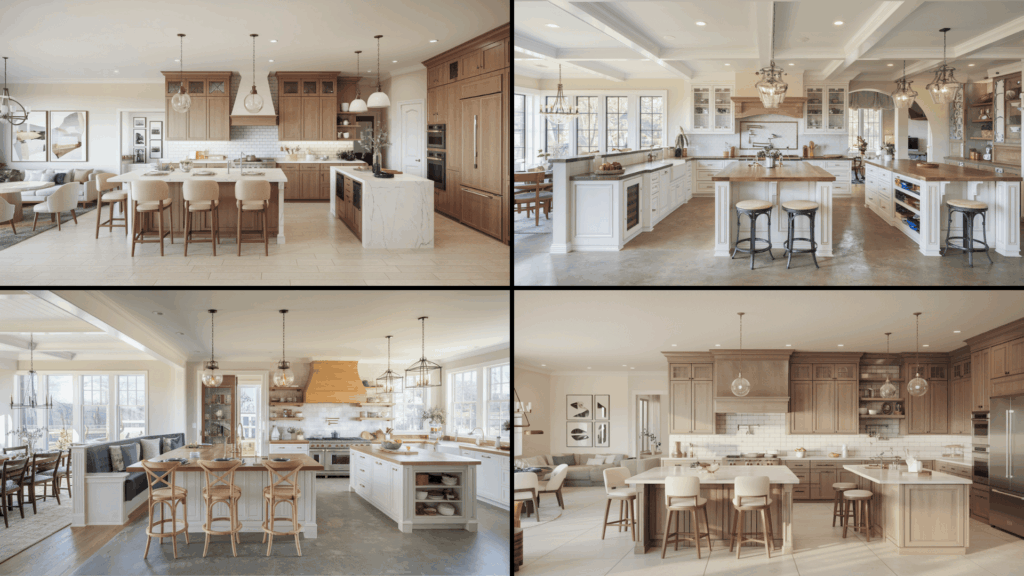
Create an L-shaped open kitchen that wraps into the living area. This layout offers a natural divide while still feeling connected. It is practical for both cooking and socializing.
Use a U-shaped layout with one side open to the living room. This setup provides ample counter space and storage. The open side makes the kitchen feel connected instead of closed in.
Add a double island for both prep and casual dining. One island can focus on cooking tasks, while the other works for seating. It is perfect for large open kitchens and big families.
Position the kitchen centrally as a hub between dining and living. A central kitchen anchors the home and becomes the heart of activity. It also keeps entertaining and is simple for everyday use.
Integrate a banquette seating area directly into the kitchen. This adds a cozy dining nook without needing extra space. It also encourages family meals right inside the kitchen zone.
Peninsulas & Transitional Spaces
Install a peninsula instead of a full island to define zones. A peninsula offers counter space while separating the kitchen from the living areas. It is a smart option for smaller layouts.
Include a walk-through galley that opens on both ends. This design connects the kitchen to multiple rooms. It improves circulation and makes the space feel larger.
Use a broken-plan layout with partial walls. Partial walls keep areas open but give a sense of privacy. It’s a good middle ground between open and closed kitchens.
Place the cooktop on an island to face the living area. This lets you cook while talking with family or guests. It turns meal prep into a social activity.
Add a raised bar counter behind the sink for functional zoning. The bar hides messy dishes while giving space for seating. It also separates cooking from dining without blocking sightlines.
Feature Islands
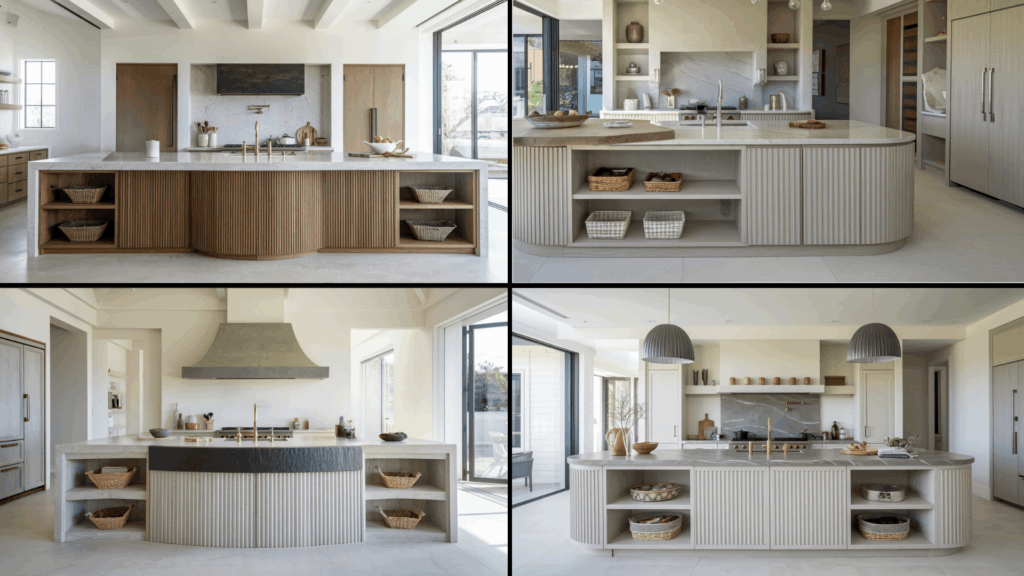
Install a waterfall-edge island as a dramatic centerpiece. The countertop material flows down the sides for a sleek, modern effect. It adds style while also creating a durable prep and serving surface.
Use a contrasting countertop material for the island. A different color or texture makes the island stand out. It turns the island into a design highlight within the open kitchen.
Create a curved island for a softer flow. Rounded edges improve movement around the kitchen and reduce sharp corners. This works especially well in busy family homes.
Design the island with fluted wood paneling. Vertical grooves add depth and interest to the base of the island. It is an easy way to bring texture into the kitchen.
Incorporate open cubbies for baskets and trays in the island. These cubbies keep essentials close without crowding counters. They also let you add baskets for a touch of warmth.
Functional Islands
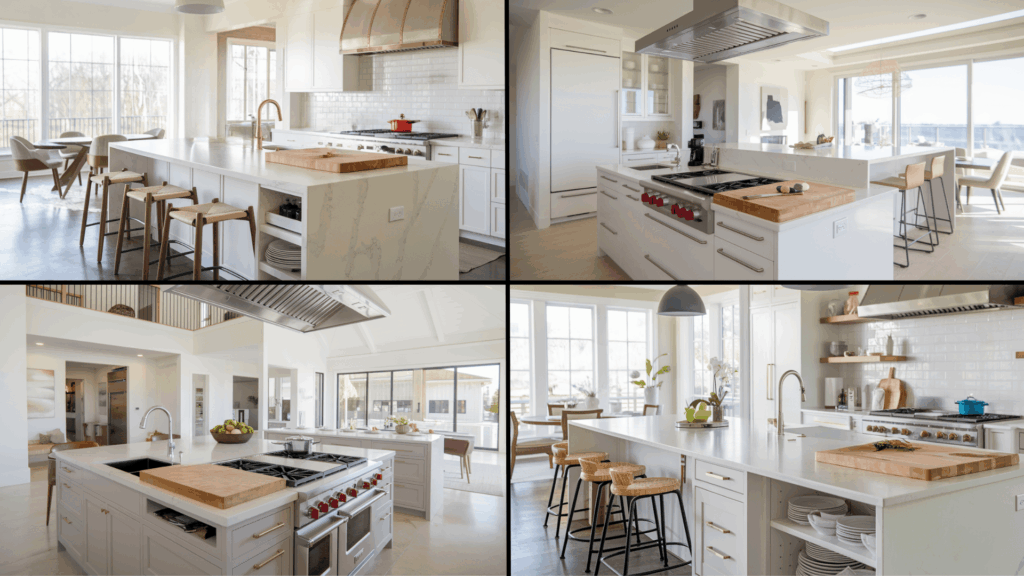
Incorporate a prep sink into the island. Having a second sink makes cooking and cleanup easier. It also keeps the main sink free for dishes or other tasks.
Add a butcher block insert for easy meal prep. A built-in cutting surface saves time during cooking. It’s durable and keeps your counters protected.
Build an island with hidden charging stations. Outlets tucked into drawers or sides keep cords out of sight. This makes the island useful for both cooking and daily life.
Design an island with a built-in cooktop and downdraft vent. Cooking on the island keeps you facing the room. The vent pulls smoke down, so no bulky hood blocks your view.
Use a two-tier island with separate prep and eating surfaces. One level works for cooking, while the higher side works for dining. It keeps each area clean and functional.
Multi-Use Islands
Make the island double as a breakfast bar. Add stools so family members can gather for quick meals. It’s a casual and practical use of space.
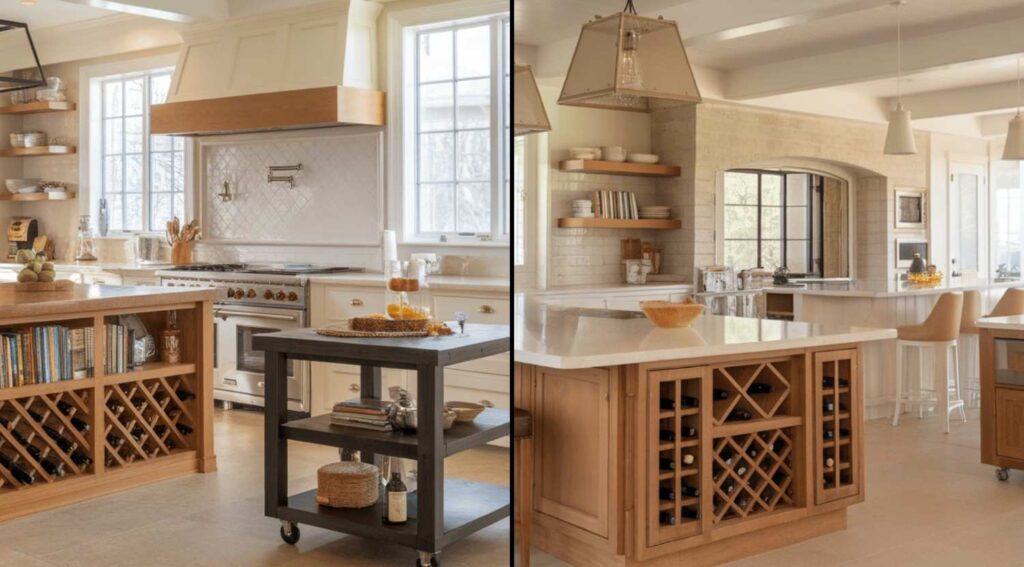
Extend the island to include open shelving for cookbooks. Display your favorite books while keeping them handy. The shelves also add personality to the kitchen.
Add built-in wine storage to the island base. Small racks or cubbies keep bottles accessible. It’s a stylish feature for anyone who enjoys entertaining.
Add seating on multiple sides of the island. This creates space for larger groups to sit together. It also turns the island into a true social hub.
Use a mobile rolling island for flexible layouts. Wheels allow you to move it wherever needed. It’s especially useful in smaller or multi-use spaces.
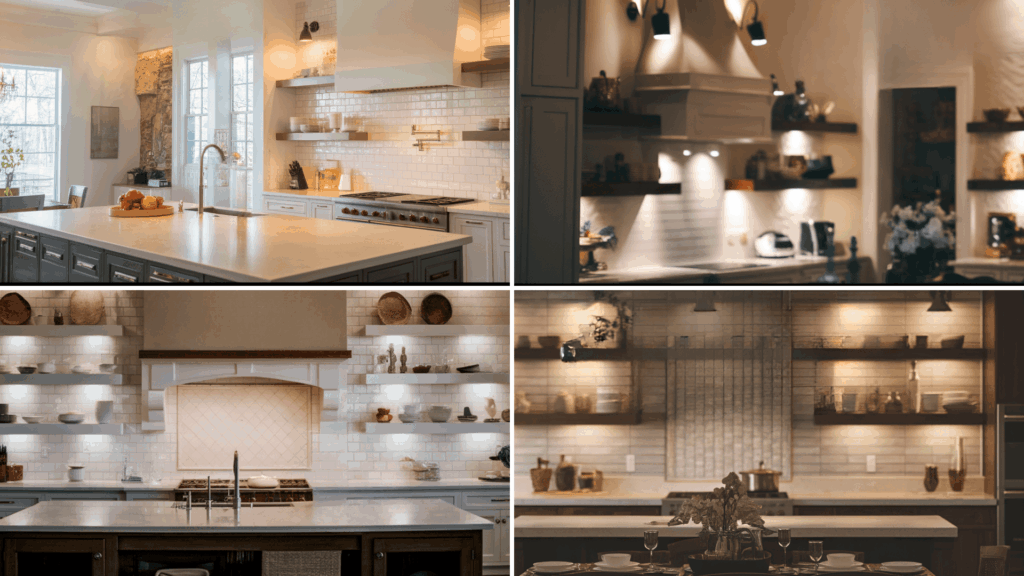
Cabinetry & Storage Finishes
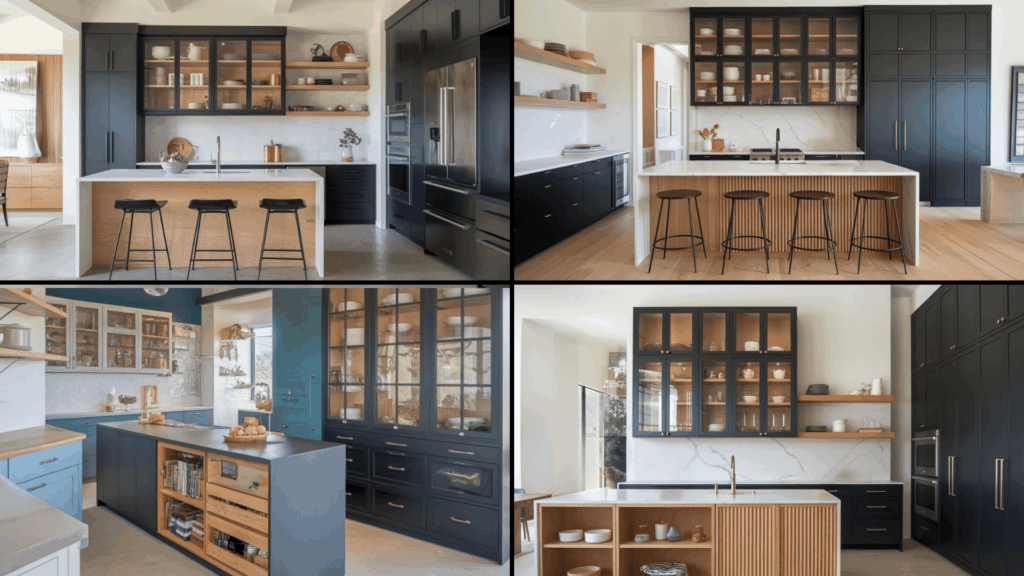
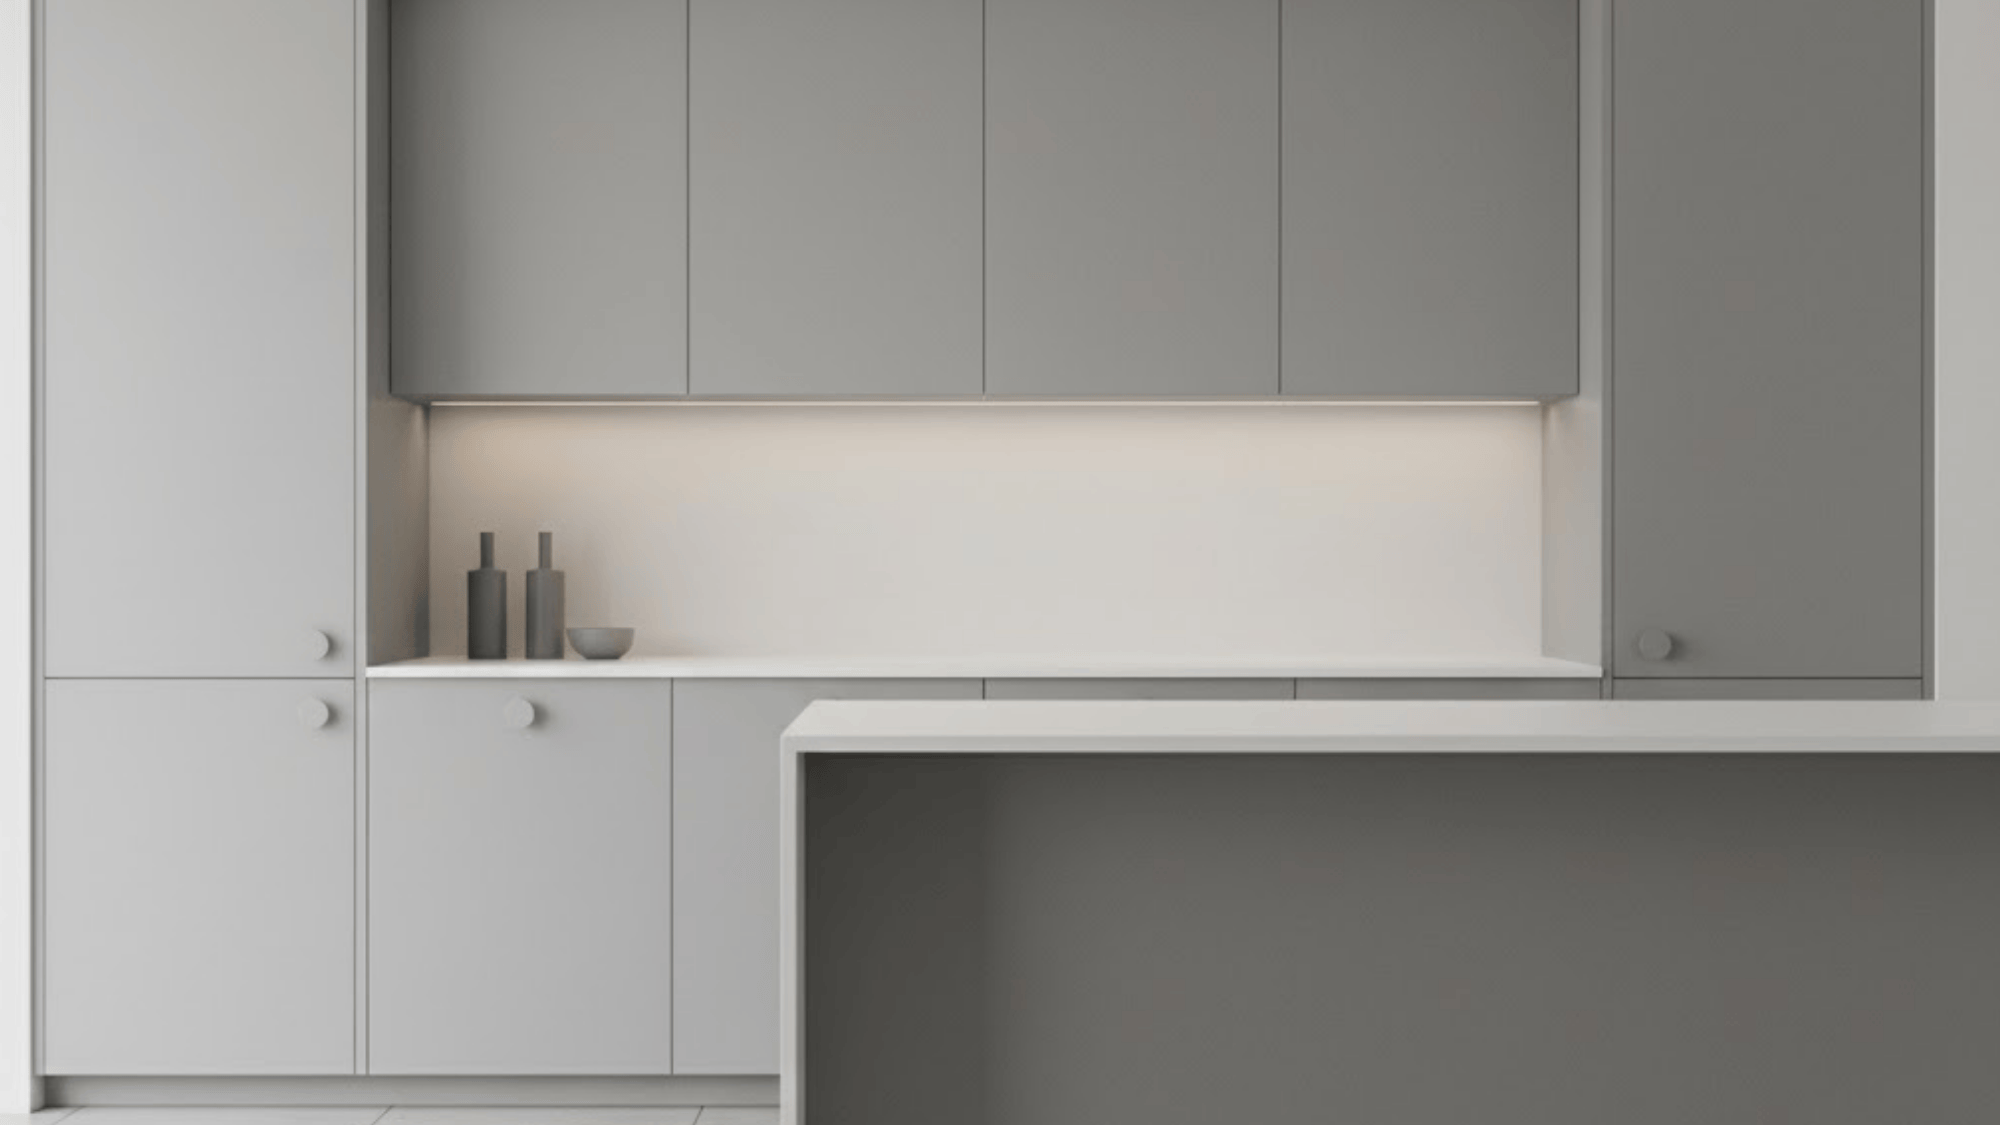
Use matte black cabinetry for boldness. Matte finishes reduce glare and fingerprints while adding a modern touch. The dark tone creates a dramatic contrast in open spaces.
Mix open shelving with glass-front cabinets. Open shelves keep daily items within easy reach, while glass doors showcase your finest pieces. This balance blends function with style.
Install reeded or fluted cabinet fronts. Vertical grooves create depth and shadow play. They turn plain cabinets into standout design features.
Install floor-to-ceiling cabinetry along one wall. Tall cabinets maximize storage without cluttering counters. They also draw the eye upward, making the room feel taller.
Combine painted cabinets with natural wood accents. Painted finishes add color while wood brings warmth. The mix creates a balanced and welcoming look.
Countertops & Backsplashes
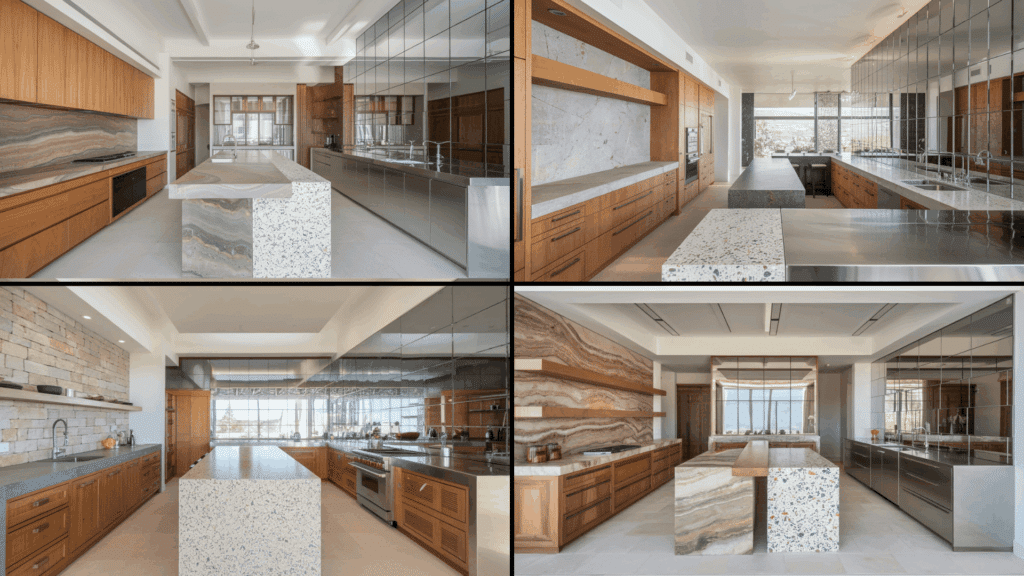
Pair natural wood cabinets with stone countertops. The combination feels grounded and timeless. Stone offers durability, while wood adds softness to the design.
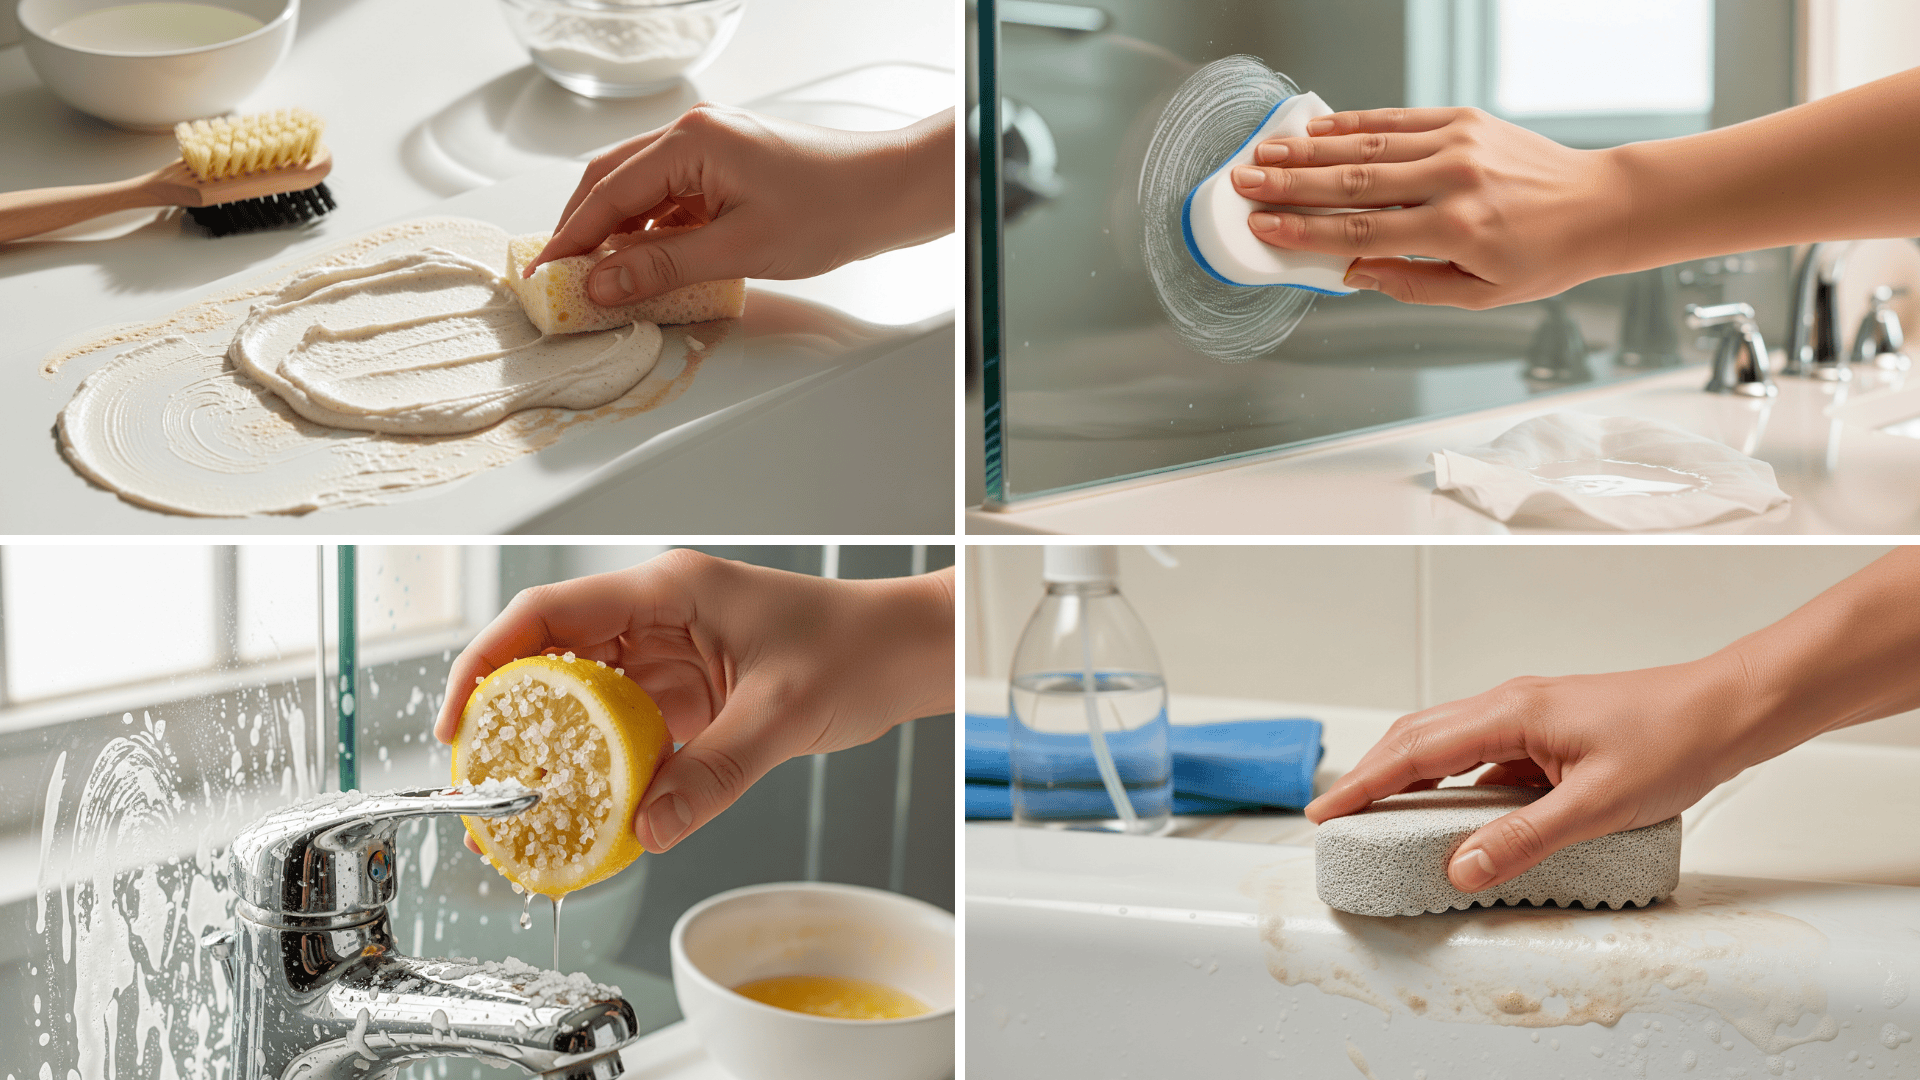
Add a stone slab backsplash for continuity. Extending the countertop material up the wall creates a smooth look. It also reduces grout lines, making cleaning easier.
Choose terrazzo countertops for retro-modern flair. Terrazzo brings speckled color and character. It’s durable and adds a playful yet stylish edge.
Add a stainless steel countertop for durability. Stainless steel is heat- and stain-resistant. It is ideal for heavy cooking while giving the kitchen a professional feel.
Install mirrored backsplash panels for brightness. Mirrors reflect natural and artificial light. They also make small kitchens look larger and more open.
Material Experiments
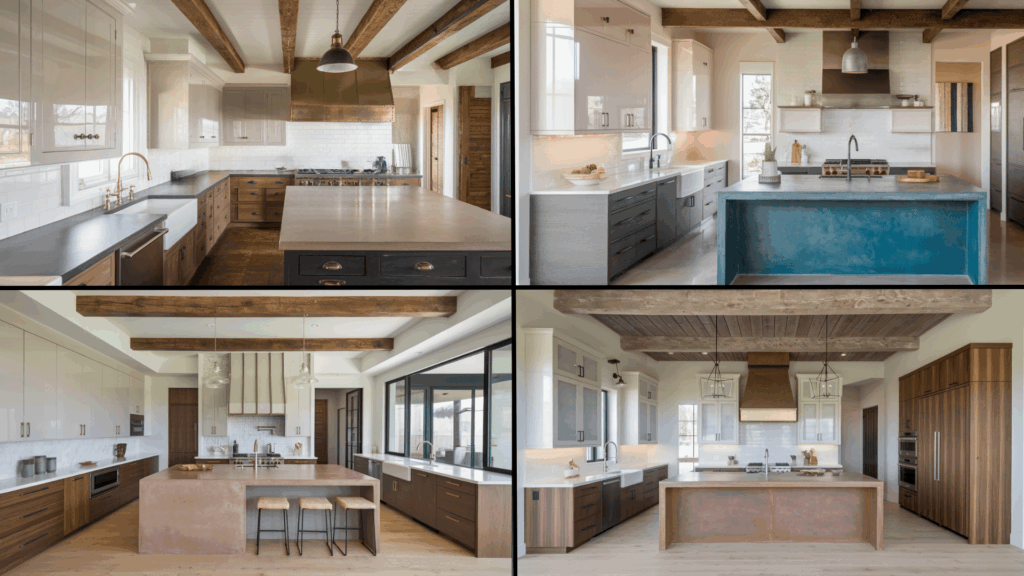
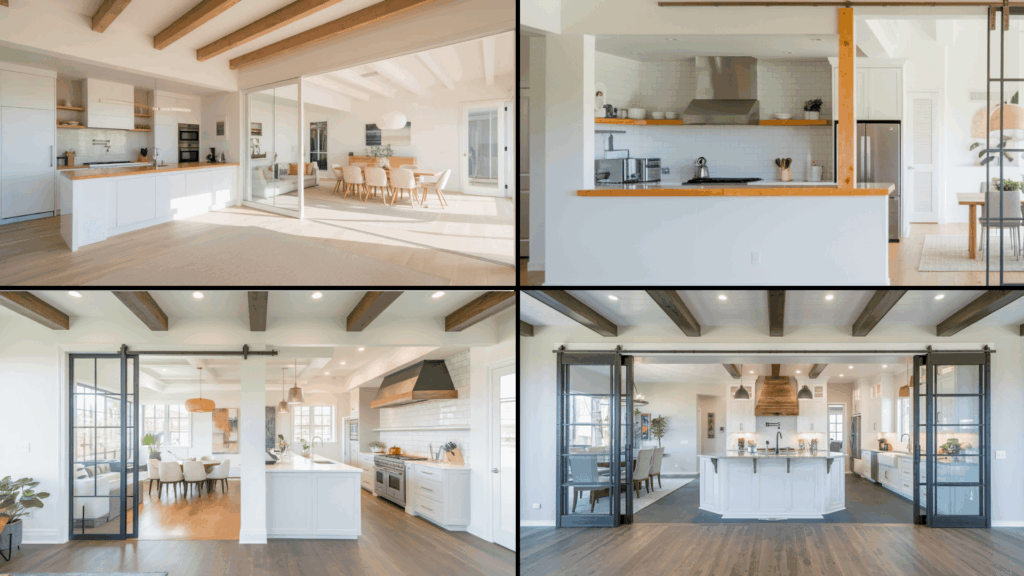
Use reclaimed wood beams across the ceiling. Beams bring rustic charm into open kitchens. They also add visual separation between spaces without using walls.
Choose high-gloss finishes for a sleek look. Glossy cabinets reflect light, making the kitchen appear brighter. They also give a polished, modern feel.
Use colored concrete countertops for a modern style. Concrete can be tinted in a variety of shades. It adds durability while making the kitchen stand out.
Mix metals for faucets, handles, and lighting. Combining finishes like brass, chrome, or matte black adds depth and visual interest. It makes the space look curated instead of flat.
Blend light upper cabinets with dark lower cabinetry. The contrast keeps the space grounded while avoiding a heavy feel. It also naturally draws the eye to different areas.
Lighting Statements
Hang oversized pendants above the island. Large fixtures add drama while providing task lighting. They also help anchor the island as the focal point of the kitchen.
Install pendant clusters for layered light. Multiple smaller pendants create depth and visual interest. This approach also spreads light evenly across the island.
Add wall sconces on either side of the shelves. Sconces highlight display areas and add warmth. They also give character and balance to the overall design.
Place a chandelier above the dining table. A chandelier brings elegance and makes mealtime feel special. It ties the dining area into the open layout with style.
Highlight the backsplash with task lights. Focused lighting draws attention to textures and finishes. It also makes food prep safer and easier.
Functional Lighting
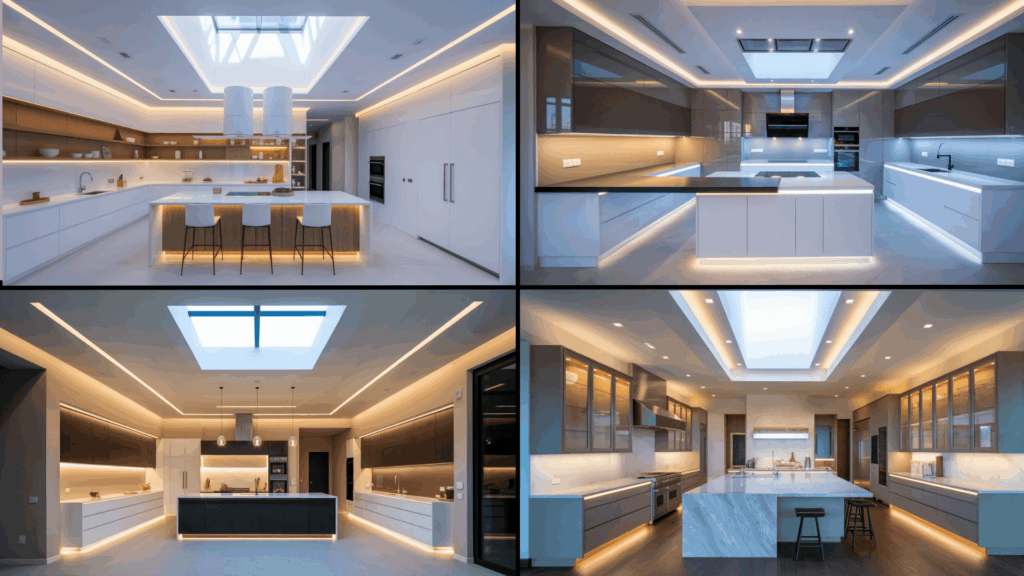
Install recessed ceiling lighting throughout. Recessed lights give clean, shadow-free brightness. They work well in modern open kitchens where fixtures need to stay subtle.
Add LED strip lighting beneath upper cabinets. This creates task lighting right where you need it most. It also doubles as ambient lighting in the evenings.
Use dimmable lighting to adapt for tasks or entertaining. Bright settings work for cooking, while softer tones create a relaxed mood. This flexibility is key in open layouts.
Install a mix of warm and cool light zones. Warm tones suit dining and social spaces, while cool tones are best for prep areas. This balance makes the kitchen practical and cozy.
Add skylights above the cooking area for natural light. Skylights brighten the space during the day and save energy. They also make the kitchen feel more connected to the outdoors.
Zoning & Separation
Use different flooring in the kitchen vs. the living room. A change in flooring helps define areas without walls. It also adds visual interest and keeps each zone practical for its use.
Change ceiling treatments for zoning. Beams, panels, or color shifts make the kitchen feel distinct. This is a subtle way to mark areas while keeping the layout open.
Add a sliding glass wall for semi-open flexibility. Glass partitions offer separation without blocking light. They can be opened or closed depending on the need for privacy.
Install retractable ceiling panels for adjustable separation. Panels can be pulled down when you want a cozier feel. They add flexibility while keeping the kitchen modern and stylish.
Install a half-wm/all behind the stove for splash protection. It keeps the cooking mess hidden from view. At the same time, it maintains sightlines across the room.
Soft Dividers
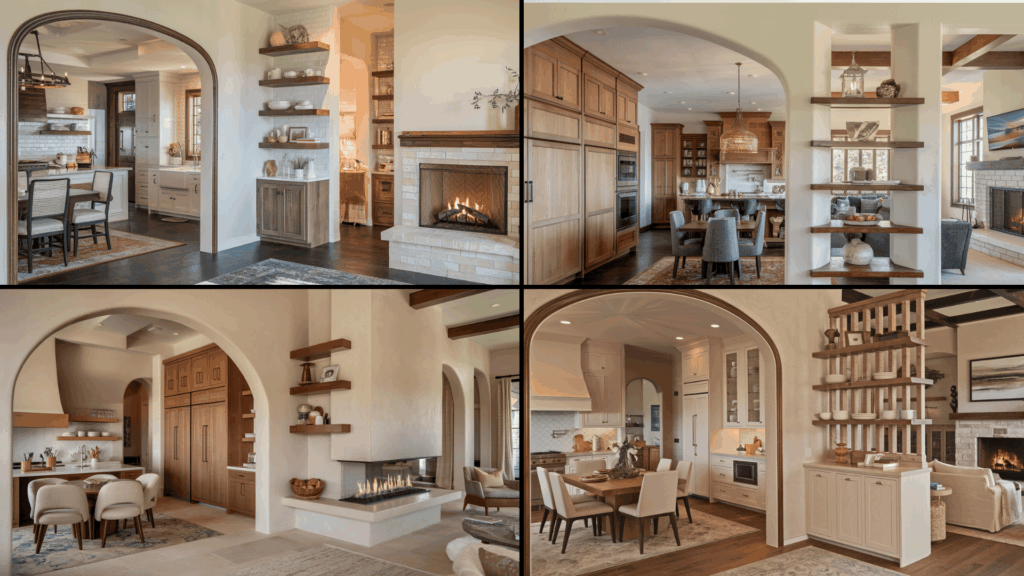
Add a framed archway at the kitchen entrance. An arch marks the transition without closing the space. It also adds charm and a soft architectural touch.
Use area rugs to separate cooking and dining. Rugs add warmth and texture while defining zones. They also bring color and comfort underfoot.
Place tall pantry storage as a subtle divider. A pantry can double as storage and a boundary. It separates areas without feeling heavy or closed off.
Incorporate a double-sided fireplace between the kitchen and the living room. The fireplace warms both areas and acts as a focal point. It creates a cozy connection across the open plan.
Use open shelving as a partial divider. Shelves allow light and sightlines to pass through. They also provide display and storage space while marking boundaries.
Small-Space Strategies
Choose compact appliances to save counter space. Slim fridges, ovens, and dishwashers keep the kitchen efficient. They free up more room for prep and storage in tight layouts.
Add vertical storage up to the ceiling. Tall cabinets or shelves effectively utilize unused wall space. This approach is ideal for smaller kitchens that require additional storage space.
Use light, neutral color schemes for expansion. Soft tones, such as white or beige, reflect light. They make even the smallest kitchens look bigger and brighter.
Opt for a single island instead of multiple counters. One central surface simplifies the layout. It avoids clutter while still offering seating and prep space.
Integrate hidden storage within benches or banquettes. Built-in seating can double as storage. It’s a clever way to add functionality without occupying more space.
Compact & Flexible Additions
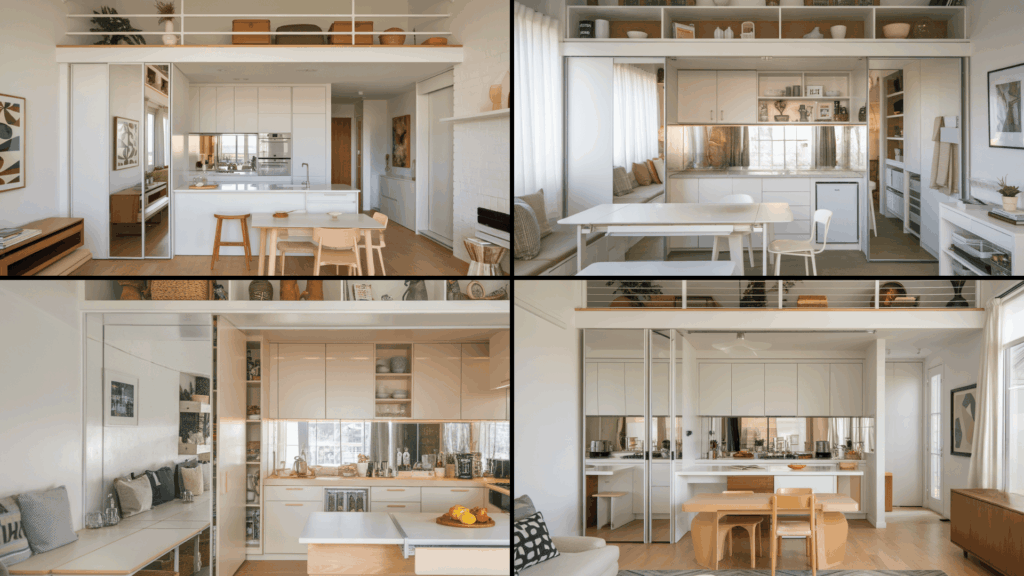
Install a lofted mezzanine above the kitchen for storage. A raised platform can hold seasonal items or decor. This utilizes vertical height in smaller homes.
Use fold-down or pull-out dining tables. It is ideal for multi-use small spaces. These tables appear when needed and tuck away to free up floor space.
Use sliding panels to conceal clutter when entertaining. Panels can quickly hide dishes or appliances. They keep the kitchen neat without requiring extra storage.
Incorporate mirrored surfaces to make the space feel larger. Mirrors bounce light and create an illusion of depth. This trick is especially helpful in compact apartments.
Keep the layout open but maximize flow with multipurpose furniture. Pieces like storage benches or extendable tables serve multiple roles. They help the kitchen adapt to different needs.
Design Tips for a Functional Open Kitchen
A functional open kitchen should be both practical and stylish. The right choices make it easy to cook, entertain, and keep the space looking clean. Here are some simple tips to help you design an open kitchen that works for daily life:
- Zoning tricks: Use flooring, lighting, or ceiling beams to define areas without walls. Pendant lights or ceiling beams also help mark the kitchen zone while keeping spaces connected.
- Hidden storage: Pull-out shelves, deep drawers, and hidden compartments keep clutter out of sight. This makes the kitchen look tidy and keeps counters clear.
- Noise and odor control: A strong yet quiet range hood effectively reduces odors. Soft-close drawers, cushioned floors, and fabric accents help reduce unwanted noise.
- Cohesive design: Match colors, finishes, and textures with nearby living areas. Using similar tones in wood, paint, or metal creates a smooth flow across spaces.
With these tips, your open kitchen will feel inviting and work well for everyday living.
Conclusion
I’ve noticed that an open kitchen design isn’t just another style choice; it’s a way to bring cooking, dining, and everyday living together in one space that actually works for you.
When you get the layout right, add smart storage, and focus on small details, the kitchen feels both practical and welcoming.
You might try using lighting to create clear zones or add flexible furniture that adapts to different needs. I’ve seen how these choices can make the space feel more comfortable and easier to use on a daily basis.
If you’re looking for more ideas, take a look at the other blogs where I share simple tips on design, storage, and home styling that can help you transform any space.