Want fresh ideas for designing a beautiful concrete porch that matches your home’s style perfectly while learning how to build it? A concrete porch is a poured platform that extends from your doorway, offering endless possibilities for colors, textures, and finishes.
You can create decorative surfaces that look like brick, blend colors with your home’s exterior, or choose smooth contemporary designs.
I’ll show you how understanding design options first helps you plan which techniques to use during construction for the look you want.
Building your own concrete porch gives you creative control while saving money on labor costs for this rewarding home project. Let me walk you through inspiring concrete porch ideas and practical building steps to make them a reality.
Why Concrete Porches Are a Smart Choice
Concrete porches offer unmatched strength and weather resistance that wood and composite materials simply cannot match over time.
Unlike wood that rots, warps, or attracts termites, concrete stays solid through decades of rain, snow, heat, and freezing temperatures.
You can customize concrete with stamped patterns, colors, or smooth finishes to match any construction style from modern to traditional homes.
Concrete adapts beautifully, if you prefer sleek contemporary designs or classic traditional looks that integrate with the existing structure.
The durability means your porch withstands heavy foot traffic, furniture weight, and harsh weather conditions without cracking or deteriorating quickly.
Concrete delivers exceptional value by lasting for generations without replacement or major repairs.
Beautiful Concrete Porch Ideas
Here are some inspiring concrete porch designs that combine beauty, durability, and functionality for your home:
1. Stamped Concrete Porch
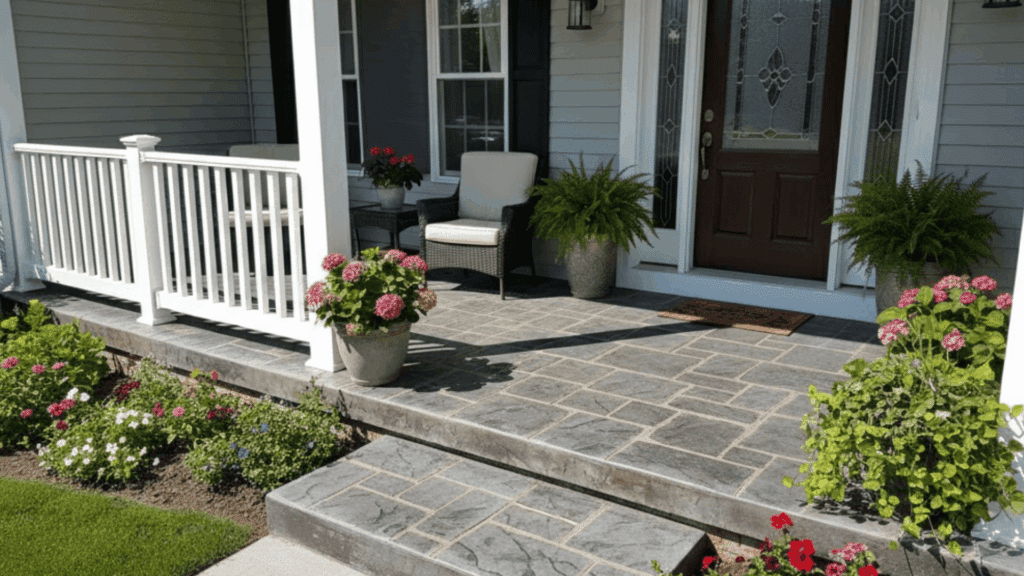
Stamped concrete mimics the look of brick, stone, or tile textures at a fraction of the cost of real materials. This technique works great for both front and backyard entrances, adding character and visual appeal without breaking your budget.
You can choose from dozens of patterns, including cobblestone, slate, wood plank, or custom designs that match your home perfectly.
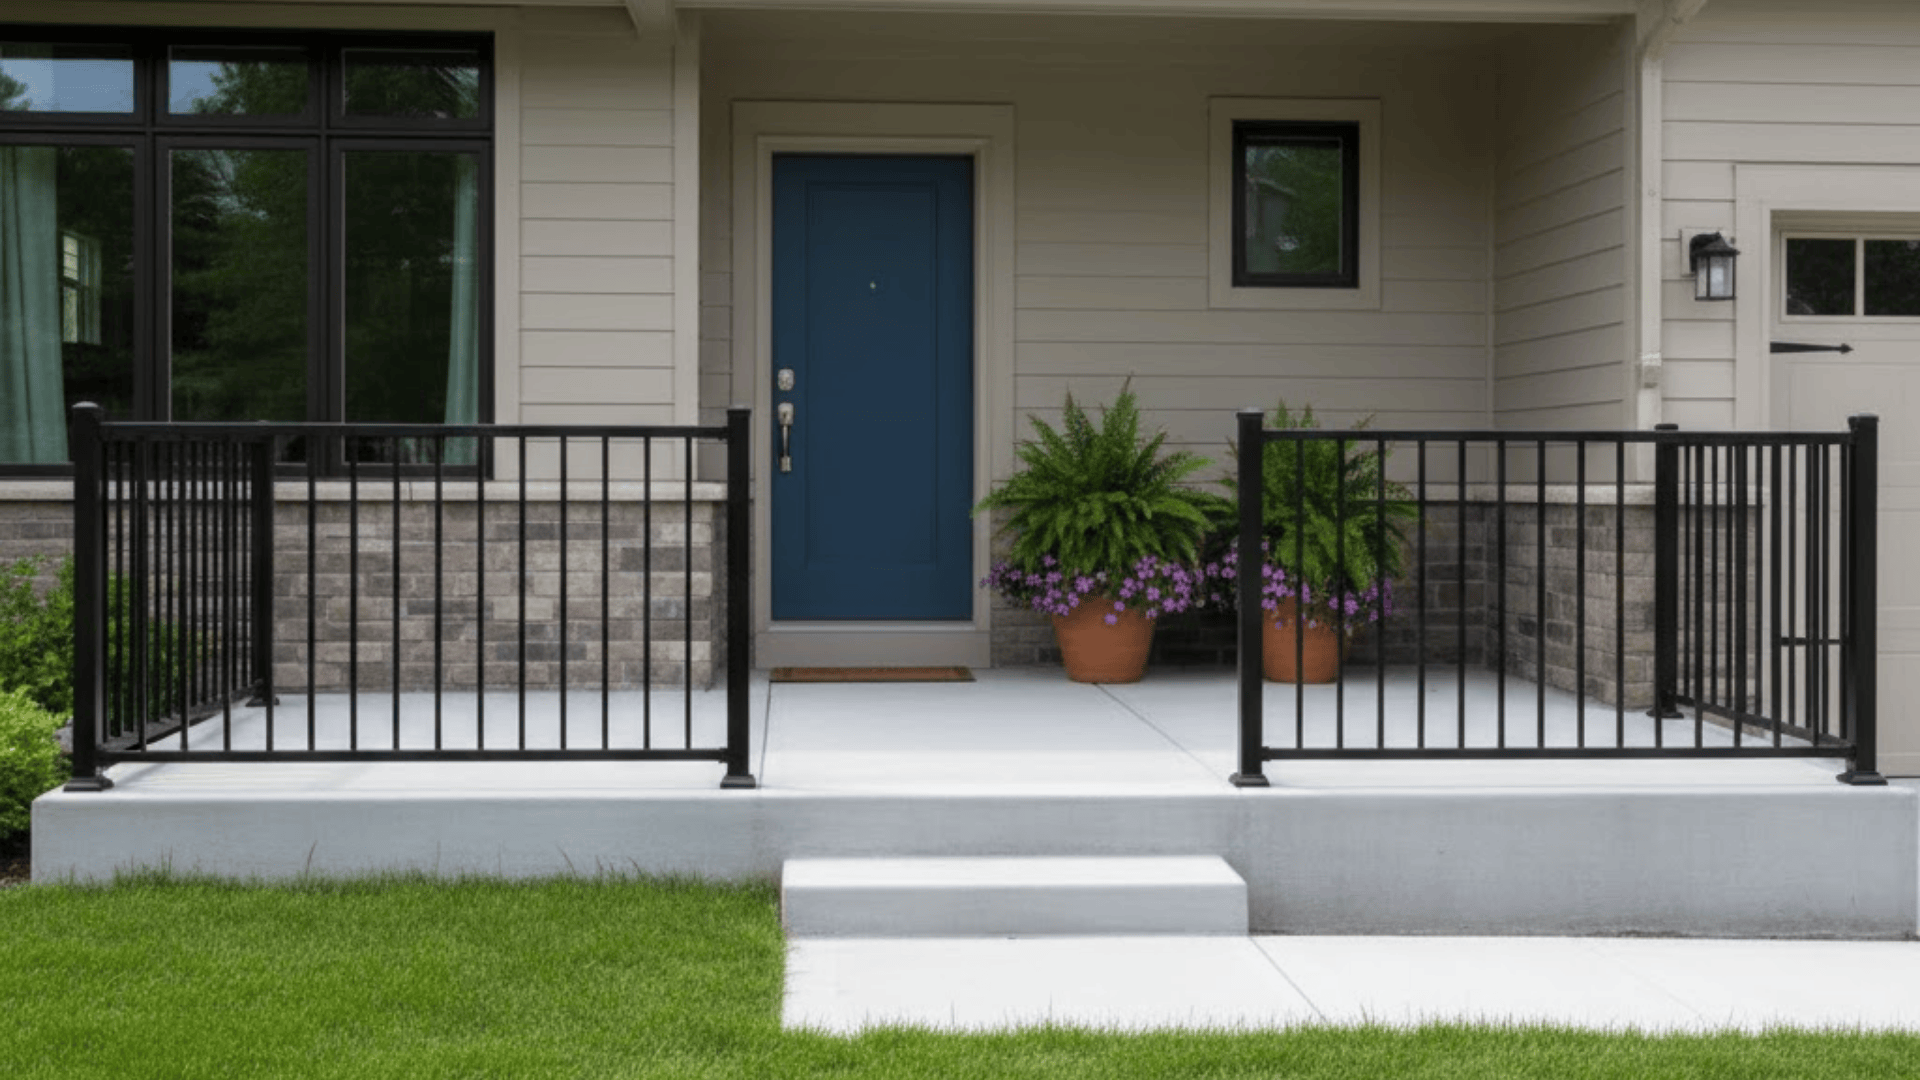
2. Modern Smooth Finish Porch
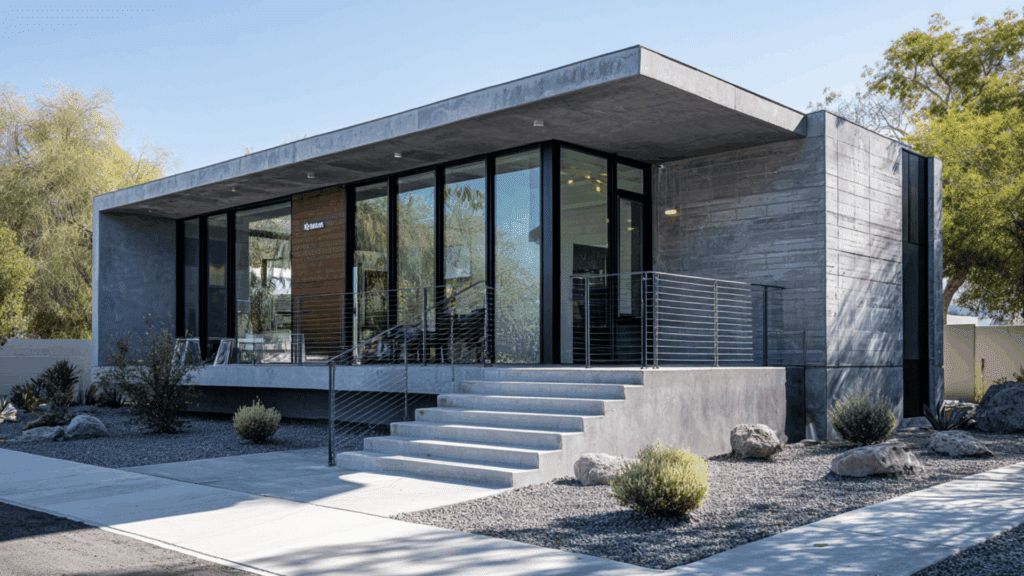
A minimalist, sleek concrete surface with clean lines creates a contemporary look that complements modern or industrial homes beautifully. This smooth finish showcases concrete’s natural beauty without competing with structural details.
The simple elegance works especially well with metal railings, large windows, and minimalist landscaping, creating a cohesive modern appeal.
3. Colored or Tinted Concrete
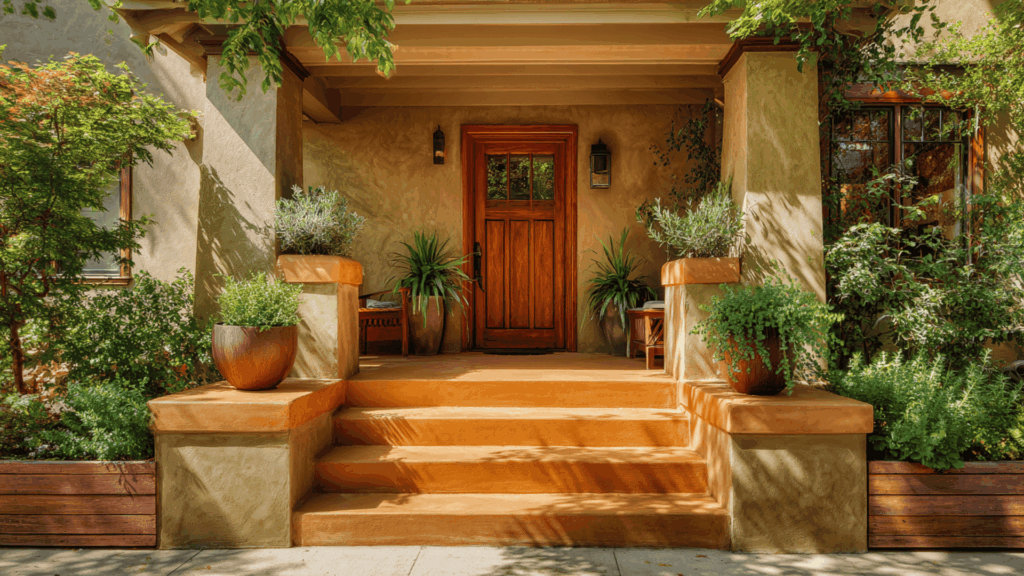
Warm tones like tan, rust, or charcoal merge flawlessly with your home’s siding and surrounding landscape for a cohesive appearance. You can use integral color mixed into the concrete or apply surface stains after pouring for different depth effects.
Colored concrete eliminates the plain gray look while maintaining all the durability and strength benefits of traditional concrete construction methods.
4. Exposed Aggregate Finish

Exposed aggregate adds grip and a decorative pebble texture that prevents slipping on wet or icy surfaces during the winter months.
This finish reveals colorful stones embedded in the concrete, creating natural beauty and improved traction for safety purposes. The textured surface works ideally for wet or icy climates where smooth concrete becomes dangerously slippery after rain or snow.
5. Covered Concrete Front Porch

Adding a roof, pergola, or columns provides shade and comfort while protecting your porch from direct rain and sun damage. This covered design creates a perfect space for outdoor seating, plants, and décor elements that would otherwise suffer from weather exposure.
The shelter extends your living space outdoors and increases your home’s usable square footage for relaxing and entertaining guests.
6. Stained or Polished Concrete Porch
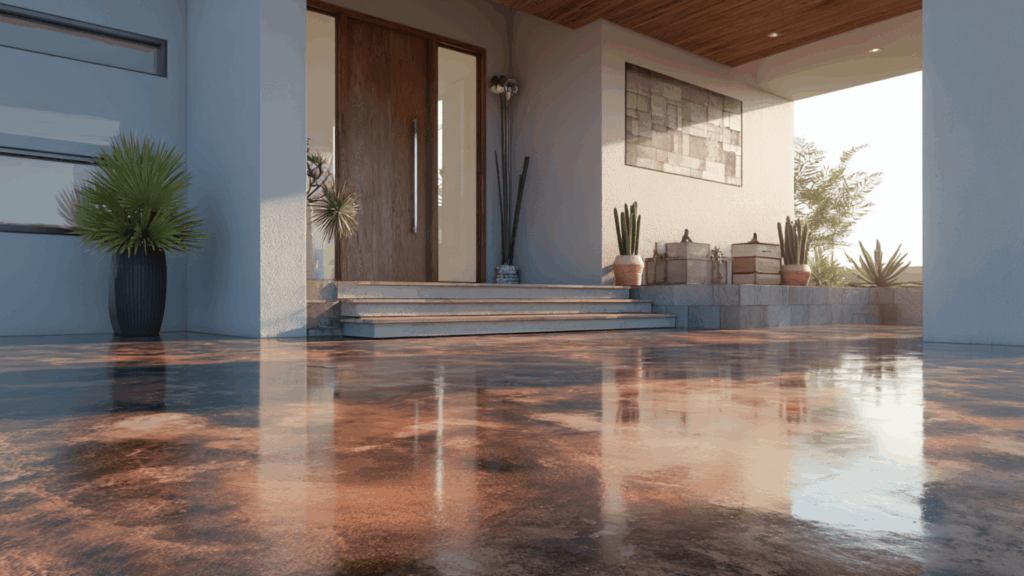
Staining or polishing adds shine and color depth that turns basic concrete slabs into attractive statement pieces for your home. These finishing techniques create rich, variegated colors that look like natural stone or elegant terrazzo without the expensive material costs.
The glossy surface reflects light beautifully and makes even small porches feel more spacious and upscale than standard finishes.
Decorating & Styling Your Concrete Front Porch
A beautiful concrete porch becomes even more inviting when you add thoughtful decorations and styling elements that reflect your personality. Here are simple ways to enhance your porch’s appearance and create a welcoming entrance for guests and family:
- Planters and greenery: Place colorful flowers or greenery along the edges to soften hard concrete surfaces and bring natural life.
- Railings and lighting: Install attractive fixtures that provide safety while enhancing your porch’s style with metal, wood, or glass options.
- Material combinations: Combine concrete with brick borders, stone accents, or wood trim to create visual interest and break up plain surfaces.
- Seasonal decor updates: Add wreaths, cushions, or pumpkins to keep your porch fresh and boost curb appeal throughout the year easily.
These simple additions convert a plain concrete slab into a warm, inviting space that makes your home feel more welcoming. Small styling changes make a big difference in how your porch looks and how guests feel when approaching your door.
What Materials Will You Need?
Gathering all necessary materials before starting ensures your concrete porch project runs smoothly without delays or trips to the hardware store. Here’s everything you’ll need for forming, pouring, and finishing a professional-quality concrete porch:
| Category | Materials | Purpose |
|---|---|---|
| Concrete | 4000 PSI, air-entrained, microfiber | Main structural material |
| Form Lumber | 2×4, 2×12 boards, extra 2×4 for lip | Shape concrete edges |
| Fasteners | Tapcon screws, drill/driver | Secure forms to the foundation |
| Measuring | Level, chalk line, tape, stakes/shims | Ensure proper slope |
| Release Agent | Form oil and brushes | Prevent sticking |
| Protection | Plastic sheeting | Protect surfaces from splatter |
| Consolidation | Vibrator or hammer | Remove air pockets |
| Finishing | Screed, float, trowel, edger | Level and smooth surface |
| Texture | Broom, buckets, water, rags | Create, finish, and clean |
| Safety | Gloves, boots, eye protection | Personal protection |
Having these materials organized and ready saves time during the pour when concrete sets quickly and demands efficient work. Double-check your list and gather everything in your work area before mixing or ordering concrete delivery.
How to Build a Concrete Porch: Step-by-Step Guide
Building a concrete porch requires careful preparation, precise forming, proper pouring techniques, and patient finishing for professional results. Follow these five detailed steps to create a durable porch with clean edges and a smooth surface:
Step 1: Prep The Area And Build Forms
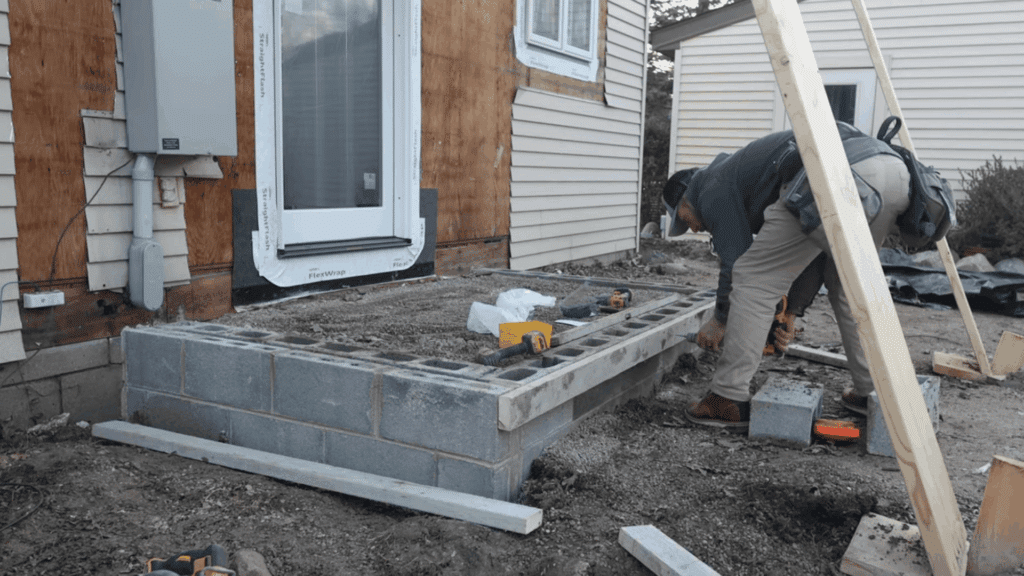
Clear the porch area and set your forms straight and tight. Plan for any overhang before you start, especially if you’ll add stone later.
Use clean boards so dirt or dried concrete doesn’t leave marks. Fasten your inside form to the block using Tapcon screws at 2- to 3-foot intervals. If you need a lip, add an outer 2×4. Smooth boards mean a sharper, cleaner edge on the finished porch.
Step 2: Set Pitch, Protect House, And Release Forms
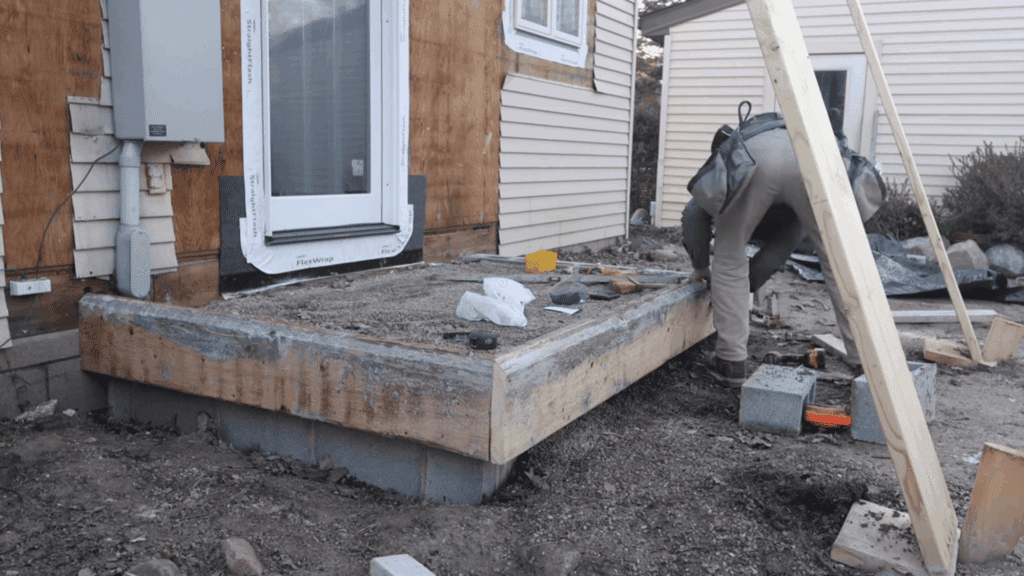
Add a slight pitch to the porch so water drains off instead of pooling. An eighth inch per foot works for covered spaces. Use a level to double-check your slope and snap a chalk line where the top meets the house.
Cover doors and rim boards with plastic before pouring to avoid splatter. Brush oil on every board so it releases easily later without tearing the concrete edges.
Step 3: Pour Concrete And Consolidate The Edges
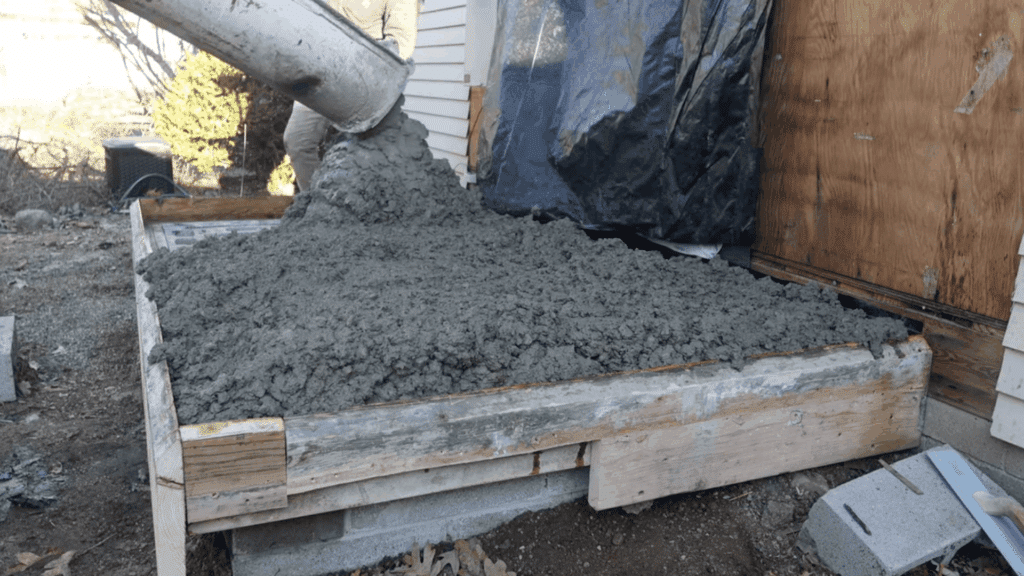
Order a bit more concrete than you think you’ll need; running short is stressful. A 4000 PSI mix with air and microfiber is ideal outdoors. Pour it slightly stiff so it doesn’t splash the walls.
Before vibrating, make sure no stones sit against the face. Use a concrete vibrator or tap along the forms to remove air pockets. Taking time here gives you stronger edges and a smooth, professional-looking finish once cured.
Step 4: Screed, Float, Edge, And Broom Finish
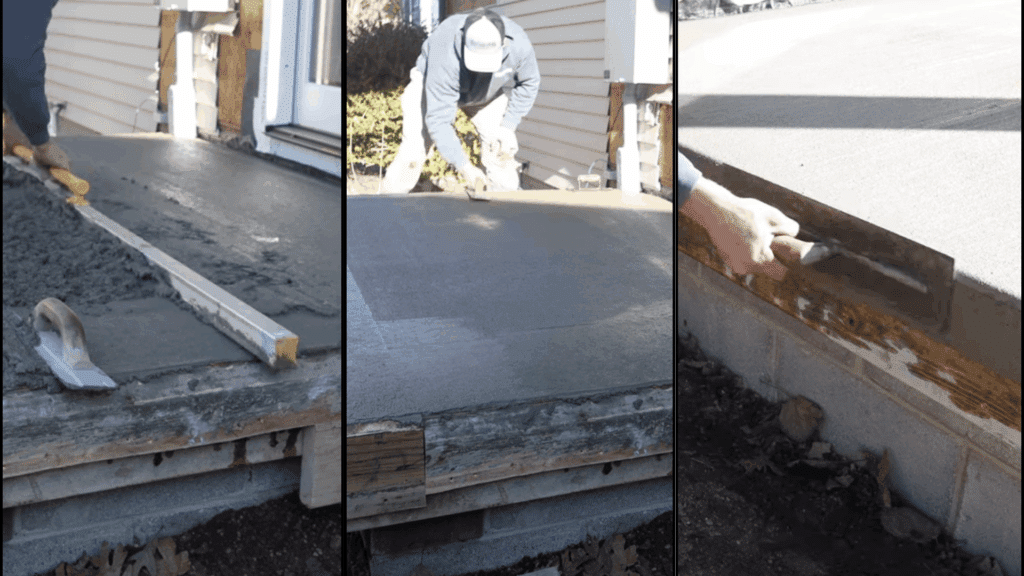
Use your screed board to level the surface from the house outward, then go across to double-check. Float along the edges and the house first, so they stay flat. Re-edge once it starts to set, pressing down any loose stones.
Use a magnesium float to keep the surface open for bleed water. Fill small voids before the final broom. Broom marks should be straight, even, and always pulled away from the edges.
Step 5: Strip Face Forms Gently And Let It Cure
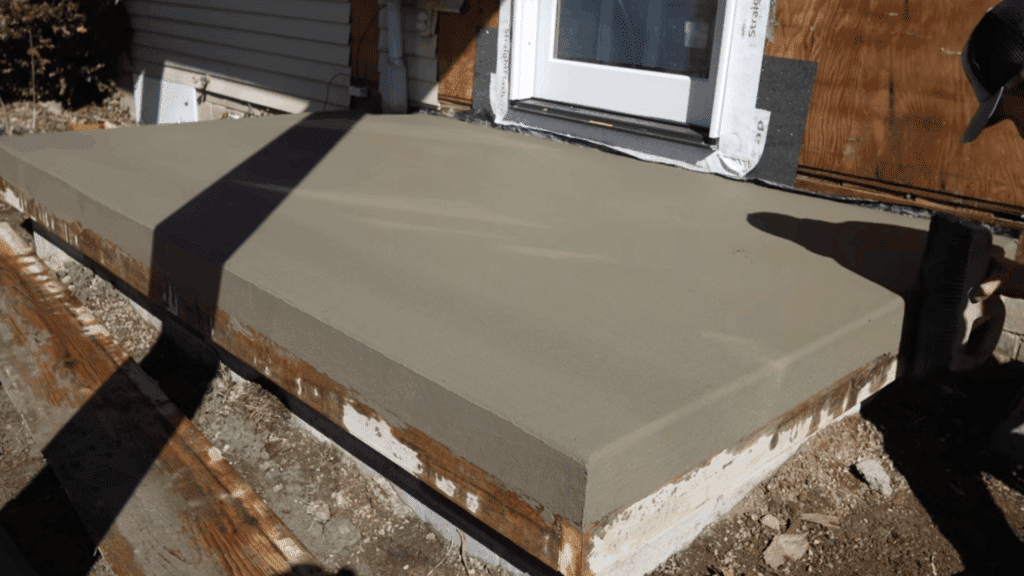
Remove every screw except those on the ends before the forms loosen. Wiggle the form slightly to break suction; never yank it straight off. Carefully trowel the exposed face and re-broom for a uniform look.
Don’t rush removing the lower forms; they help support the edge as it cures. Leaving them several days gives the slab more strength. The result is a clean, durable porch cap with crisp edges and smooth faces. For more details, watch the complete video tutorial by Rathburn Ranch.
Watch Out for These Concrete Porch Mistakes
Even experienced builders make errors during concrete porch projects that compromise the quality, durability, and appearance of the finished surface. Avoiding these common mistakes ensures your porch turns out professional-looking and lasts for decades without major problems:
- Forgetting pitch: Failing to add proper slope causes standing water that damages concrete and creates slippery, unsafe conditions over time.
- Removing forms too early: Pulling forms before concrete fully cures weakens edges and causes chips, cracks, or complete edge failure.
- Overworking wet surface: Excessive troweling or floating while the concrete is still wet brings up weak material and causes surface defects.
- Using weak concrete mixes: Choosing concrete below 4000 PSI or skipping air entrainment leads to cracking, spalling, and premature failure outdoors.
- Skipping proper curing time: Rushing to use your porch before it fully cures creates permanent weakness and surface damage that’s impossible to fix.
Learning from these mistakes saves you time, money, and frustration during your concrete porch project from start to finish. Take your time, follow proper procedures, and don’t rush any steps even when you’re eager to finish quickly.
Cost of a Concrete Front Porch
The cost of building a concrete front porch typically ranges from $6 to $20 per square foot, including materials and labor.
Doing it yourself (DIY) can lower costs to around $4 to $10 per square foot, but hiring professionals usually costs between $10 and $20 per square foot.
Extra features like stamping, coloring, adding railings, or porch coverings can increase the cost to $15 or more per square foot. These upgrades add style and protection but may significantly raise your budget.
Knowing these ranges helps plan your project realistically and decide between DIY and hiring pros for quality and savings.
NOTE: These are estimated costs that may vary based on your location, material quality, labor rates, and specific project requirements.
Maintenance and Longevity Tips
Proper maintenance keeps your concrete porch looking beautiful and structurally sound for decades without needing expensive repairs or replacement work. Follow these essential care practices to protect your investment and extend your porch’s lifespan significantly:
- Seal every few years: Apply concrete sealer every 2-3 years to protect color, prevent moisture damage, and stop cracks from forming.
- Clean regularly: Wash your porch with mild soap and water to remove dirt, stains, and debris that can damage the surface.
- Avoid harsh chemicals: Skip deicing salts and harsh cleaners that break down the concrete surface and cause premature deterioration over time.
- Use plastic shovels: Choose plastic snow shovels instead of metal ones in winter to avoid scratching or chipping the concrete surface.
These simple maintenance steps prevent costly damage and keep your concrete porch looking new for many years ahead. Spending a few hours on care each year saves thousands of dollars in repair or replacement costs down the road.
Final Thoughts
Creating a stunning concrete porch combines creative design choices with solid construction techniques that anyone can learn with patience and preparation.
I hope you’ve found inspiration from the beautiful styles ranging from stamped patterns to polished finishes, plus the building process.
Remember that choosing your design first guides your material choices, forming techniques, and finishing methods during the actual construction phase.
Your concrete porch becomes a lasting statement piece that welcomes guests, increases home value, and provides a functional outdoor living space daily.
The combination of beauty and durability makes concrete ideal for entrances that look amazing and perform flawlessly. What concrete porch style inspires you most? Share your favorite design ideas in the comments below.