Want budget-friendly character and protection for your bathroom walls without major renovations or expensive tile work? Beadboard in bathroom spaces uses vertical grooved panels that add texture while shielding walls from moisture and daily wear.
This versatile material works beautifully if you prefer classic white wainscoting, bold painted accents, or full-wall coverage that changes the room.
You can install beadboard yourself over a weekend, customize it with any paint color, and enjoy decades of durability.
I’ll show you design ideas, material options, installation steps, and maintenance tips that make beadboard bathroom projects successful. Let me show you how you can convert your plain walls with the guidance I’ve gathered.
What Makes Beadboard Perfect for Bathrooms?
Beadboard adds texture and dimension to plain bathroom walls, creating visual interest that makes spaces feel more finished and intentional.
I’ve seen countless bathrooms changed by this simple material that protects walls from water splashes, humidity, and daily wear effectively.
You can easily paint and customize beadboard to match any color scheme or style preference you have for your space.
The versatility means beadboard works beautifully in all design styles, if you prefer farmhouse appeal, coastal vibes, or modern minimalism.
I recommend beadboard bathroom walls for durable, attractive surfaces that handle moisture while adding character and personality throughout the room.
Beadboard Height and Placement in Bathrooms
Different beadboard heights create distinct looks while offering varying levels of protection against moisture and daily wear in your bathroom. I’ll show you the most popular installation options and where each works best for your space:
| Height Option | Installation Area | Best For | Visual Impact |
|---|---|---|---|
| Half-Wall (Chair Rail) | Bottom 32-36 inches | Small bathrooms, budget projects | Balanced look, breaks up wall space |
| Two-Thirds Wall | Bottom 48-60 inches | Medium bathrooms, standard tubs | Creates height, more dramatic than half-wall |
| Full Wall | Floor to ceiling | Large bathrooms, statement designs | Maximum texture, dramatic modification |
| Around Fixtures | Tub surrounds, sink backsplashes | High-splash areas only | Focused accent, functional design |
Each height option serves different functional and aesthetic purposes depending on your bathroom size and moisture protection needs. Choose based on your budget, room dimensions, and how much visual texture you want throughout the space.
Beadboard Bathroom Design Ideas
Beadboard brings texture, joy, and protection to bathrooms through countless creative applications that work for any style or budget. I’ve gathered some inspiring beadboard ideas that convert ordinary bathrooms into stylish, functional spaces you’ll love:
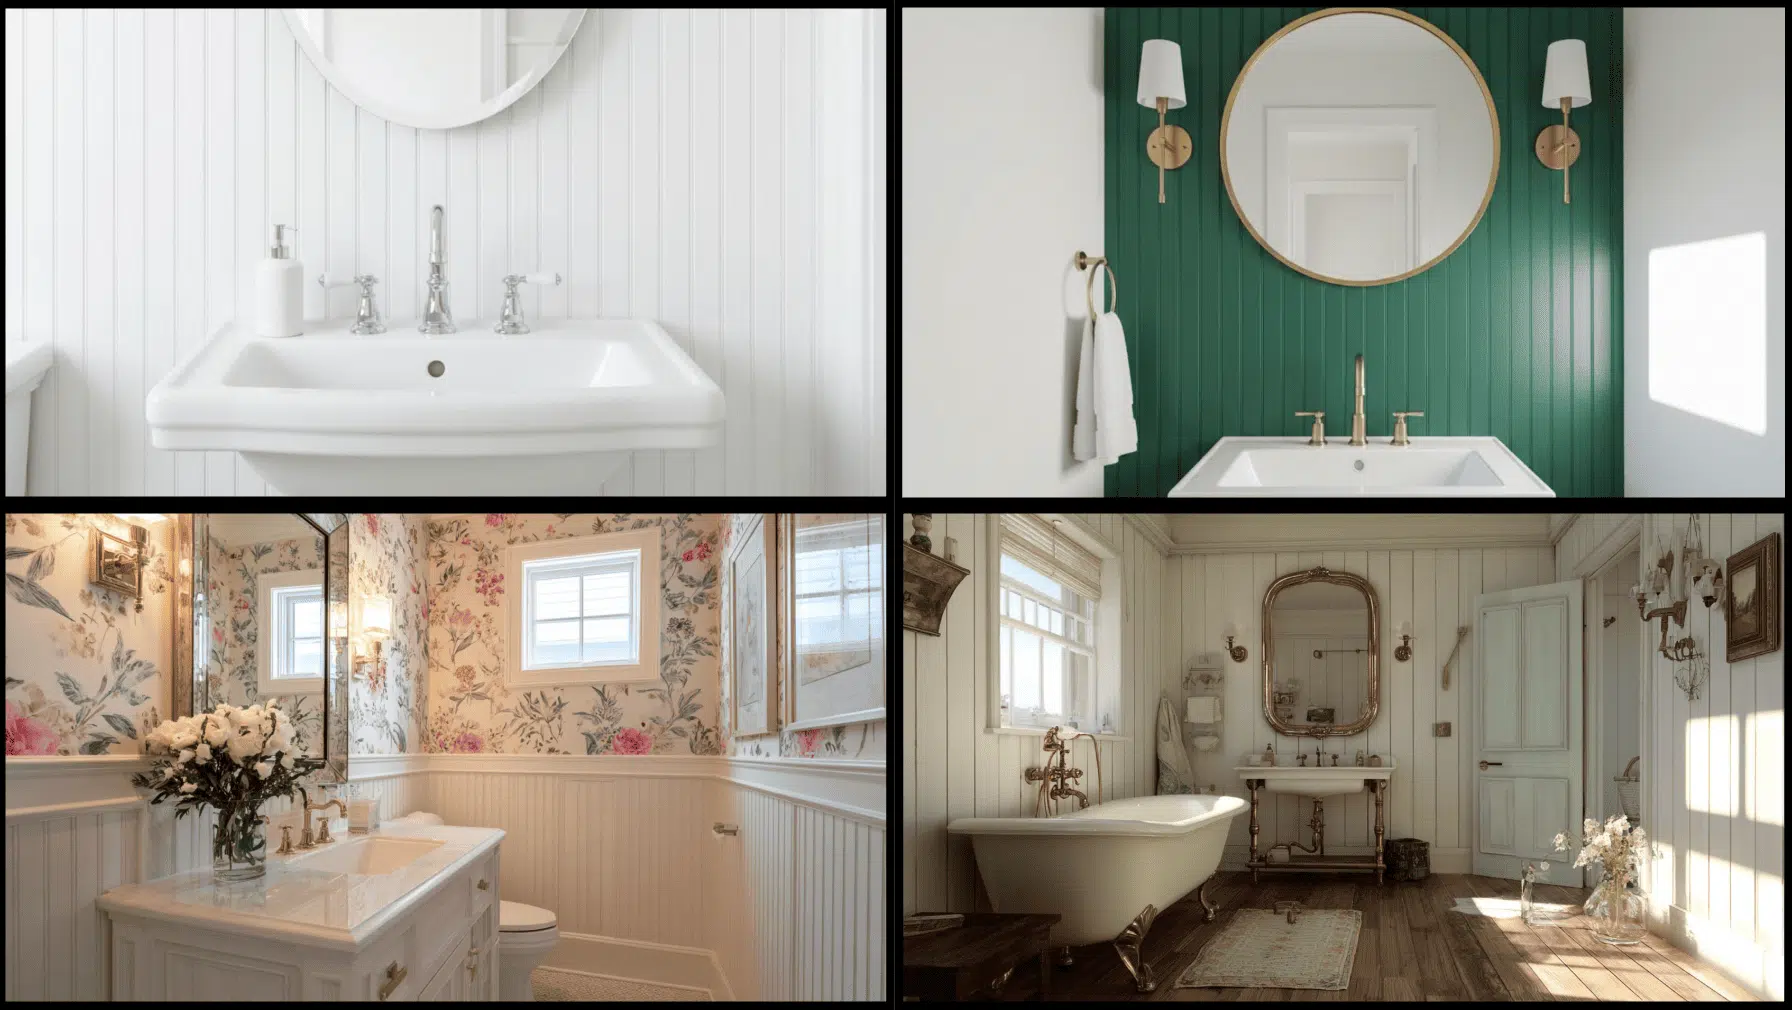
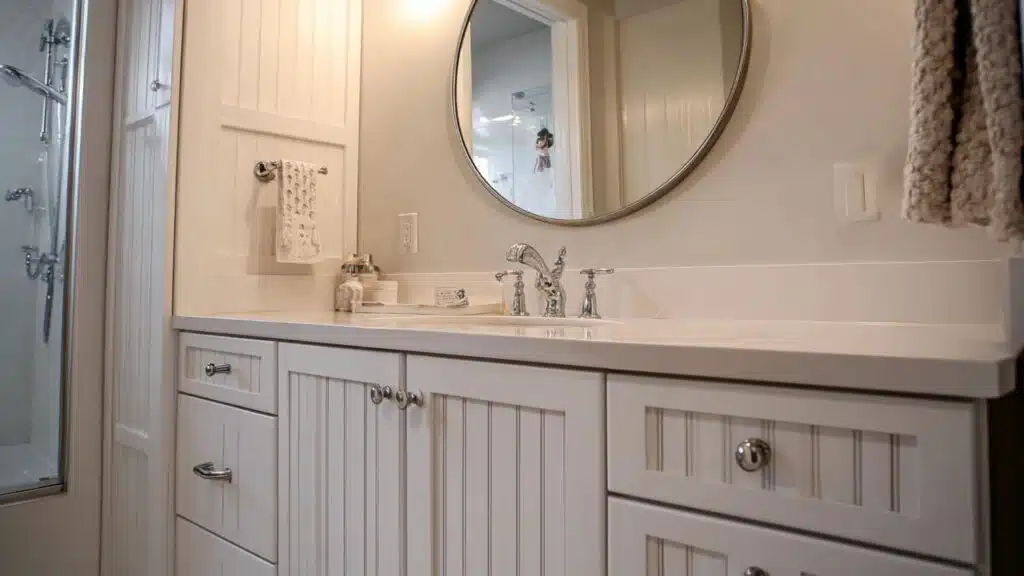
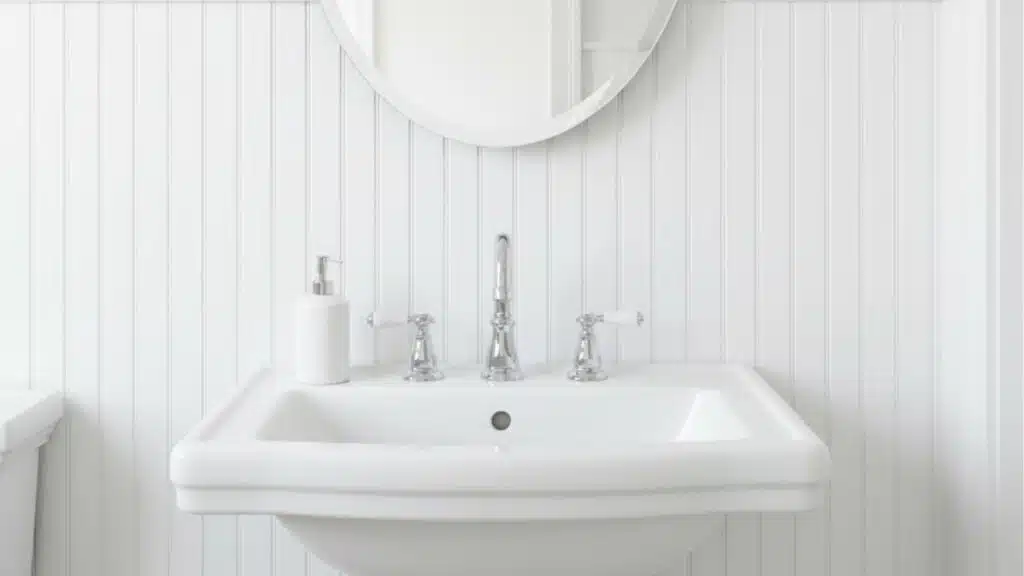
1. Classic White Beadboard
White beadboard never fails to brighten small bathrooms and bring in a clean, airy feeling. My friend Laura used glossy white panels and said, “It made my old walls look brand new.”
It hides imperfections and pairs well with almost any color scheme. Experts often suggest semi-gloss paint for easy cleaning and moisture resistance. This timeless style works beautifully in both modern and traditional bathrooms.
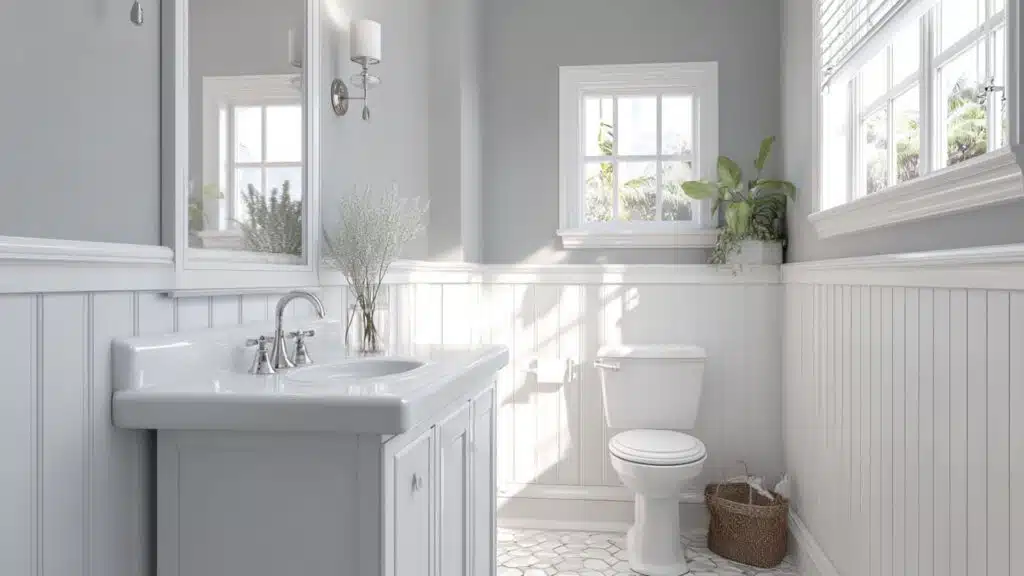
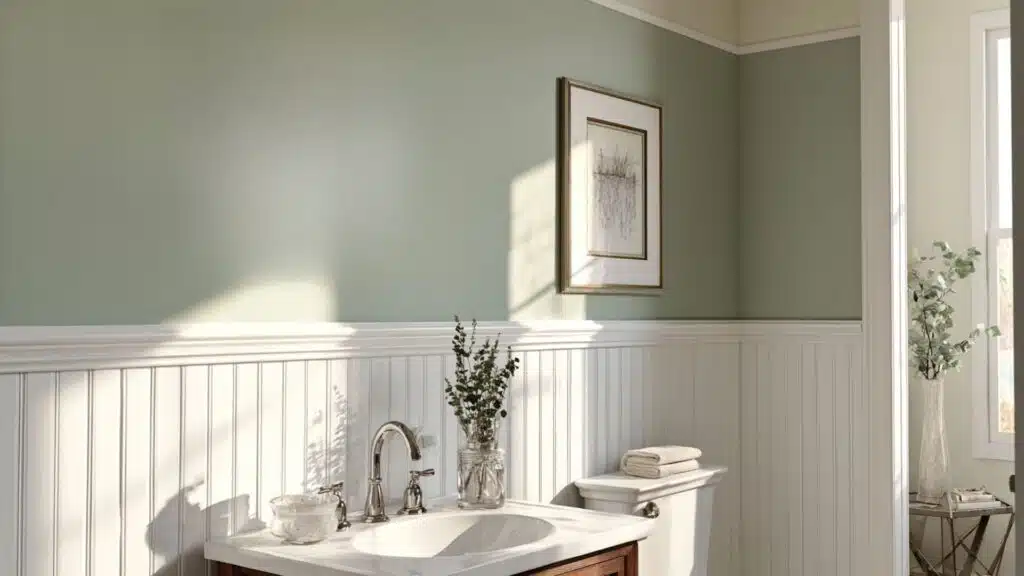
2. Half-Wall Beadboard Wainscoting
Half-wall beadboard adds joy while keeping your walls protected from splashes and scuffs. My uncle, who’s been a contractor for 20 years, calls it “a shield that looks stylish.”
It gives a nice balance between texture and open wall space. You can paint the upper section any color to fit your taste. This approach is affordable, easy to maintain, and ideal for busy family bathrooms.
3. Ceiling Beadboard Panels
Beadboard ceilings make bathrooms look cozy and refined, especially in older homes. I tried this in my guest bath and instantly noticed how it made the room feel taller. It’s great for hiding uneven surfaces or cracks.
Lightweight PVC panels work best since they resist humidity. Expert builders often recommend adding crown molding for a more complete, finished appearance that makes ceilings feel intentional, not forgotten.
4. Two-Tone Beadboard Walls
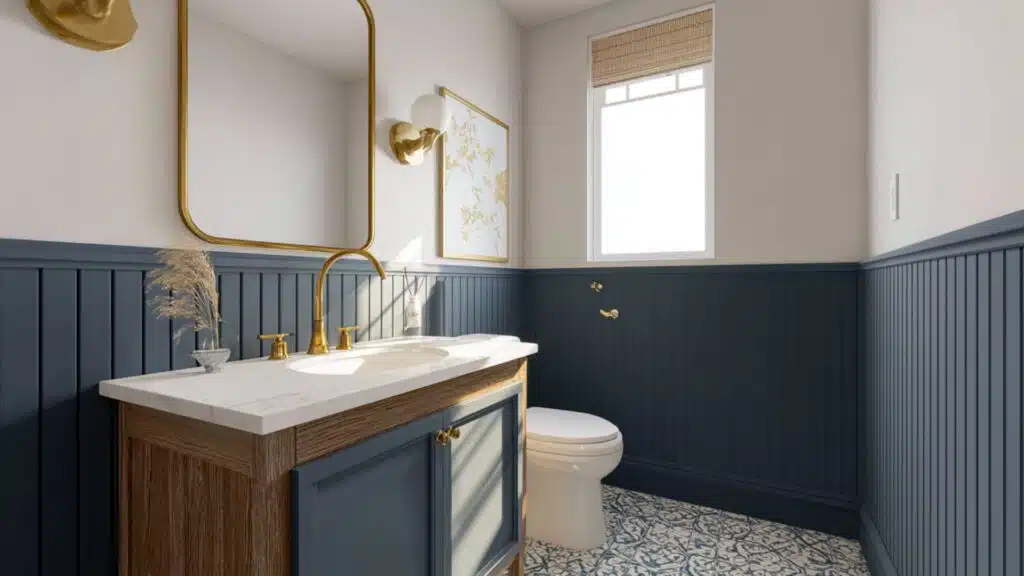
Two-tone walls let you add personality without making the space feel cluttered. My friend Kim painted her beadboard navy and kept the top wall white; it turned out stunning. This color split creates depth and a sense of proportion.
It’s also a great way to add visual interest if your bathroom doesn’t have much natural light. Experts suggest taping carefully for a clean paint line that lasts.
5. Beadboard Accent Wall
A beadboard accent wall gives your bathroom a focal point without overwhelming the space. My neighbor Joe tried this behind his sink and said, “It’s the best change we made.”
Using a bold color makes the wall pop beautifully. This option adds appeal and definition, especially in plain bathrooms. It’s an easy DIY upgrade that turns a simple room into a stylish, finished-looking space.
6. Beadboard Cabinet Fronts
Updating cabinets with beadboard panels can make your whole bathroom look custom-built. My cousin’s renovation expert recommended MDF inserts for affordability and precision. “It’s the detail that changes everything,” she said.
The panels hide wear and give new life to old vanities. You can paint or stain them for different looks. It’s a practical choice that combines texture with functionality, perfect for small updates.
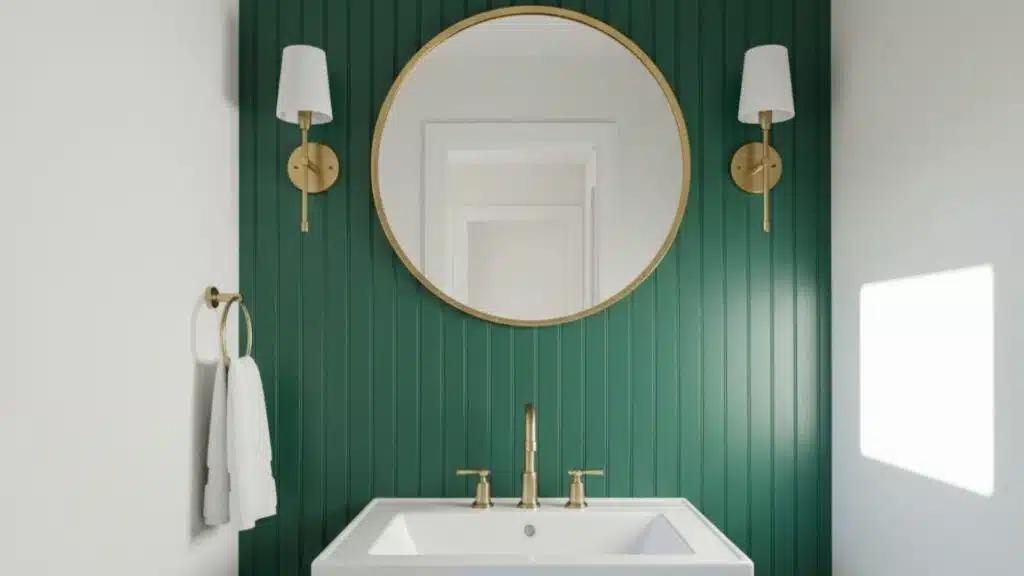
7. Full Bold Color Beadboard
Painting beadboard in bold colors like navy, dark green, or charcoal gives your bathroom a strong personality. My friend Alyssa used deep teal, and it completely changed her space. She said, “It feels like a spa now.”
Experts recommend choosing a semi-gloss paint finish for protection from humidity. Bold beadboard looks great when balanced with light flooring, bright fixtures, or natural light filtering through windows.
8. Framed Beadboard Mirrors
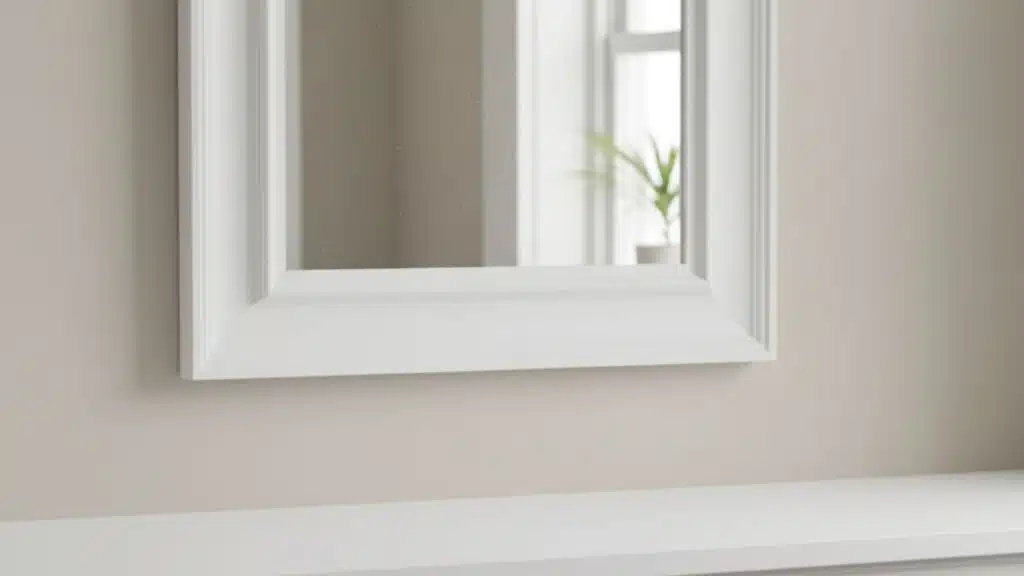
Framing mirrors with beadboard trim is a simple yet impressive DIY project. I made one from leftover panel scraps, and it looked like a custom store piece. This small touch ties together other beadboard features in the room.
Experts note that mirror framing adds depth and helps define your vanity space better. It’s a low-cost idea that delivers a high-end result without major remodeling.
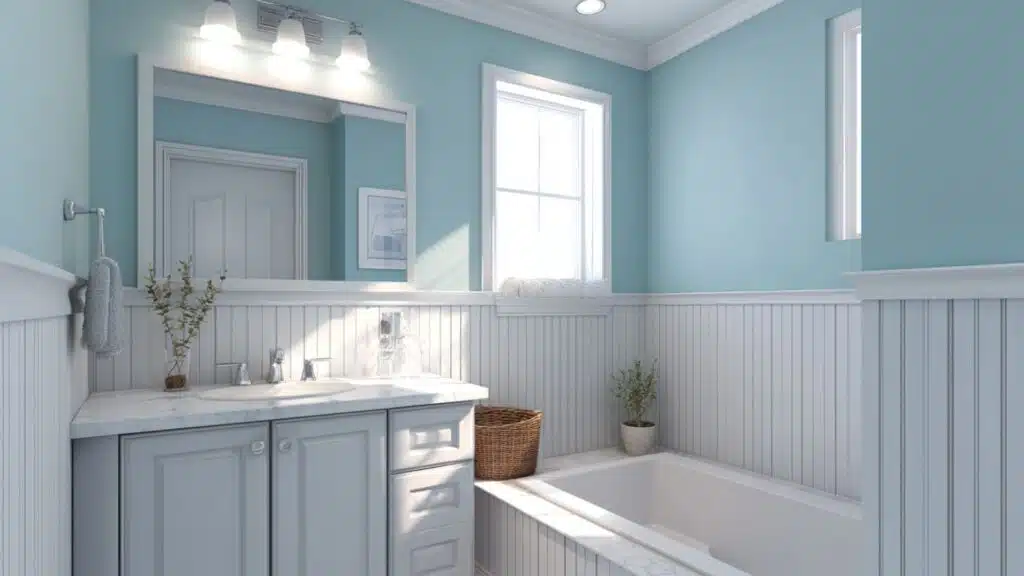
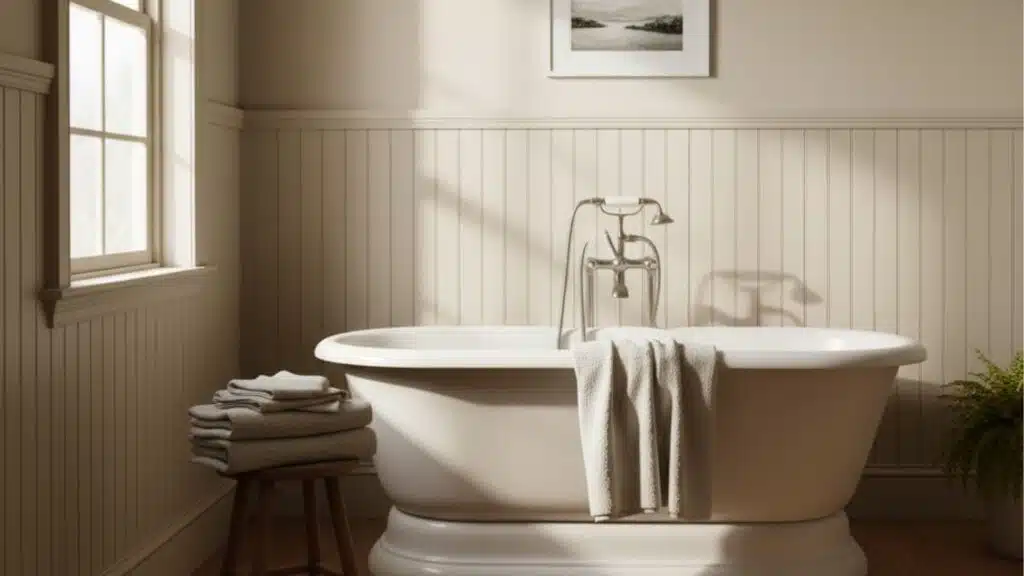
9. Beadboard Bathtub Surround
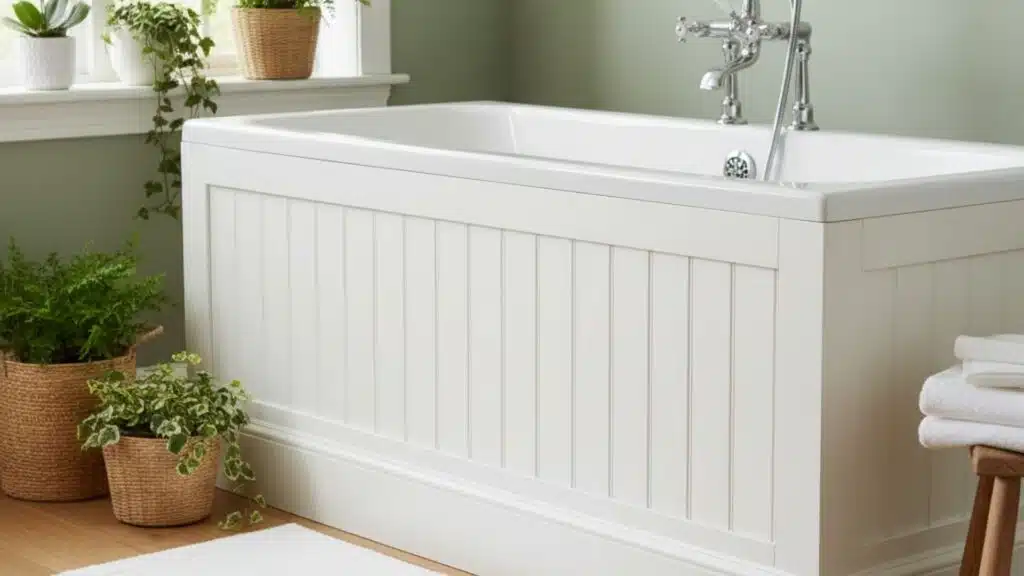
Adding beadboard around your bathtub instantly creates a cottage-like feel while protecting walls from splashes. My neighbor used PVC beadboard panels and sealed every edge with waterproof caulk. “It still looks perfect after three years,” she told me.
The look adds warmth where tiles can feel cold. Experts recommend leaving slight expansion gaps to prevent cracking from heat and moisture changes over time.
10. Beadboard Room Divider
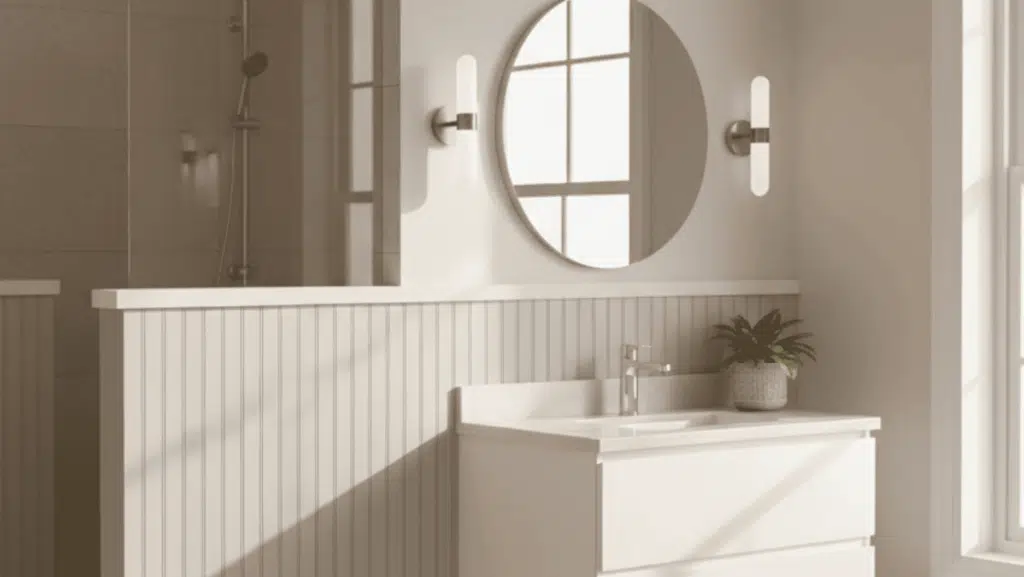
Beadboard makes a light, attractive divider between areas like the sink and shower. My sister added one for privacy in her shared bath. It didn’t block light but gave a clear separation. You can paint both sides differently for contrast.
Experts suggest topping dividers with molding for a finished edge. This design adds function and texture without making small bathrooms feel boxed in.
11. Beadboard Corner Shelving
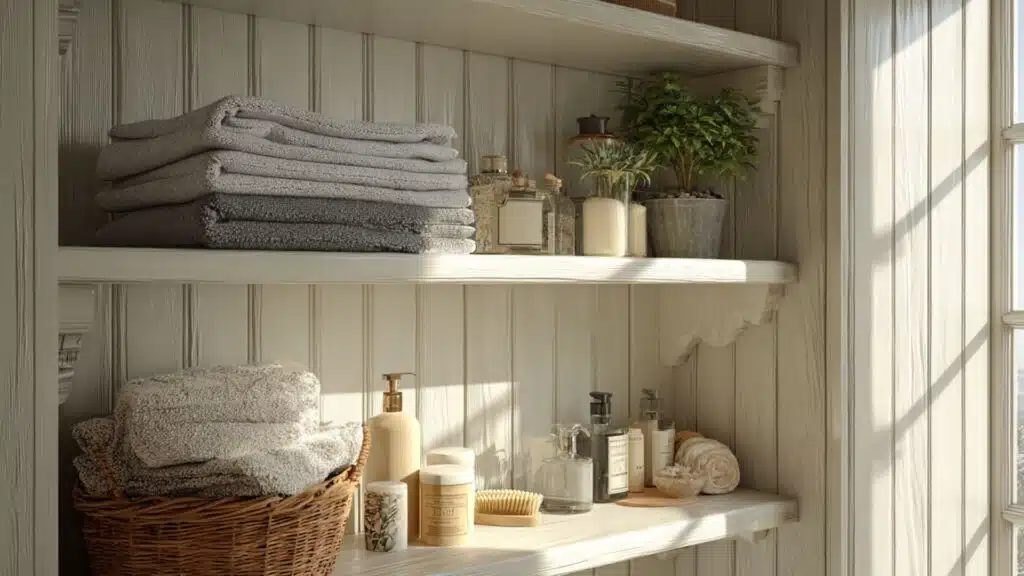
Installing beadboard behind corner shelves turns ordinary storage into décor. I used white beadboard behind mine, and it instantly looked more polished. The panels make toiletries and plants stand out while protecting the wall from drips.
It’s perfect for renters or small-space updates. This detail doesn’t take much effort but gives your shelves a built-in, coordinated appearance that feels both neat and cozy.
12. Beadboard Sink Backsplash
A beadboard backsplash adds warmth and protects your wall from water near the sink. My dad installed one and sealed it with waterproof paint. “It’s easier to clean than tile grout,” he told me.
It looks adorable, costs less than tile, and gives your bathroom a tidy finish. Experts say to always use high-moisture paint and silicone caulk for long-lasting results in damp areas.
13. Contrasting Trim Beadboard
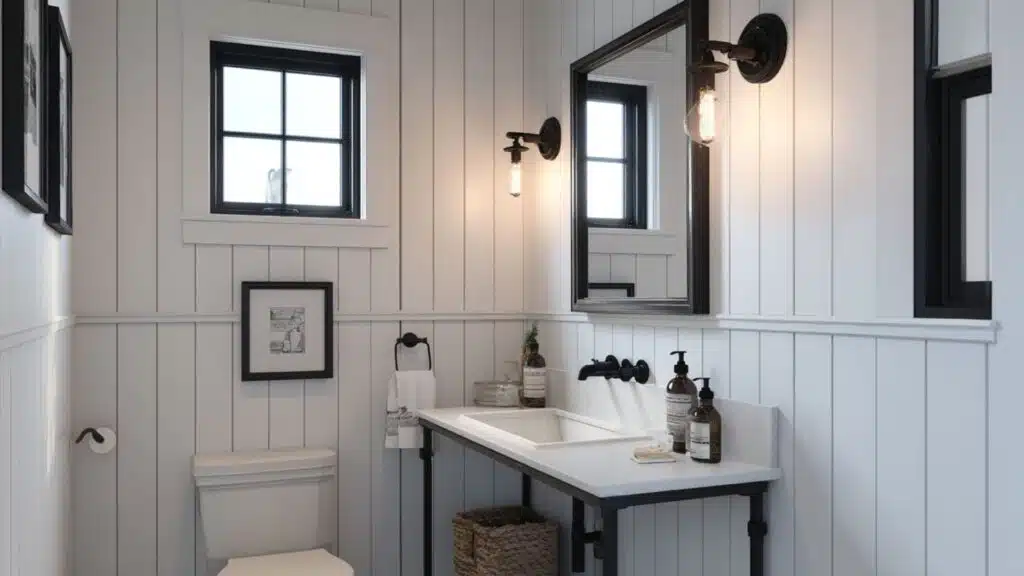
Pairing beadboard with a darker or lighter trim color gives your bathroom depth and contrast. My friend Erica painted her trim black against white beadboard, and it looked modern but cozy.
The mix draws attention to architectural lines and feels intentional. Experts often recommend keeping one element matte and the other glossy for texture contrast. This trick easily turns plain beadboard into a statement.
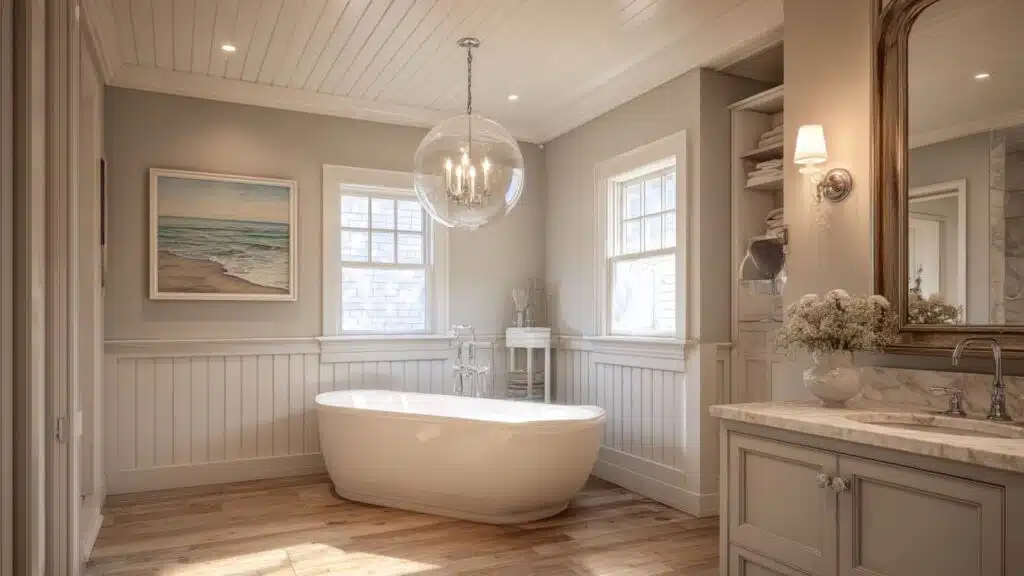
14. Subtle Neutral Beadboard Colors
Soft neutrals like beige, ivory, or warm gray beadboard create a calm, relaxing vibe. My aunt chose a greige tone for her master bath, and it made the room feel peaceful. She said, “It goes with everything.”
Neutrals mix beautifully with wood accents or white fixtures. Experts note that light tones help smaller bathrooms appear brighter and more open, especially with limited natural light sources.
15. Rustic Beadboard Styling
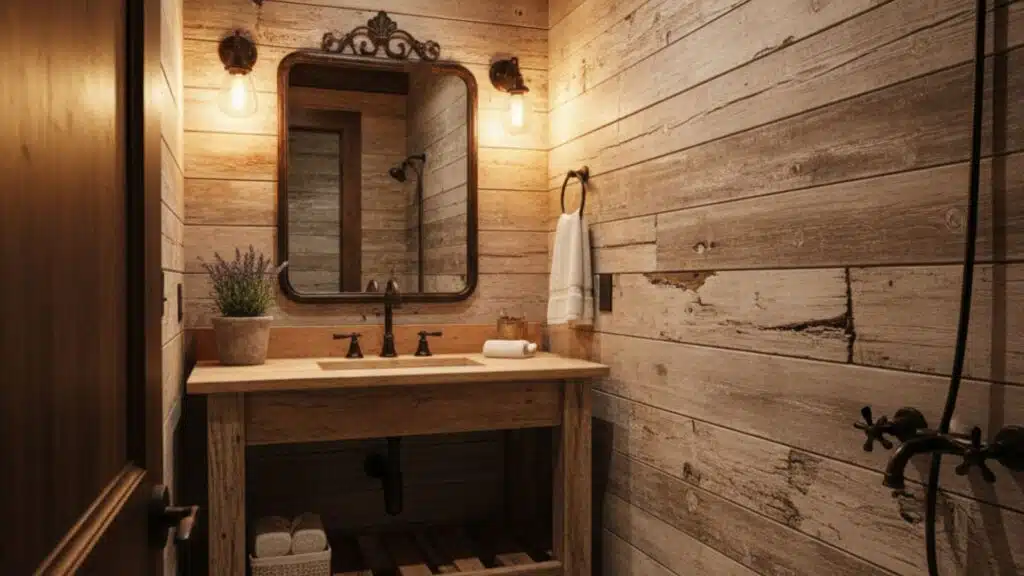
Rustic beadboard uses aged paint, reclaimed wood, or a weathered finish for that old-world appeal. My neighbor’s cabin bathroom features this look, and it feels homey and warm.
“I wanted it to look like it’s been there forever,” he said. Experts suggest sealing reclaimed boards to prevent moisture absorption. This texture works beautifully with metal fixtures or stone floors for a true farmhouse feel.
16. Beadboard Under Wallpaper
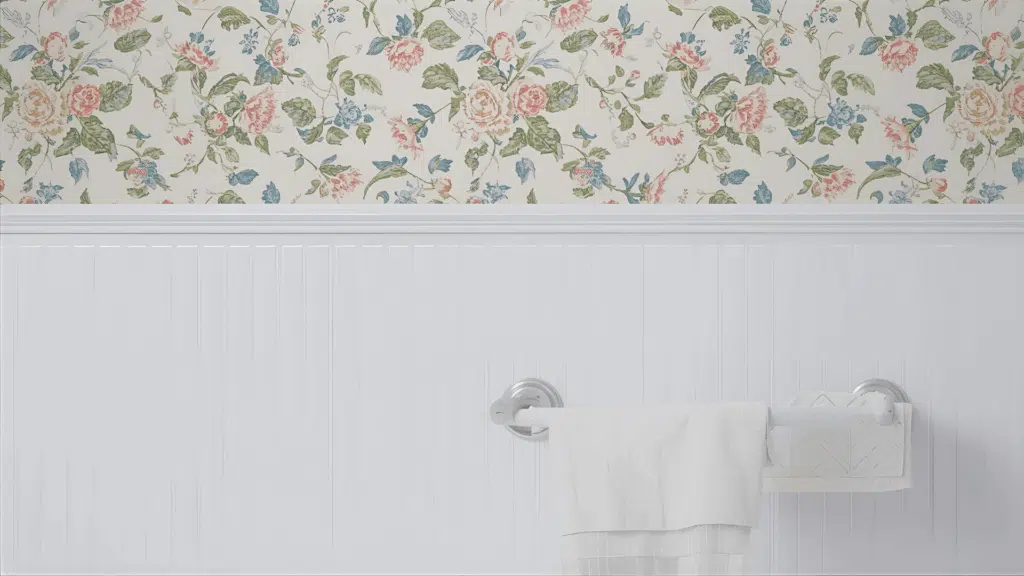
Mixing wallpaper with beadboard brings both texture and pattern into your bathroom. My cousin paired white beadboard with soft floral wallpaper above it; it looked balanced and attractive.
This combo protects lower walls while letting you play with designs up top. Experts recommend moisture-resistant wallpaper for steamy areas. It’s an easy way to layer old-fashioned appeal with modern materials and keep walls looking fresh.
17. Beadboard Bathroom Doors
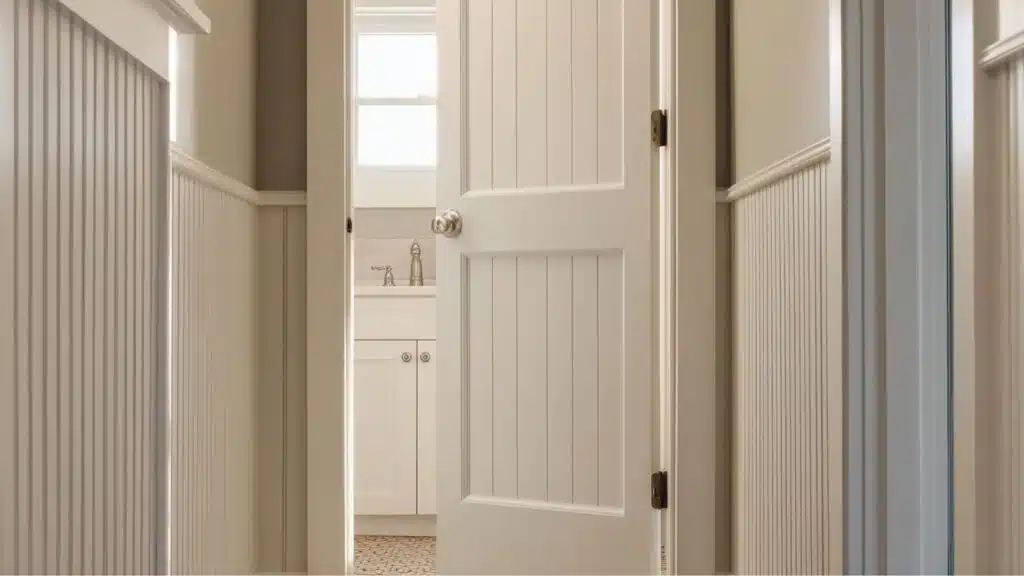
Adding beadboard inserts to plain doors makes them look custom. My friend Megan used MDF beadboard on her hollow-core door, and it looked handcrafted. She said, “No one believes it’s the same door.”
It ties your bathroom design together when you already have beadboard walls. This update is affordable, easy to paint, and adds a touch of craftsmanship to an often-overlooked detail.
18. Beadboard Chair Rail Detail
A chair rail above beadboard gives your walls a neat, finished look. I installed one in my hallway bath, and it looked immediately more structured. This detail also protects walls from scuffs.
Experts say matching paint between the rail and paneling keeps it cohesive. It’s a subtle upgrade that gives walls definition while balancing traditional style with practical protection for daily use.
19. Beadboard Behind Towel Racks
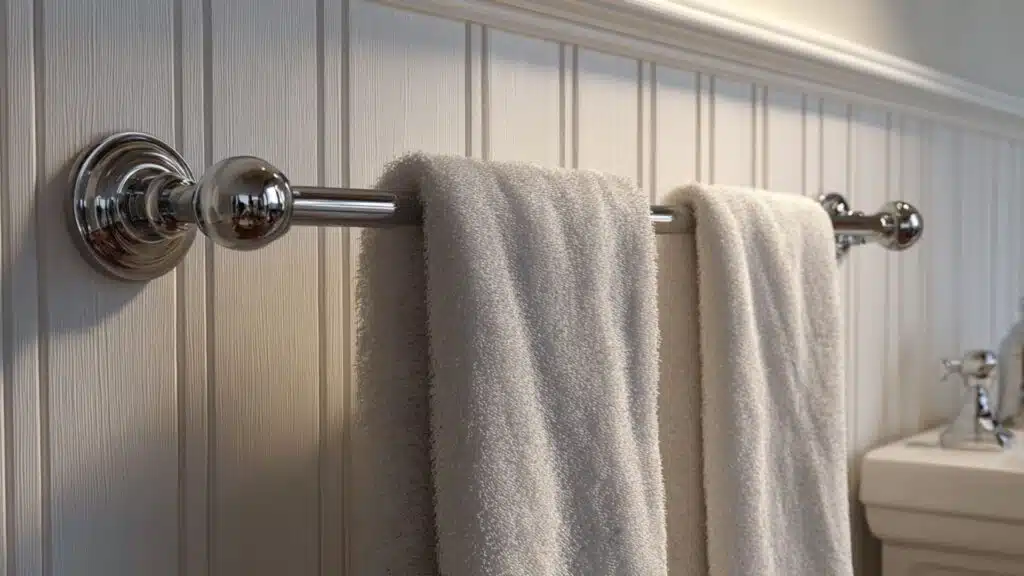
Installing beadboard behind towel racks keeps walls safe from moisture and adds a nice backdrop. My friend Daniel did this after his paint kept peeling. “No more bubbling walls,” he said happily.
It’s easy to clean and adds subtle style near the sink area. This idea is simple but effective, turning a functional necessity into an eye-catching, protective design detail anyone can try.
20. Moody Painted Beadboard Walls
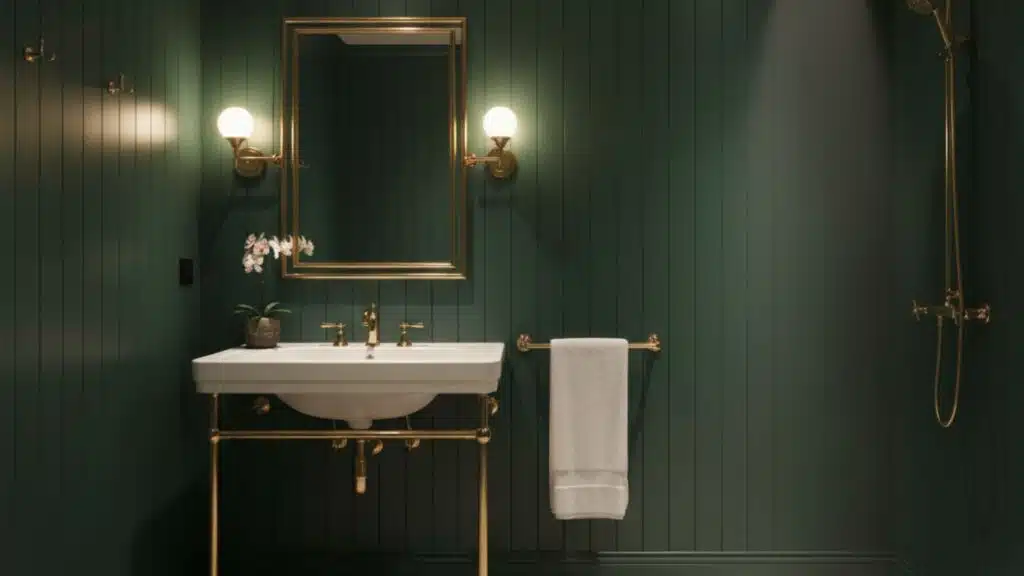
Dark, moody beadboard colors like charcoal or forest green add drama and warmth. My cousin used charcoal gray in her large bathroom; it feels luxurious. She said, “It’s dark but calming.”
Experts recommend pairing darker beadboard with light flooring and soft lighting. This bold style works best in well-lit spaces, giving a cozy, high-end vibe that feels more personal than plain white walls.
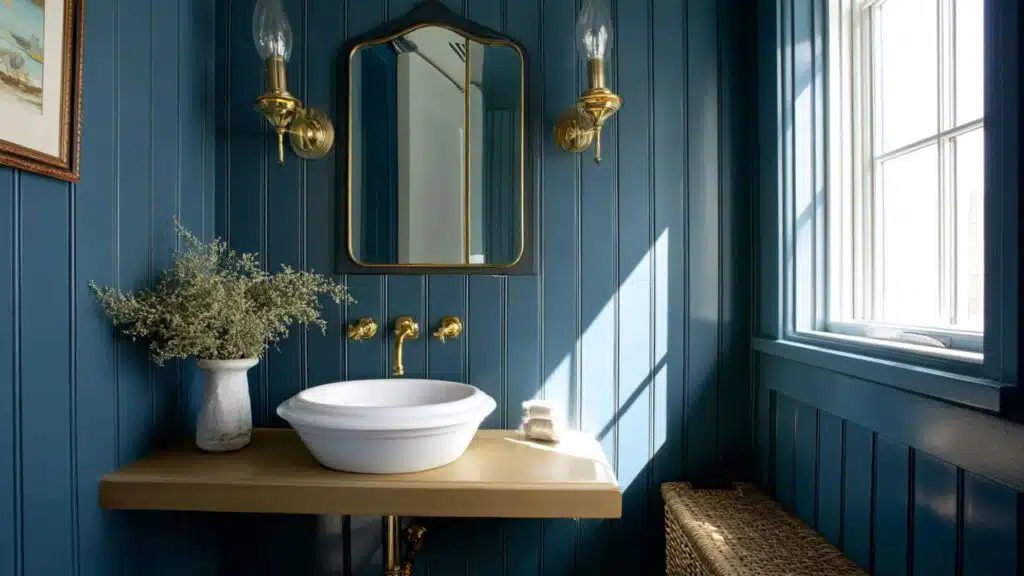
21. Beadboard with Vintage Fixtures
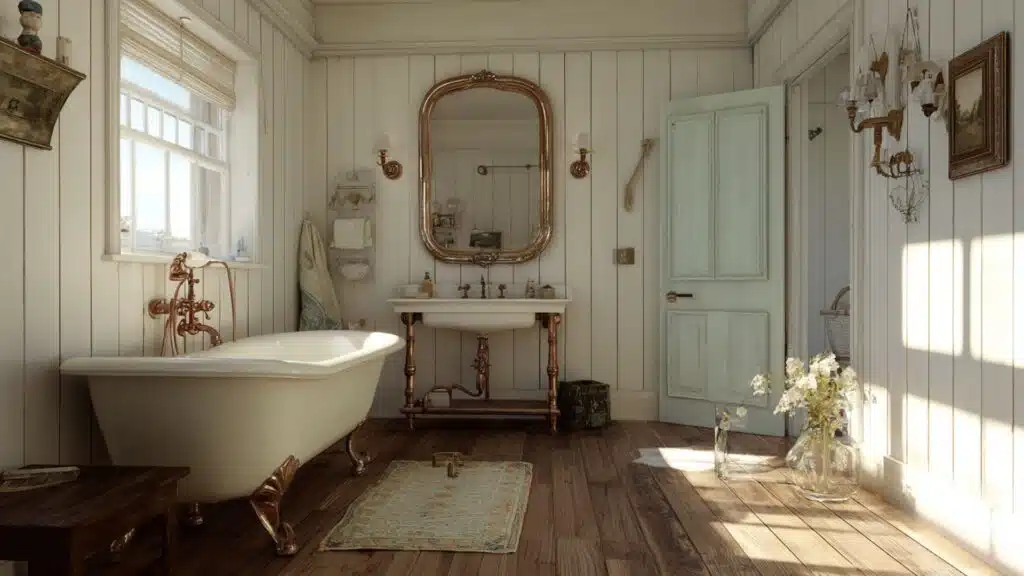
Beadboard pairs perfectly with vintage fixtures for a nostalgic look. My neighbor combined beadboard walls with brass faucets and an antique mirror, and it looked timeless. “It feels like stepping back in time,” she said.
Experts agree warm metals improve the beadboard’s appeal. This classic pairing brings out a sense of comfort and craftsmanship that never goes out of fashion in home design.
22. Beadboard Baseboards
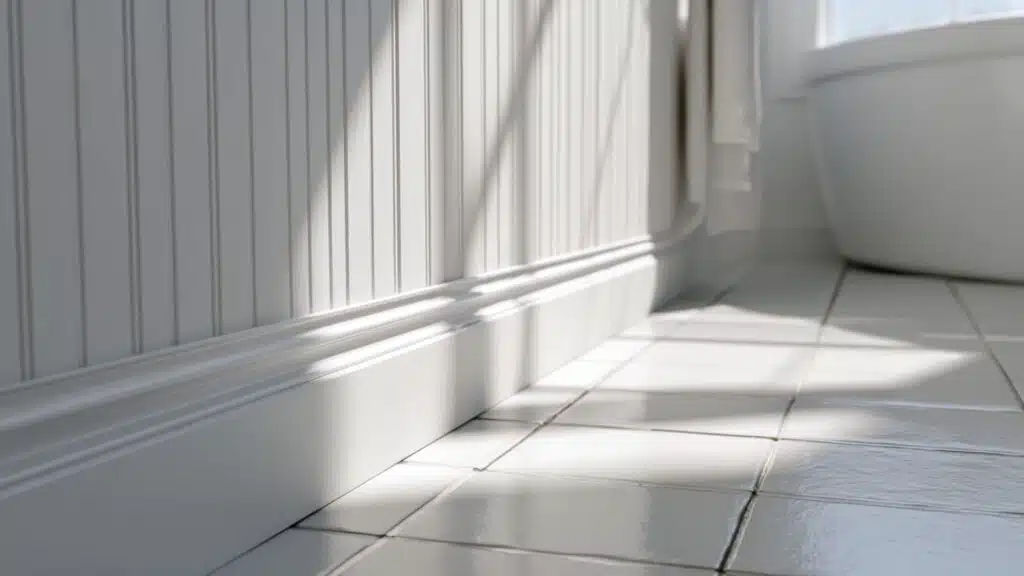
Replacing plain baseboards with beadboard trim ties everything together beautifully. I picked up this trick from a carpenter named Luis who swears by it. “It makes the floor meet the wall naturally,” he said.
The matching grooves create flow between panels and flooring. This understated detail adds continuity and helps your entire design feel cohesive, even in small or narrow bathrooms.
23. Beadboard Around Window Frames
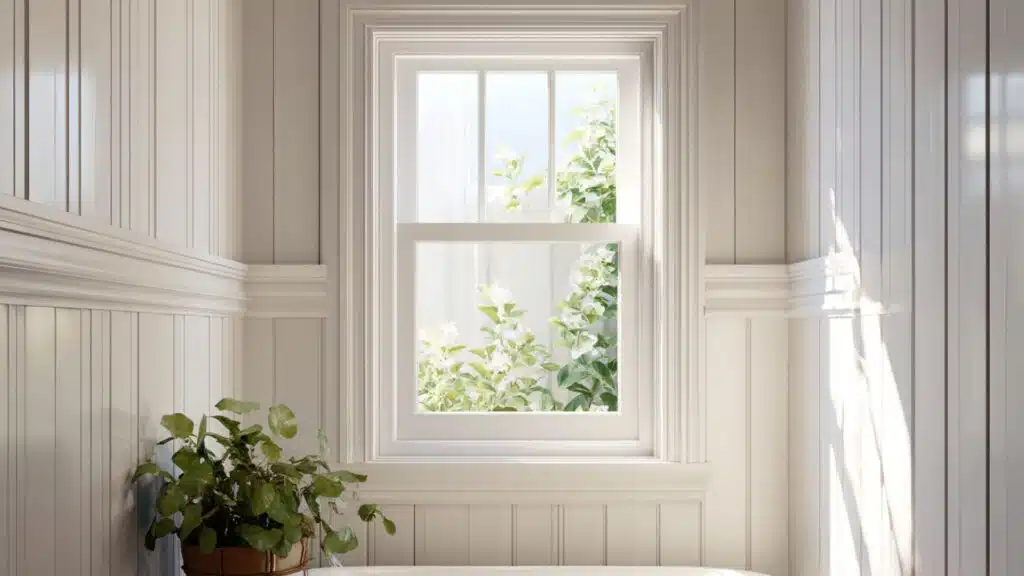
Framing windows with beadboard gives your bathroom a polished, built-in look. My friend Hannah used leftover beadboard from her wainscoting project, and it worked perfectly. “It feels finished now,” she said proudly.
Experts suggest sealing window edges to prevent condensation damage. This detail keeps the design consistent across walls, adding appeal while maintaining a clean, flawless transition from window to wall.
Choosing the Right Material for Bathroom Beadboard
Selecting the right beadboard material determines how well your bathroom walls handle moisture, humidity, and daily use over many years.
Wood beadboard looks beautiful and authentic but can warp or rot in damp conditions without proper sealing and maintenance regularly.
MDF beadboard costs less than real wood and paints smoothly, though it swells badly when exposed to excessive moisture over time.
I’ve found that PVC beadboard resists water damage completely, never rots, and cleans easily with simple soap and water.
Vinyl beadboard offers similar moisture resistance at lower prices but may look less authentic than other options available today.
I suggest evaluating your bathroom’s humidity levels and budget before choosing the material that balances durability, appearance, and cost effectively.
Community Views on Beadboard Bathrooms
In a popular Reddit discussion, users share mixed thoughts about beadboard in bathrooms. Many prefer vinyl or PVC to avoid moisture damage common with wood or MDF.
Some worry about seams showing over time, especially in steamy bathrooms. Users talk about beadboard’s appeal but also mention cleaning challenges due to grooves trapping grime.
Overall, the conversation shows both the appeal of beadboard for aesthetics and the concerns about durability in wet environments.
This post reflects a variety of real-life experiences from DIYers and professionals, making it helpful for anyone considering beadboard for their bathroom walls.
How to Install Beadboard in a Bathroom
I’ve installed beadboard in several bathrooms and found the process straightforward when you follow the right steps carefully. Here are the five essential steps for installing beadboard successfully in your bathroom:
- Step 1: Measure and mark height: Decide on half-wall, two-thirds, or full-wall coverage, then mark a straight line at your desired height.
- Step 2: Cut beadboard panels: Measure each wall section carefully and cut panels to fit using a circular saw, accounting for outlets and corners.
- Step 3: Apply adhesive or nail to wall: Secure beadboard panels with construction adhesive or finishing nails, starting from one corner and checking level frequently throughout.
- Step 4: Add trim or chair rail: Install baseboards at the bottom and chair rail molding at top to cover panel edges for a finished look.
- Step 5: Seal and paint: Apply waterproof caulk to all seams and edges, then prime and paint with moisture-resistant paint for protection.
Proper sealing makes the difference between beadboard that lasts decades versus panels that warp within months. I always spend extra time on waterproofing steps to ensure bathroom beadboard stays beautiful and protected for years.
Common Mistakes to Avoid
Even experienced DIYers make beadboard installation errors that lead to warping, water damage, or design problems that ruin the finished look. Knowing these common mistakes helps you avoid frustration and ensures your beadboard project turns out beautiful and long-lasting:
- Using non-sealed wood in humid bathrooms causes panels to absorb moisture, warp badly, and develop mold or rot over time.
- Forgetting to caulk corners and seams allows water to seep behind panels where it causes hidden damage you won’t notice immediately.
- Overcrowding beadboard with busy wallpaper or dark paint makes small bathrooms feel cramped, closed-in, and visually overwhelming instead of lovely.
- Installing beadboard without proper wall preparation leads to uneven panels, visible bumps, and a sloppy finish that looks unprofessional throughout the room.
Learning from these mistakes saves time, money, and prevents the headache of redoing work that should have been done correctly initially. I always spend extra time on preparation and sealing because fixing water damage later costs far more than doing it right.
Budget and Cost Breakdown
Beadboard materials usually cost between $0.50 and $3 per square foot, depending on style and quality.
Hiring a professional to install beadboard typically adds $4 to $6 per square foot in labor costs. If you’re handy, DIY installation can save about half of that cost but requires patience and skill.
For budget-friendly options, beadboard wallpaper or peel-and-stick panels cost around $20 to $50 per roll and are easy to apply yourself.
These alternatives install quickly and add similar pleasure without high labor fees. Choosing the right option depends on your budget, skill level, and how long you want the finish to last.
These are estimated costs only and may vary based on location, material quality, labor rates, and project specifics.
Beadboard Maintenance and Moisture Protection Tips
Proper maintenance and moisture protection keep your beadboard looking fresh and prevent damage from humidity and water exposure over time. Here are essential care practices to protect your investment and extend your beadboard’s lifespan:
- Seal beadboard with quality primer and waterproof paint to create a protective barrier against moisture that penetrates unprotected wood surfaces.
- Caulk all seams and edges thoroughly with waterproof silicone to prevent water from seeping behind panels where it causes rot.
- Clean beadboard regularly with gentle wipes using mild soap and water, avoiding harsh scrubbing that damages paint or protective finishes.
- Prevent mold and mildew buildup by ensuring proper bathroom ventilation with exhaust fans and keeping surfaces dry after showers or baths.
These simple maintenance steps prevent costly repairs and keep your beadboard walls looking beautiful for many years without major issues. I check my bathroom beadboard quarterly for any caulk gaps or paint chips that need quick touch-ups before problems develop.
Final Words
Adding beadboard in bathroom spaces offers an affordable way to upgrade walls while protecting them from daily moisture and humidity damage.
I hope these design ideas, installation steps, and material comparisons helped you see how versatile and practical beadboard can be.
Proper sealing, regular maintenance, and choosing the right material ensures your beadboard lasts decades without warping or damage issues.
Your bathroom deserves walls that combine beauty with function rather than settling for plain painted surfaces that peel constantly.
I always recommend taking your time with installation and never skipping waterproofing steps for lasting results. What beadboard style are you most excited to try in your bathroom? Share your project plans in the comments below.