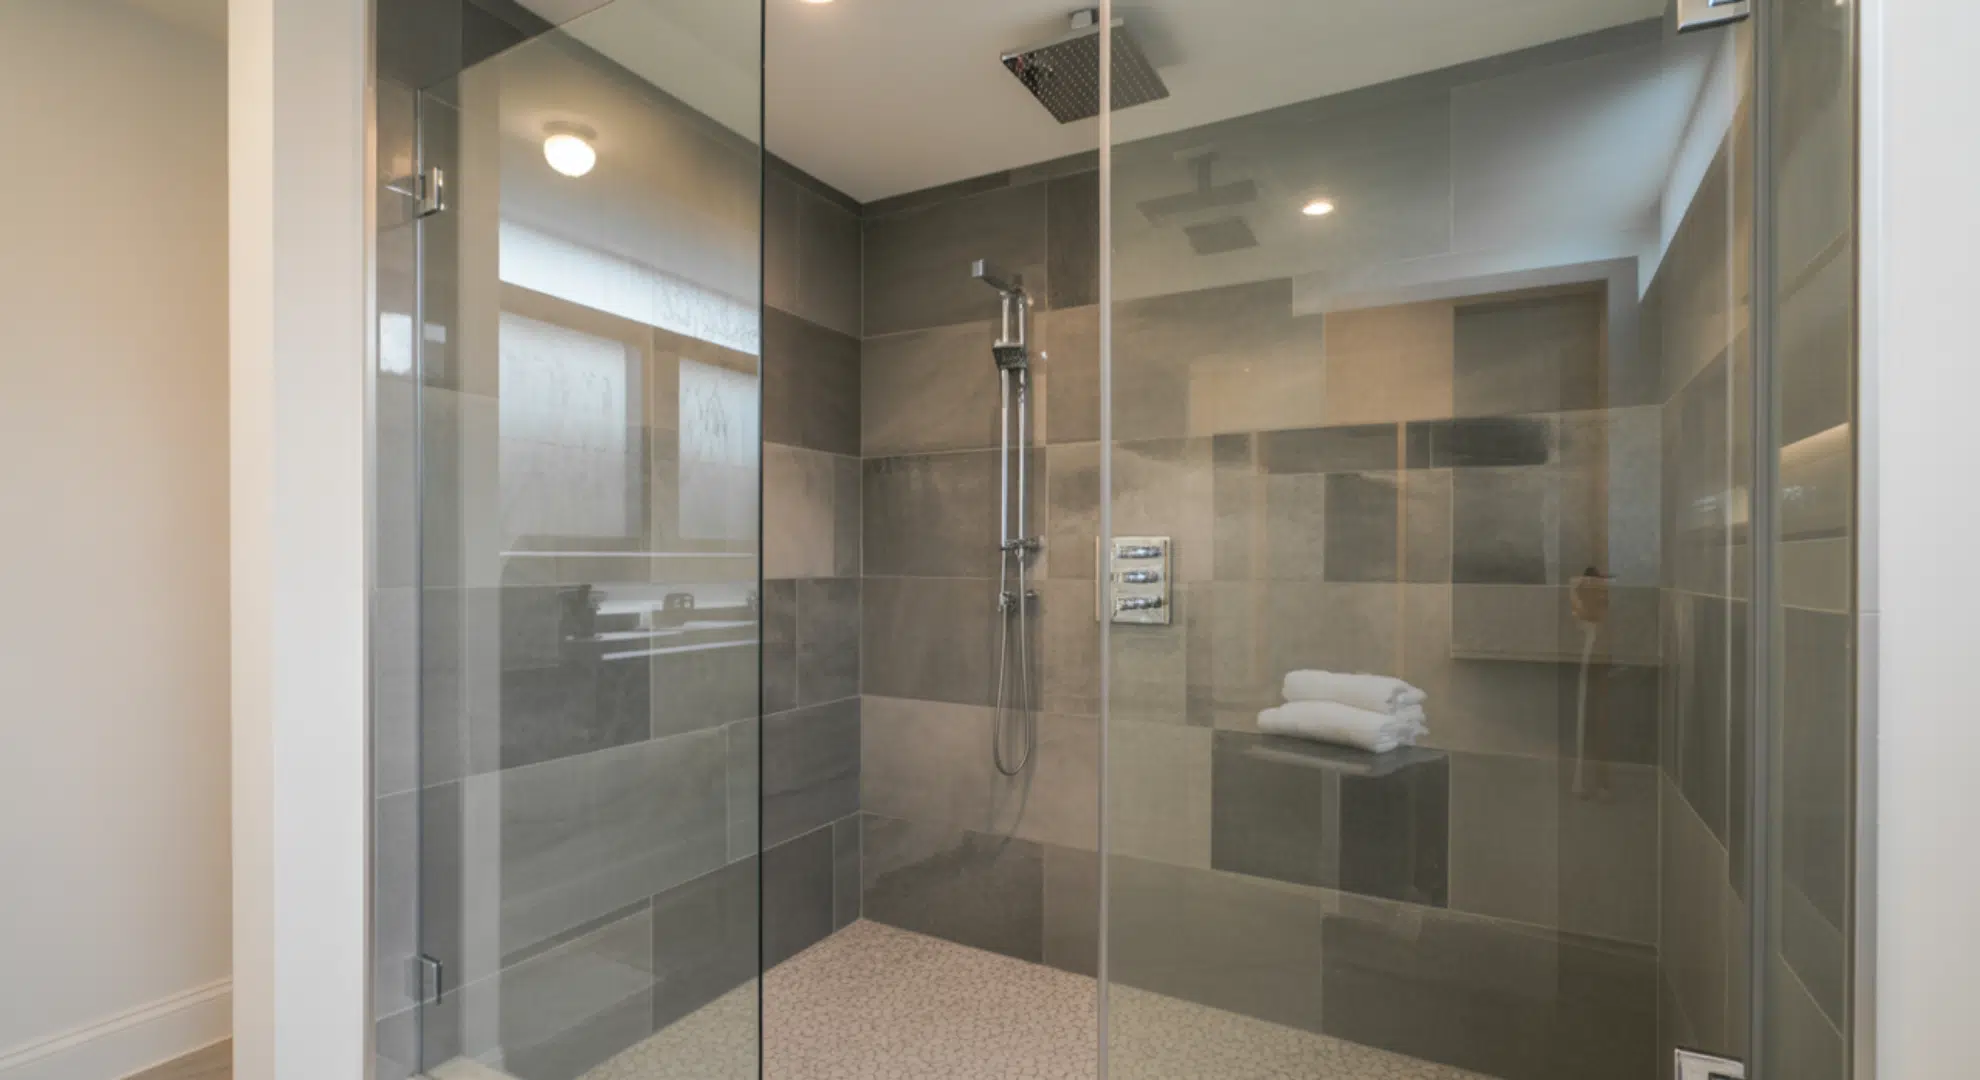
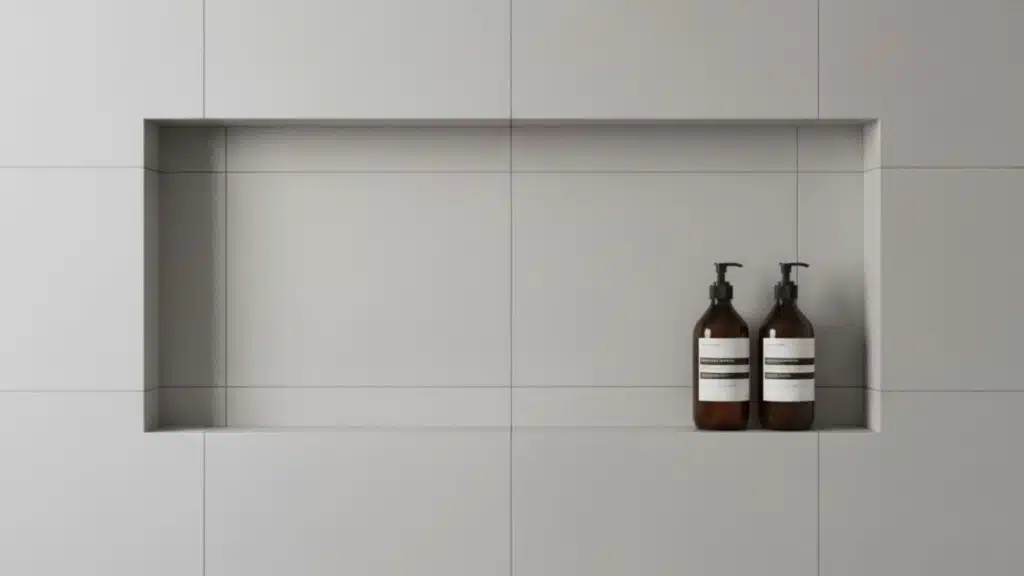
Tired of shower caddies that fall down or rusty shelves that ruin your bathroom’s look and create constant frustration? A shower niche is a built-in recessed shelf installed directly into your shower wall for permanent storage solutions.
Shower niche ideas offer infinite design possibilities that stay in place while making your space look professionally designed and organized.
I love how niches eliminate cluttered corners and give you easy access to everything you need during showers.
You can choose from sleek modern designs, spa-inspired styles, or creative custom looks that match your personality perfectly. Let me show you shower niche ideas that work beautifully in any bathroom, style, or size.
Why You Need a Shower Niche?
Installing a shower niche keeps all your bathing essentials organized and within easy reach during every shower.
Unlike hanging caddies or suction shelves, niches stay permanently in place and never fall down or rust over time. The recessed design protects your products from direct water spray while keeping everything accessible when you need it.
I’ve found that shower floors stay much cleaner without bottles cluttering corners or creating tripping hazards everywhere.
A niche adds to your bathroom’s appearance by creating clean lines and a custom look that feels expensive and professional. I think you’ll save money in the long term, since niches don’t require replacement like metal caddies or plastic shelves.
Choosing the Right Shower Niche Height and Placement
Getting your shower niche height right makes a huge difference in how comfortably you can reach your products daily.
Most niches work best between 36 and 60 inches from the floor, depending on your household’s needs and preferences.
I recommend placing your niche at chest or shoulder height so you can grab items without bending or stretching awkwardly.
Think about who uses the shower most and what products you’ll store before deciding on the exact height.
Taller family members might prefer niches closer to 60 inches, while shorter users find 48 inches more comfortable overall. You can install niches on center walls for easy access or side walls to save space wisely.
Popular Shower Niche Designs and Styles
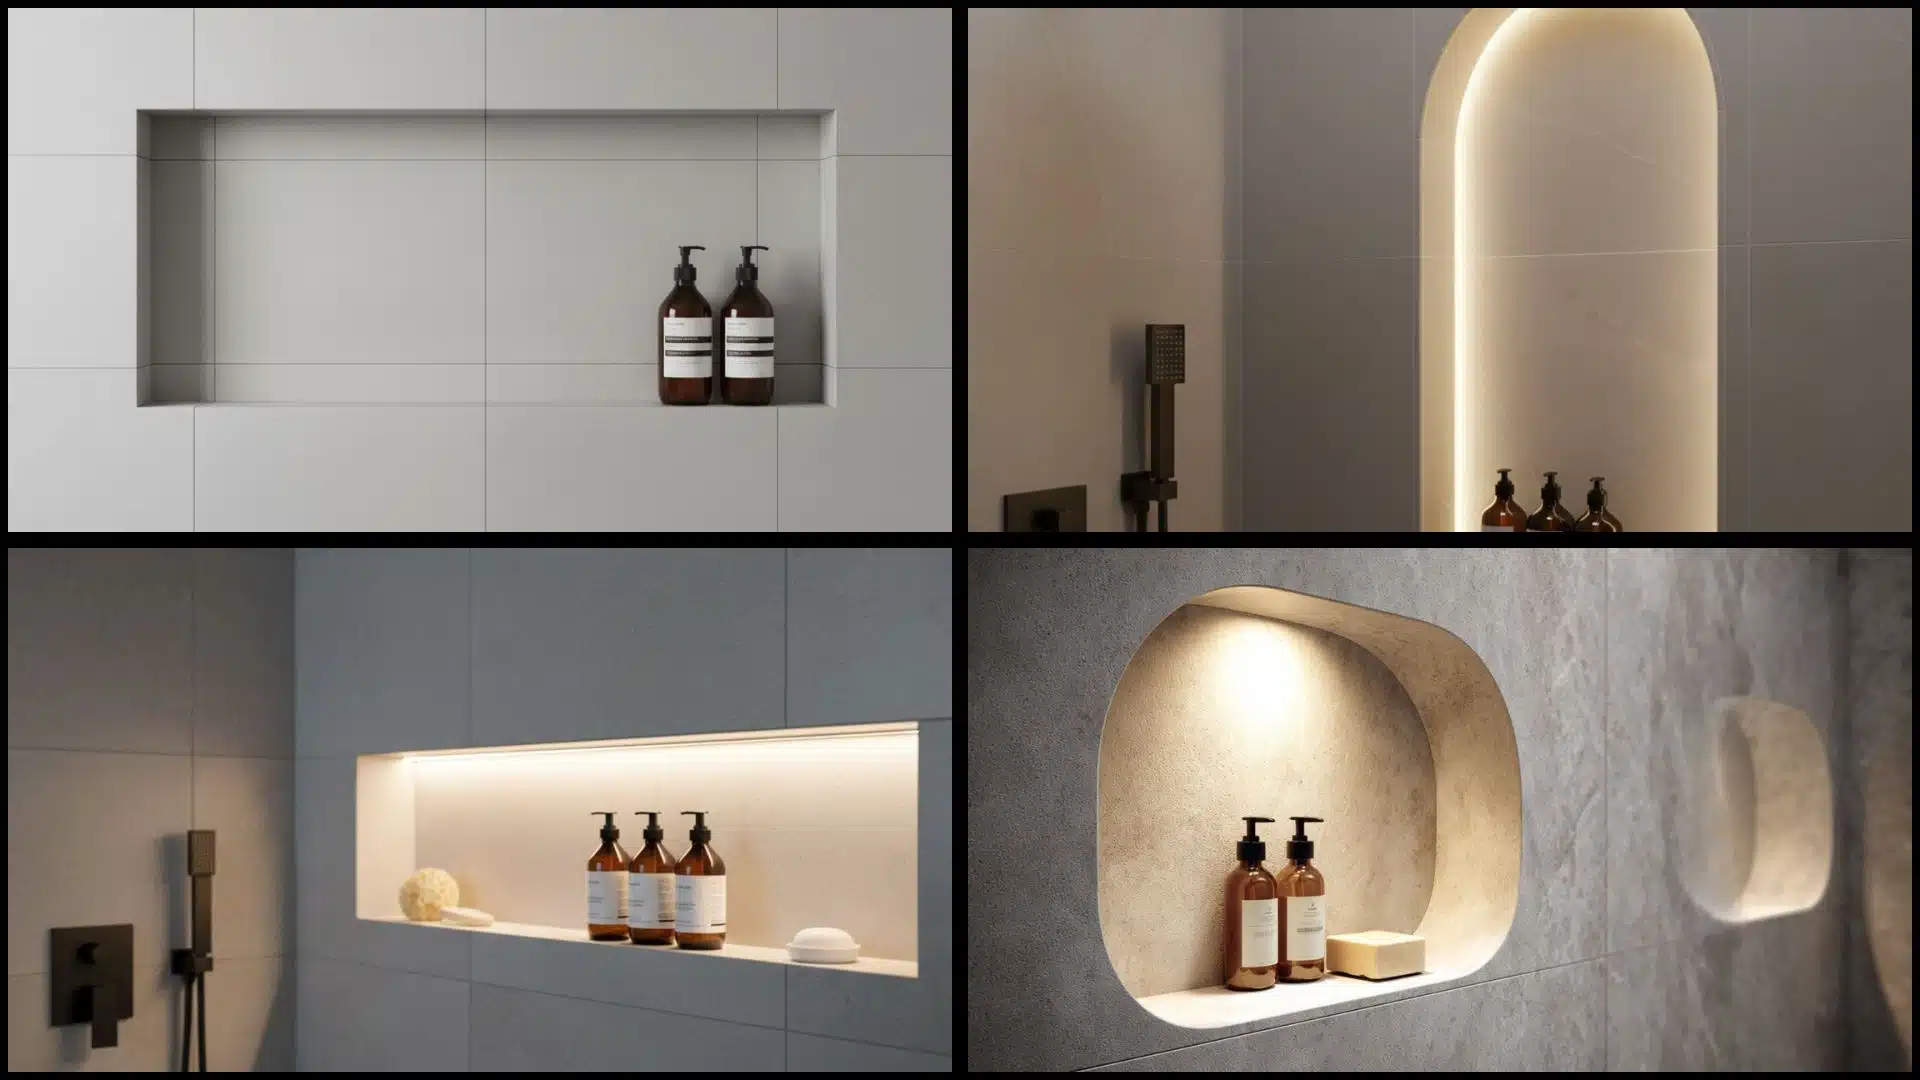
I’ve seen countless bathroom niche designs and ideas over the years, and each style offers unique benefits for different bathroom layouts and personal tastes. Here are the most popular niche designs to inspire your bathroom project:
1. Vertical Full-Height Niche
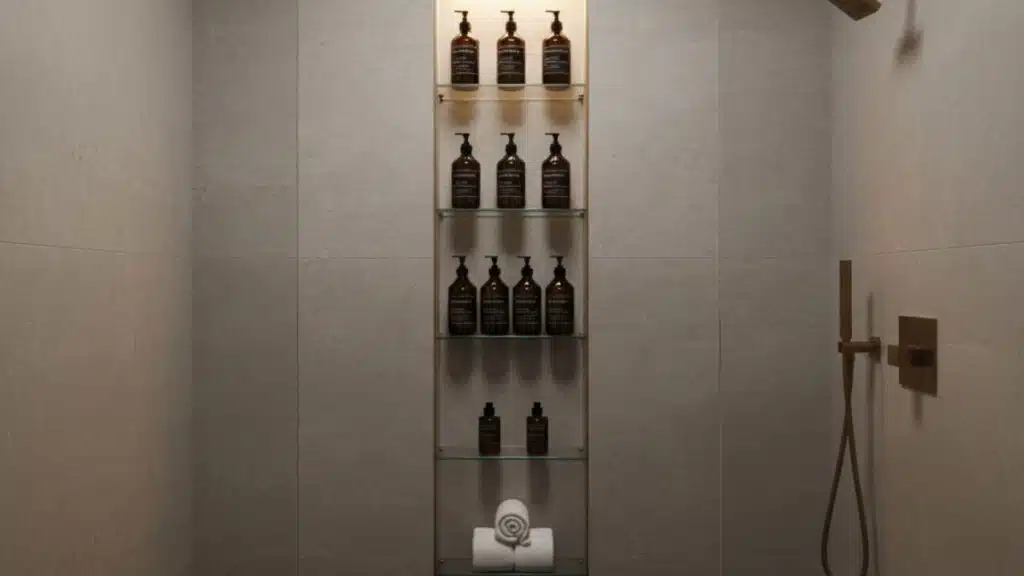
I helped my friend Carla install a tall, floor-to-ceiling shower niche that made her bathroom look much larger. She said, “Now I can reach everything easily.”
The design added style and function with multiple shelf levels. It’s perfect for families with lots of products. The vertical layout also draws your eyes up, creating a bright, open feeling in smaller showers.
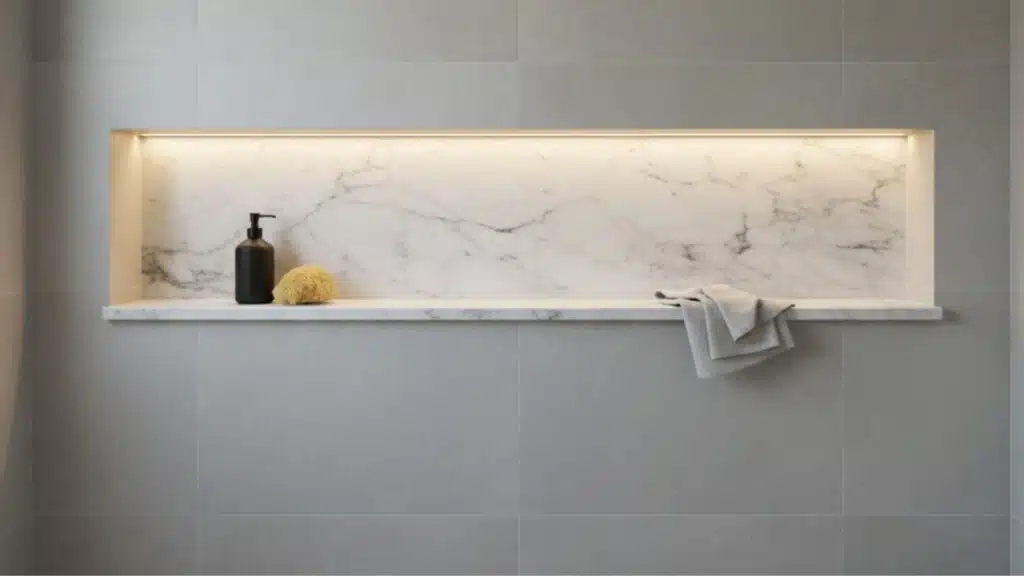
2. Horizontal Wall-Spanning Niche
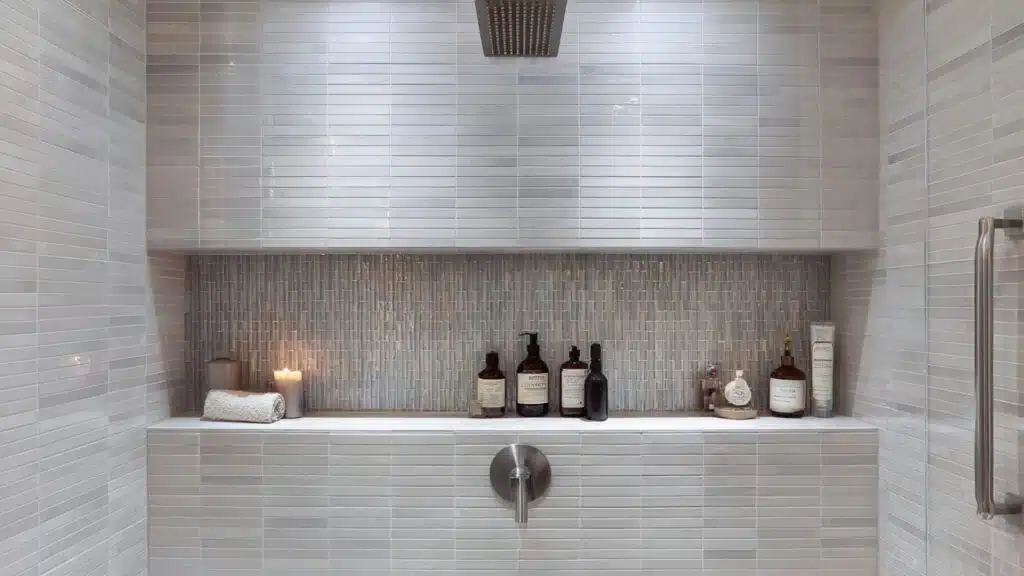
My cousin Lily’s contractor added a long, wall-spanning niche that stretched behind her rainfall shower. “It feels like a spa wall,” she said. It looked modern and stored everything neatly.
The horizontal shape added balance and flow to her shower design. Experts recommend placing it at shoulder height for easy access and even symmetry along the tiled wall.
3. Double-Tiered Niche
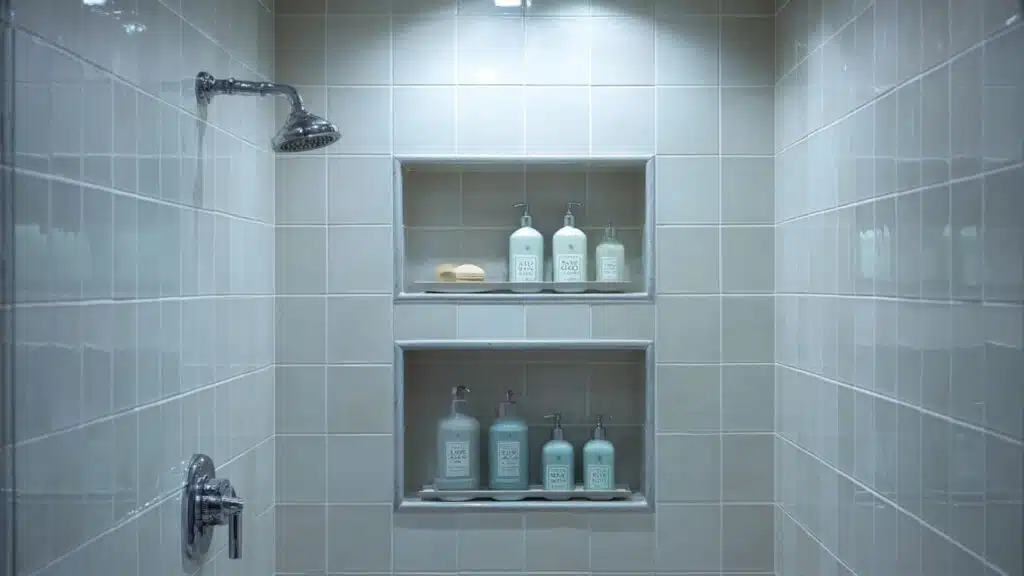
When my friends Sara and Luke remodeled their shower, they built a two-level niche. “We each get our own shelf,” Luke laughed.
The stacked design gave them space without clutter. It’s great for couples or busy families. Experts note that evenly spacing shelves keeps things organized and prevents water pooling between tiers for longer-lasting results.
4. Framed Recessed Mirror Niche
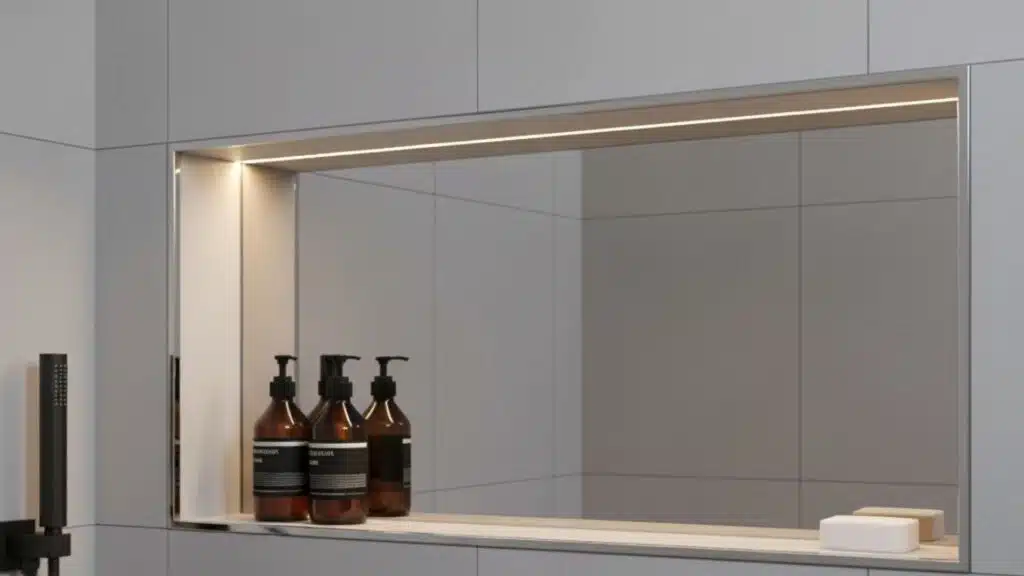
I saw a niche with a mirrored back framed in chrome. “It makes the shower feel twice as big,” the designer said. The reflection brightened the entire wall. It’s a clever way to add light and depth without remodeling.
This design looks stylish in smaller bathrooms. It combines beauty and practicality, doubling as both decor and smart storage.
5. Framed Accent Tile Niche
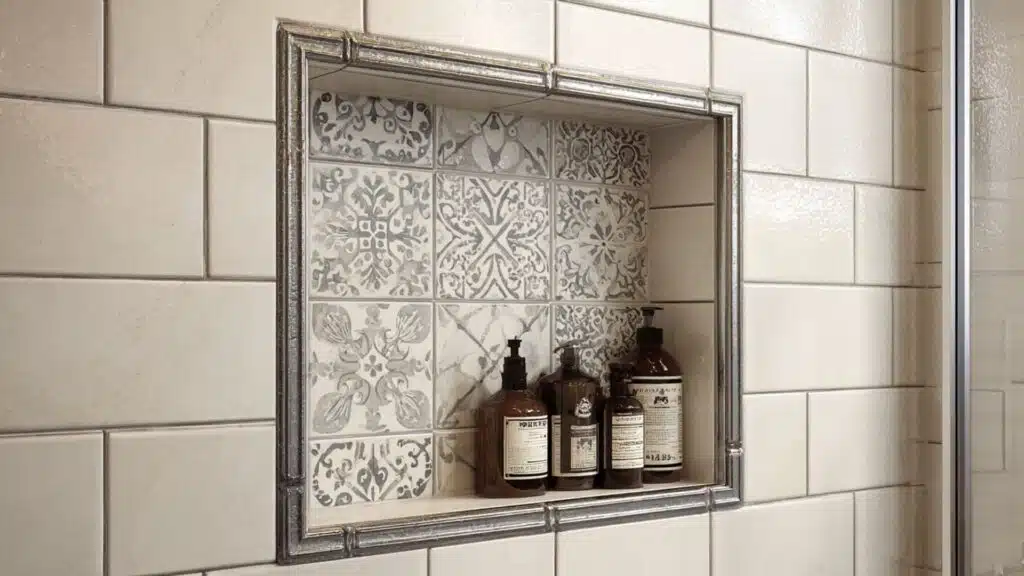
I framed my niche using patterned tiles from leftover backsplash pieces. The result looked surprisingly professional. “That’s the best detail in the room,” my installer said.
The frame drew attention and broke up plain wall tiles. Experts suggest matching accent colors to fixtures or towels for balance. It’s a simple, affordable way to create a custom, finished look.
6. Mosaic-Tiled Niche Back
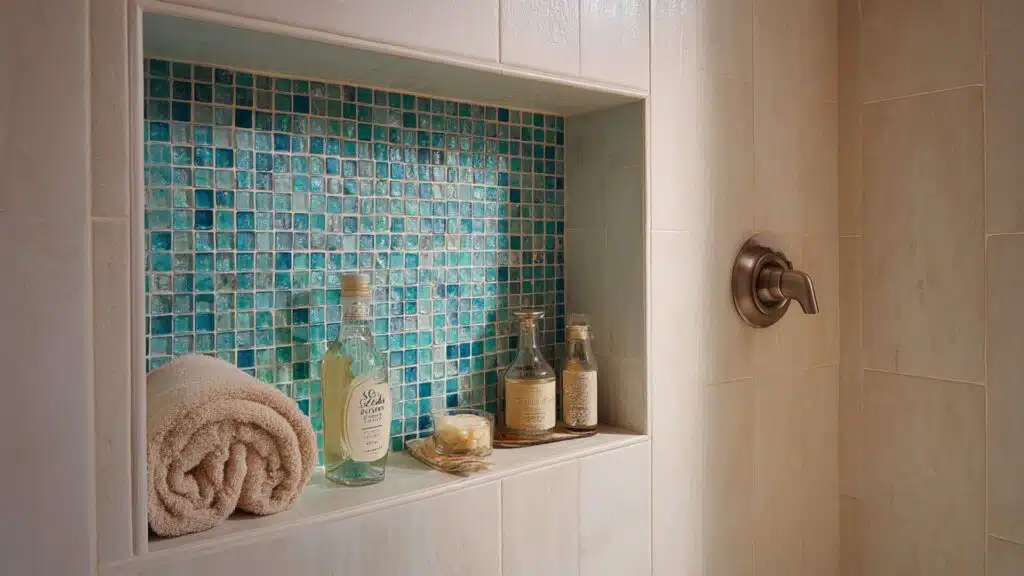
My friend Ava’s shower niche sparkled with mosaic tiles in ocean tones. “It feels like vacation every morning,” she told me. The mosaic added color and depth against plain tiles.
The smaller pieces reflected light beautifully. It’s ideal for anyone wanting a touch of art in their shower. Experts suggest sealing grout carefully to avoid mold in humid spaces.
7. Hidden Flawless Niche
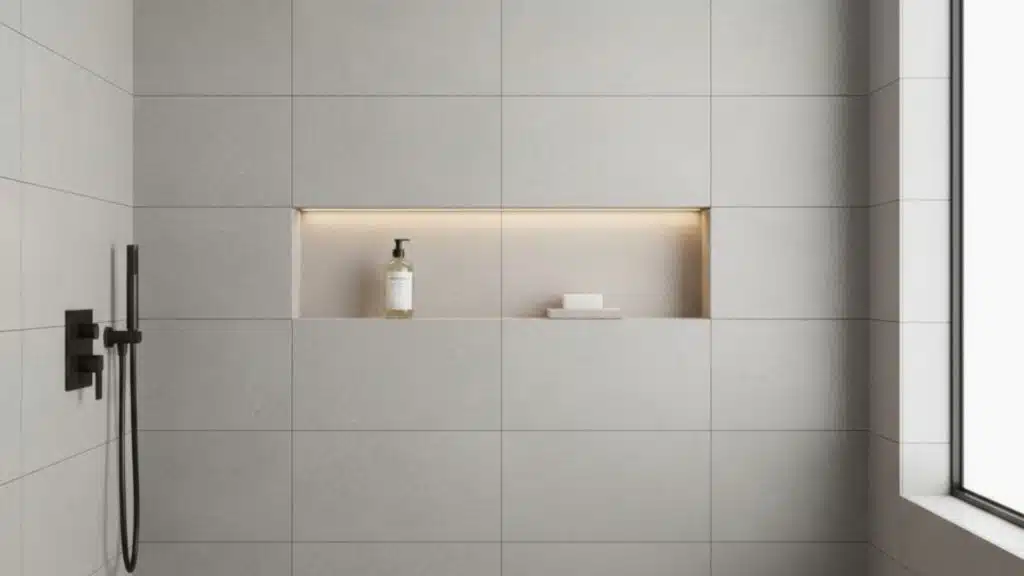
At first glance, you wouldn’t notice my client’s hidden niche; it was incorporated right into the tile lines. “That’s the point,” he laughed. It kept the sleek look of the wall but added storage behind the design.
This minimalist idea is perfect for modern bathrooms. No trim, no edges—just function hidden in plain sight. It feels calm and intentional.
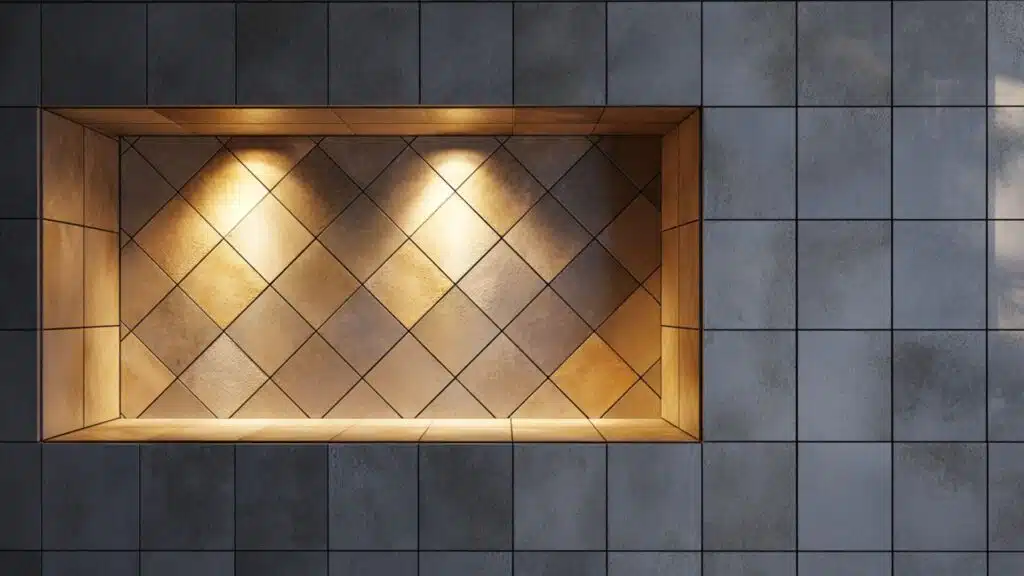
8. LED-Lit Shower Niche
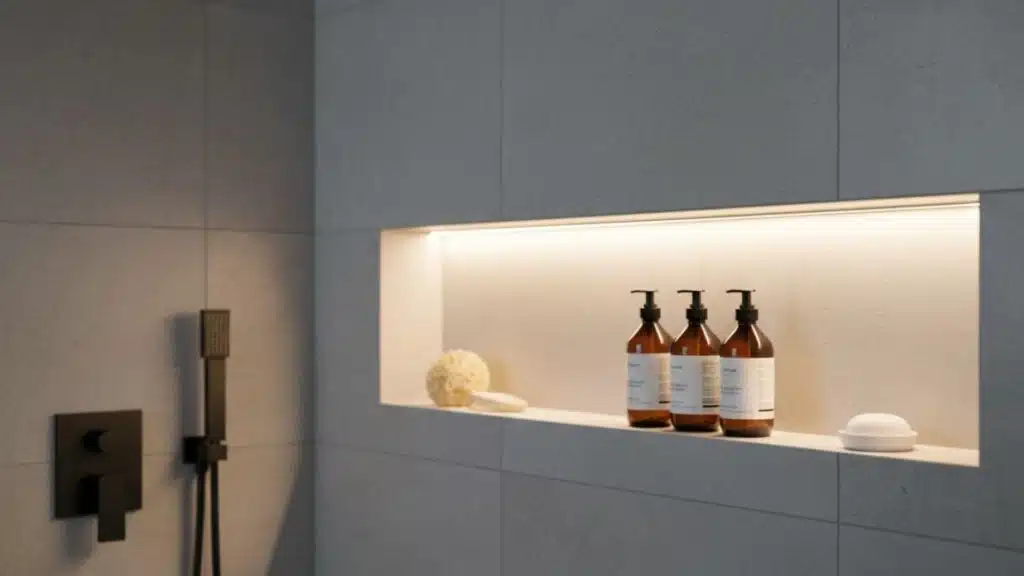
My cousin Nate added LED lighting under his niche shelves. He said, “It’s like showering in a spa.” The glow made late-night showers relaxing. The light strips also helped highlight the beautiful tile.
Experts recommend waterproof, low-voltage LED strips for safety. This type of niche makes your shower feel luxurious without major remodeling. It’s stylish and practical too.
9. Niche with Glass Shelves
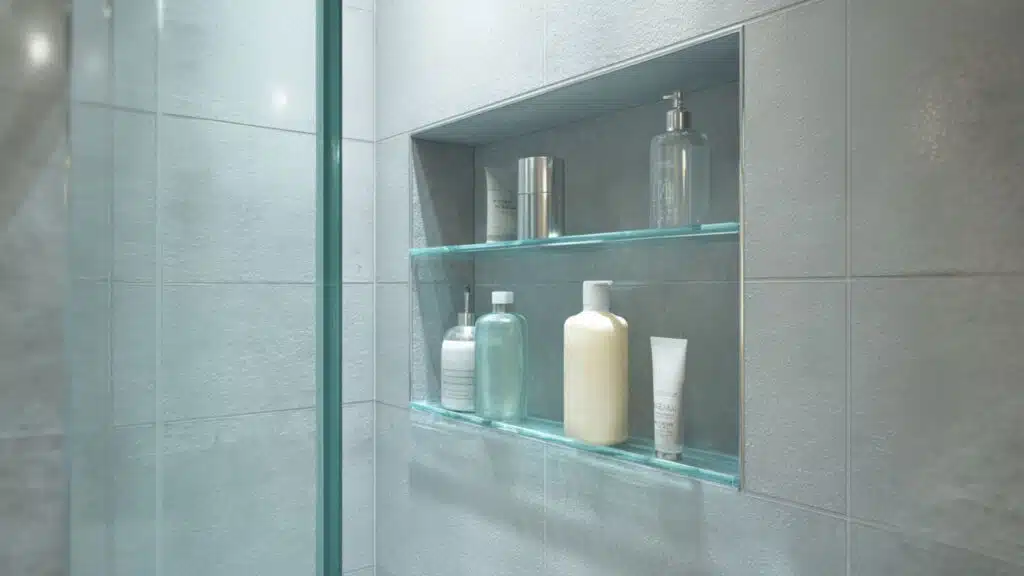
When I helped Jenna with her remodel, we added clear glass shelves inside her niche. “It keeps everything bright,” she said happily. The shelves disappeared into the wall, creating an airy, open effect.
They worked perfectly for small showers where heavy shelving would clutter space. The look stayed clean, light, and polished with almost no maintenance or visible joints.
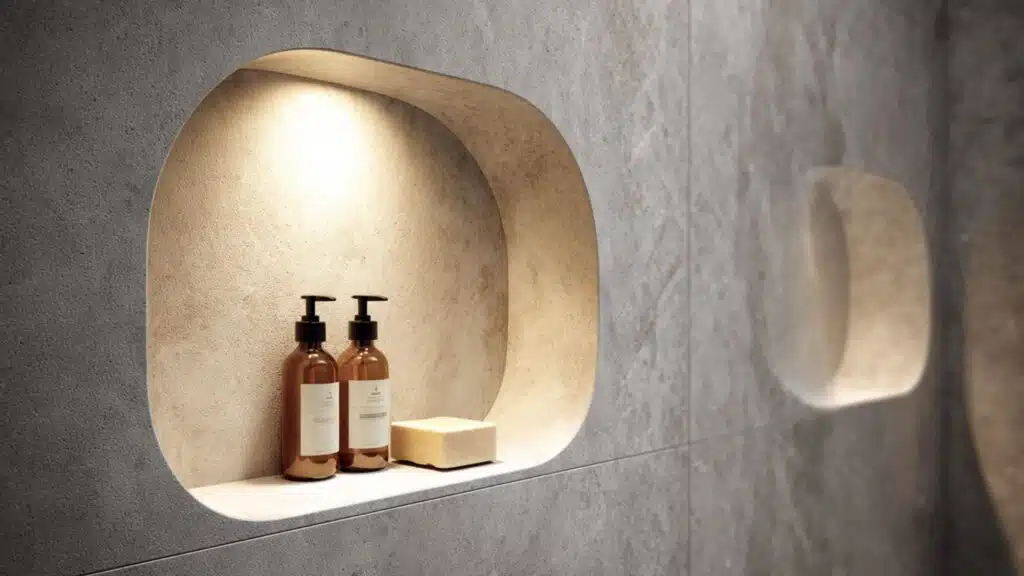
10. Arched Niche

My neighbor Lisa added a curved-top niche in her new shower. “It softens the space,” she said. The arched design added appeal that balanced the modern lines of her tile.
It’s a lovely choice for traditional, Mediterranean, or cottage-style bathrooms. Experts recommend using smaller tiles to form the curve smoothly, keeping the shape even and graceful.
11. Stainless Steel Niche Insert
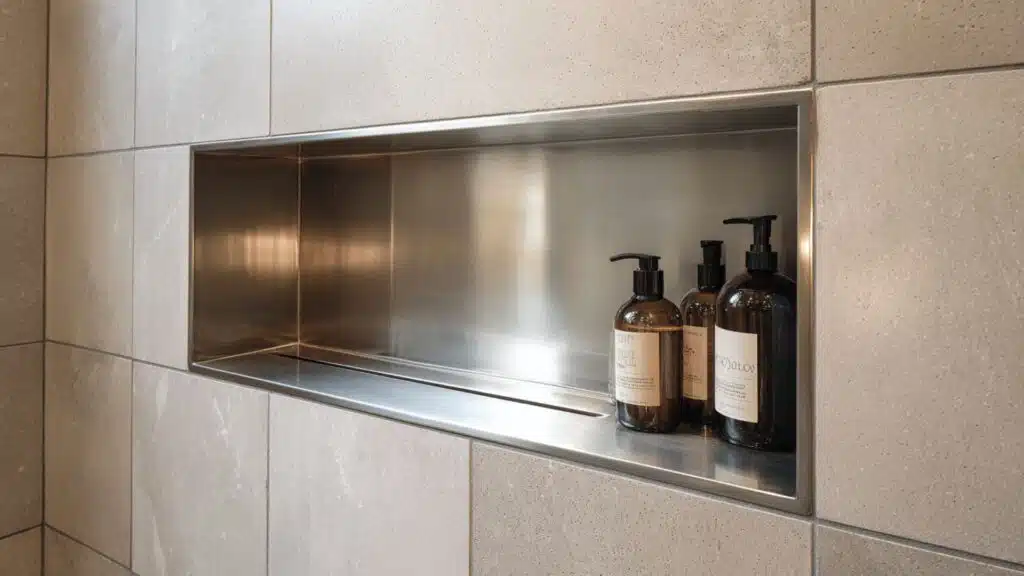
My friend Ray installed a stainless steel niche in the bathroom of his rental property. “It looks sharp and never rusts,” he said. The polished metal reflected light, giving the small space a clean, modern vibe.
It’s an easy-to-install, durable option for high-traffic bathrooms. You can find prefabricated inserts online that fit standard stud widths with minimal effort.
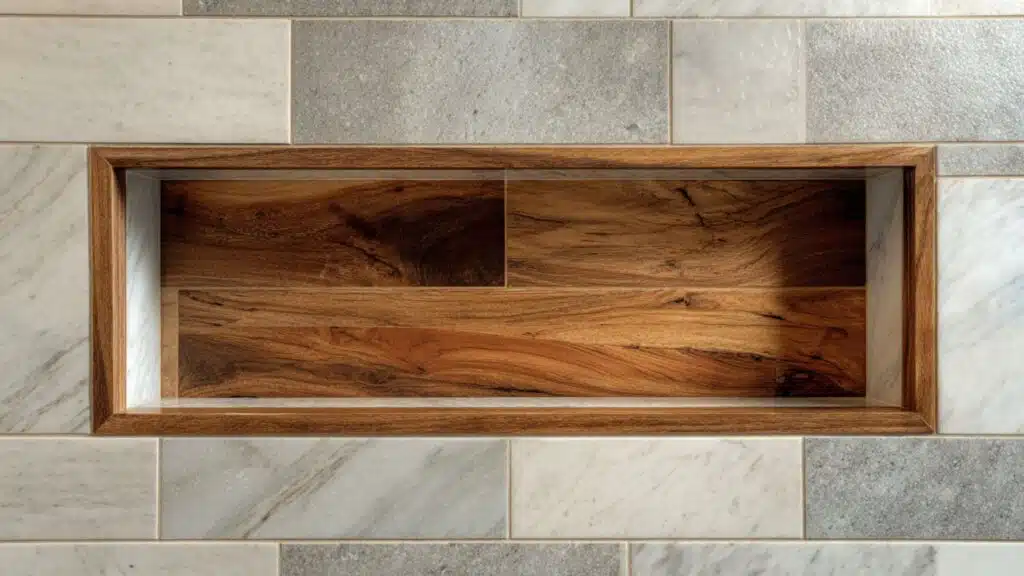
12. Reclaimed Wood-Trimmed Niche
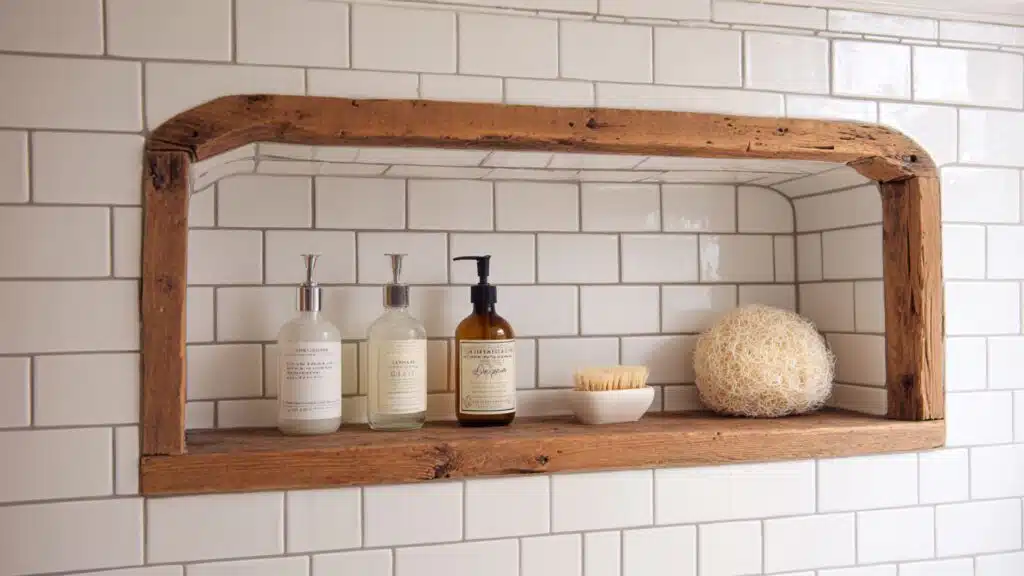
Carla trimmed her niche with reclaimed barn wood for a cozy farmhouse feel. “It brings warmth into the tile,” she said. The sealed wood held up beautifully against humidity. The mix of materials added personality and depth.
Experts suggest applying waterproof varnish for protection. This combination of rustic appeal and practical design makes any bathroom feel more inviting.
13. Textured Stone Niche
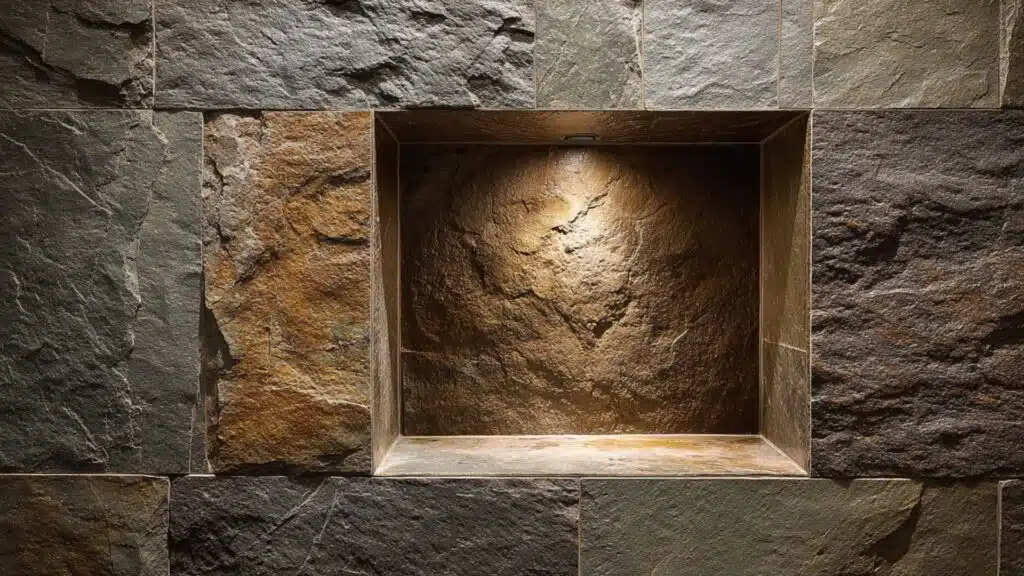
I saw a spa renovation where the shower niche used rough slate stone. “It’s earthy but graceful,” the owner shared. The natural texture gave the wall dimension and calmness. It paired beautifully with matte fixtures.
This design suits people who love natural materials. It’s low-maintenance but should be sealed yearly to resist soap buildup and moisture stains.
14. Niche with Built-In Hooks
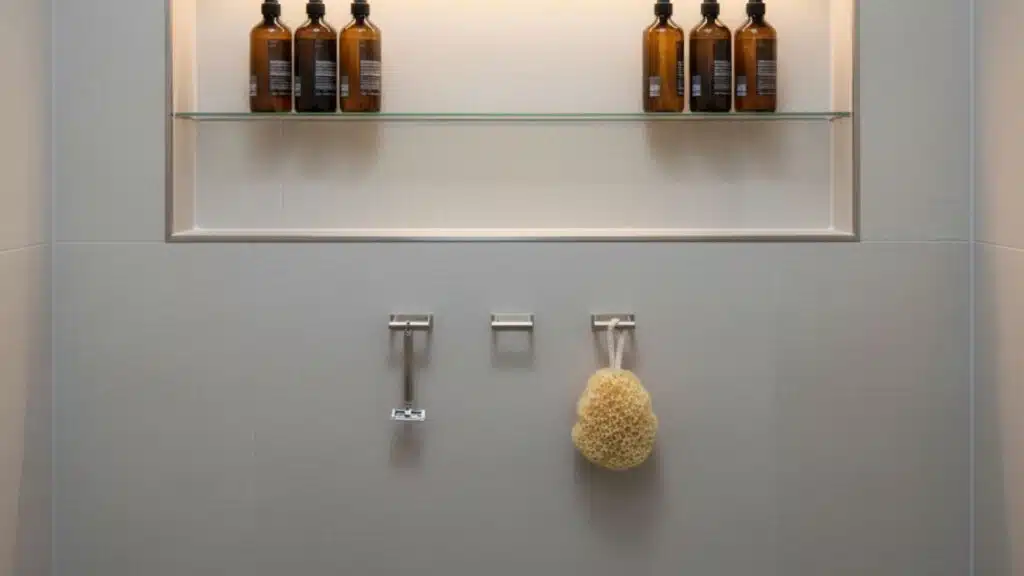
Ben’s niche had tiny stainless hooks right below it. “I hang my loofah and razor here,” he said proudly. It’s a clever idea that saves shelf space. The hooks make small showers feel organized and practical.
Experts suggest corrosion-resistant materials for humid bathrooms. It’s a simple upgrade that adds both convenience and tidiness without cluttering your design.
15. Bench-Integrated Niche
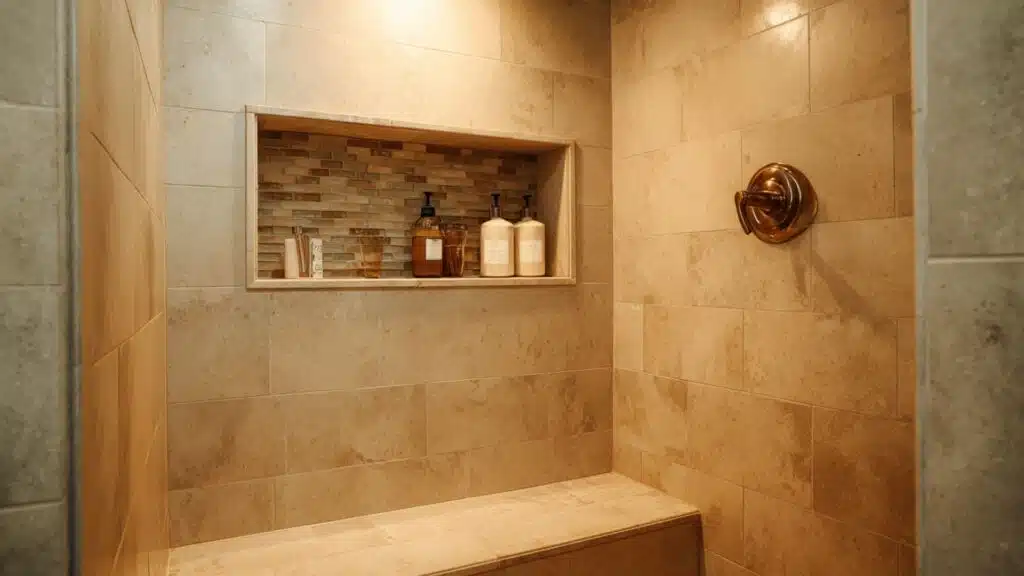
My aunt’s remodel included a niche right above her shower bench. “I don’t have to stand to reach my shampoo,” she said happily. The setup made everything feel within reach.
It’s great for anyone who loves long showers or needs accessible design. Experts say waterproofing both the bench and the niche together prevents leaks over time for long-term durability.
16. Contrasting Material Niche
In one remodel, the homeowner used wood-look porcelain inside a marble shower. “It breaks up all the stone,” she said. The texture contrast added warmth. It made the niche stand out without overpowering the rest of the space.
Designers say this mix works best with balanced tones. It’s ideal if you want subtle variety and visual interest.
17. Curved-Corner Niche
I once saw a niche with rounded interior corners that felt sleek and organic. “It’s easier to clean,” the homeowner told me. The curved edges softened the space beautifully. It’s great for contemporary bathrooms with fluid shapes.
Experts recommend using molded inserts for smooth corners. This niche design combines practicality and comfort while still feeling polished and modern.
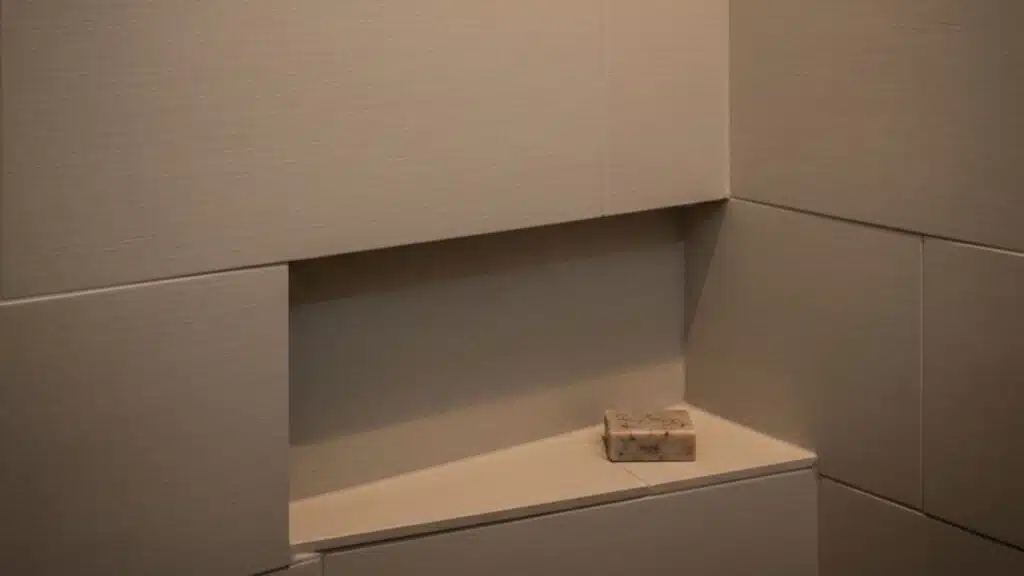
18. Floating Ledge Niche
I added a floating quartz shelf inside my shower niche last year. “Simple but stylish,” my installer said approvingly. The single ledge gave just enough space for essentials. It made cleaning faster and gave it a modern look.
This type works best in minimalist designs. Experts suggest using solid materials like quartz or marble for strength and a smooth finish.
19. Hexagon Niche
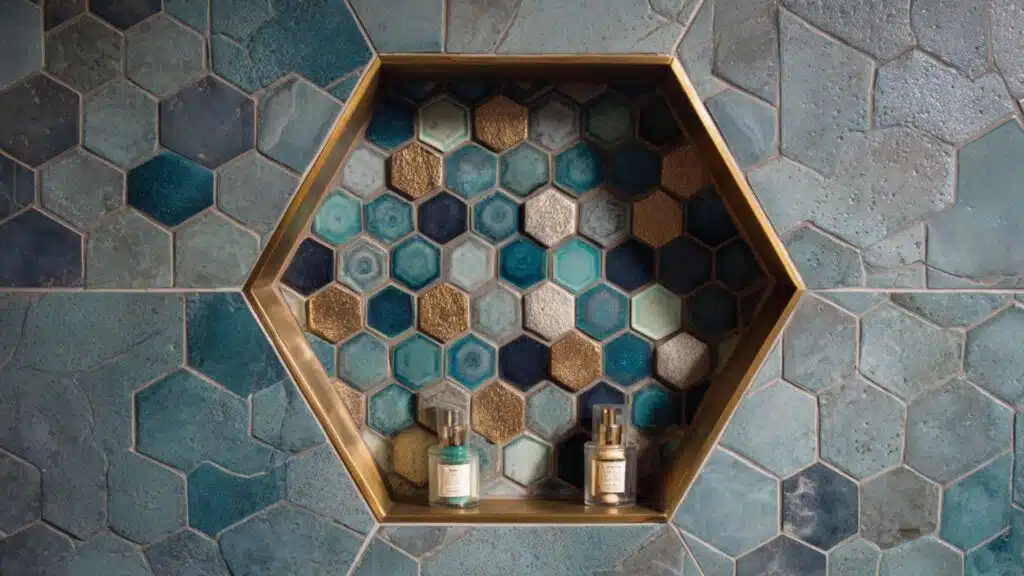
My friend Tara chose a hexagon-shaped niche for her shower wall. “Everyone notices it first,” she told me. The geometric design gave her space a fun, trendy look. It paired beautifully with her matte tiles.
It’s ideal for creative or modern spaces. The angles add energy while keeping symmetry. This shape also complements other honeycomb-style decor nicely.
20. Frameless Glass-Covered Niche
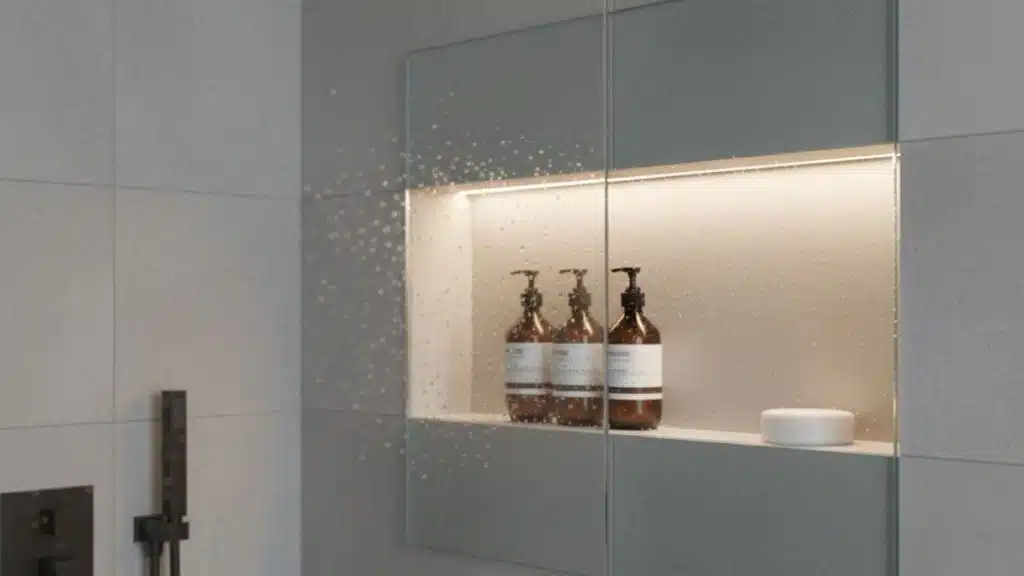
A homeowner I met used a frameless glass front to cover her niche. “It keeps bottles dry but visible,” she said. The sleek design looked urbane and clean.
The glass panel protects from splashes without blocking light. Experts recommend tempered glass for safety. This niche style fits perfectly in high-end, spa-inspired bathrooms or minimalist wet rooms.
21. Floor-Level Foot Rest Niche
My sister added a tiny niche near the shower floor for shaving. “It’s surprisingly comfortable,” she told me. The small recessed ledge worked better than a bulky footstool. It saved space while adding practical function.
This idea fits perfectly in compact showers. It’s subtle, safe, and makes daily routines more comfortable without interrupting the wall design.
22. Contrasting Grout Edge Niche
When designing my own bathroom, I defined my niche with dark grout rather than trim. It looked bold yet simple. “That contrast pops,” my tile guy said. The defined edges added personality to an all-white wall.
It’s an easy, affordable way to highlight structure. Experts say to use waterproof, mildew-resistant grout for lasting contrast and clean lines.
23. Twin Symmetrical Niches
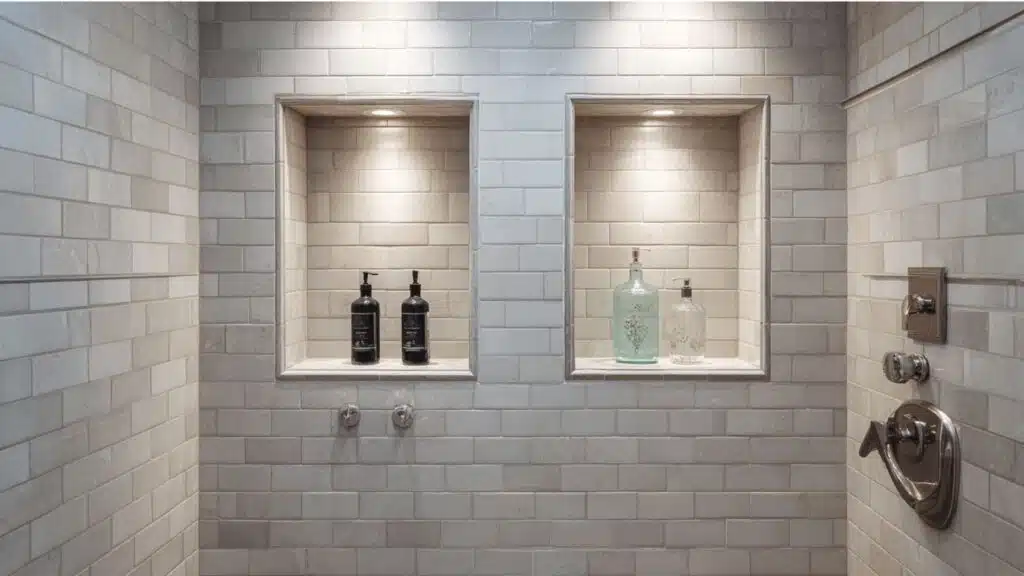
My neighbors built twin niches side by side for their double shower. “Everything has its place,” they said proudly. The symmetry balanced the wall perfectly. Each niche held identical products, keeping the look uniform.
It’s great for couples who like order. Builders recommend centering them evenly between tile joints for clean alignment and a professional-looking finish.
24. Diagonal Tile Pattern Niche
My friend Maya used diagonal tiles inside her niche, contrasting with straight tiles outside. “It adds motion,” she said. The pattern made her shower wall look dynamic without overwhelming it.
The diagonal layout emphasized depth and direction. Experts note that cutting angles carefully ensures even grout lines. It’s a creative twist that livens up simple tiled showers.
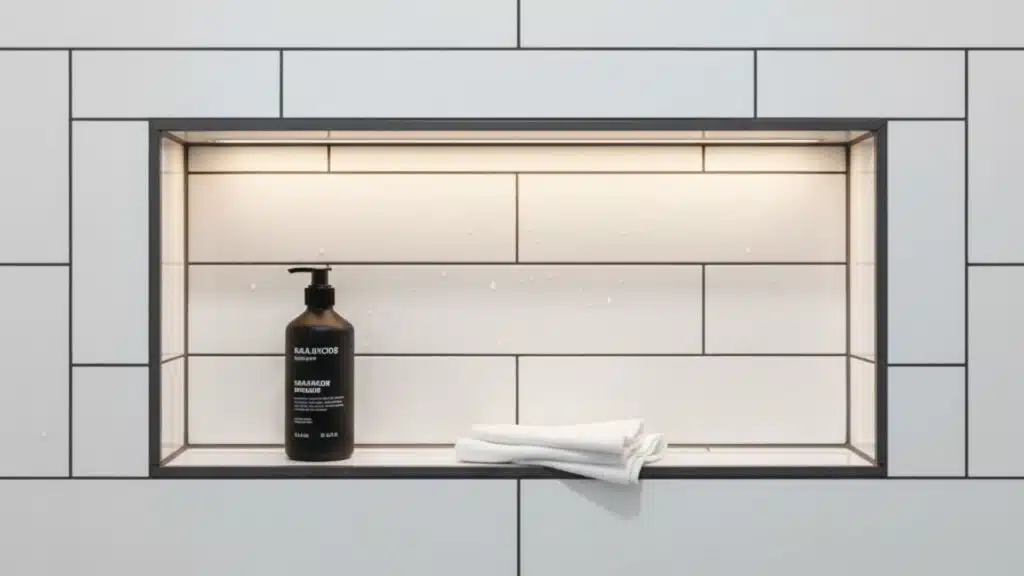
25. Frameless Minimalist Niche
I designed a frameless niche for a modern condo project, keeping it ultra-simple. “No trim, no clutter,” the owner said happily. The flawless integration made the tiles flow naturally. It integrated perfectly into the wall.
This understated design feels timeless and clean. It’s easy to wipe down and fits any color scheme, from bright whites to bold tones.
Essential Materials for Your Shower Niche Project
Gathering all your materials before starting your shower niche project saves time and prevents frustrating trips to the hardware store. Here’s everything you’ll need for a successful installation:
| Category | Materials | Purpose |
|---|---|---|
| Measuring & Marking Tools | Laser level, tape measure, pencil, square, masking tape | Accurate measurement and layout marking |
| Cutting & Demolition Tools | Stud finder, pry bar, circular saw or oscillating tool, utility knife, or router with guide bit | Locating studs, cutting drywall, and creating openings |
| Framing Materials | 2×4 lumber, exterior-grade screws, moisture-resistant drywall | Building niche frame and backing support |
| Waterproofing Supplies | Liquid waterproofing membrane (AquaDefense or RedGard), paint roller, brush, tray | Sealing niche against water damage |
| Tiling Materials | Thinset mortar, notched trowel, tile, spacers (1/8″), grout | Installing and securing tiles with proper spacing |
| Finishing Supplies | Silicone sealant, sanding block, rags | Sealing edges and cleaning the finished surface |
Double-check that you have quality versions of each item to avoid problems during construction. Investing in proper materials now prevents costly repairs and water damage issues later on.
How to Build a Shower Niche Step-by-Step
Building a shower niche requires careful planning, precise measurements, and proper waterproofing to ensure long-lasting results without leaks. Follow these five essential steps to create a functional and beautiful niche:
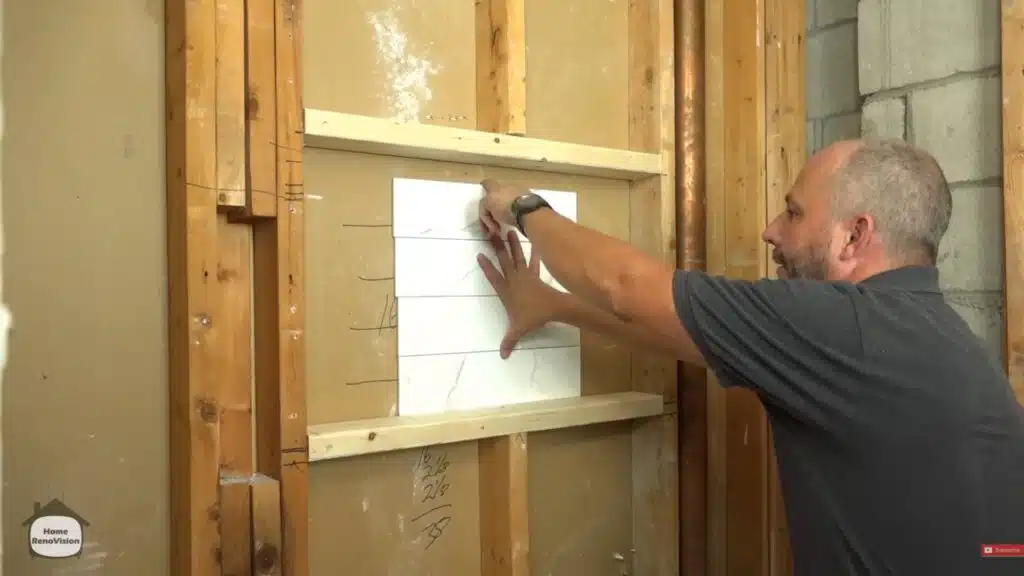
Step 1: Plan Size Using Your Tile Grid
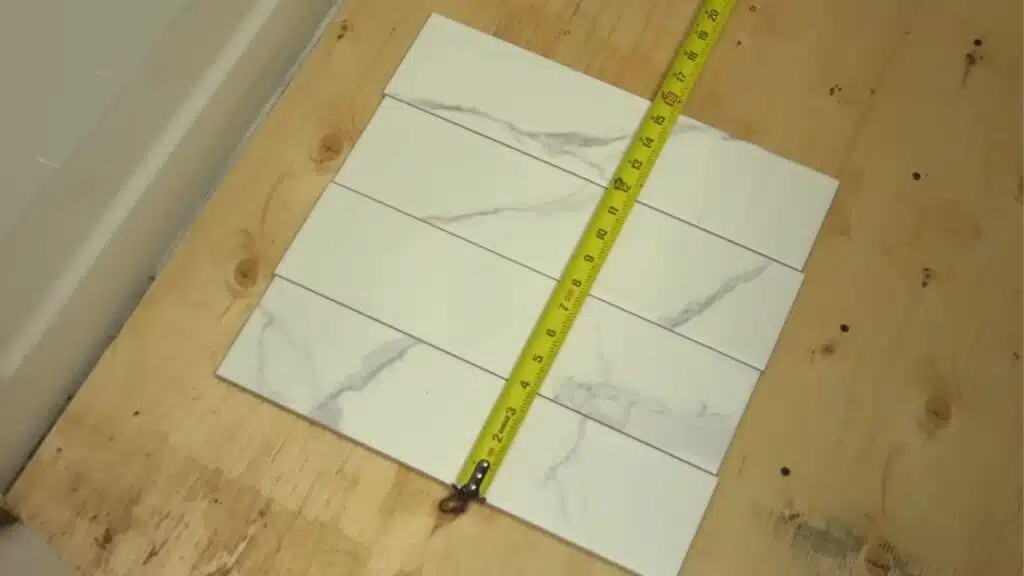
Pick a niche size that matches your tile module to keep cuts clean. For example, 4×16 tiles with 1/8″ grout stack to sixteen inches. That keeps edges landing on full tiles, not skinny slivers.
Decide height and width based on storage needs and wall studs. Bigger shelves need more structure and careful planning. Sketch the layout and count rows before cutting anything.
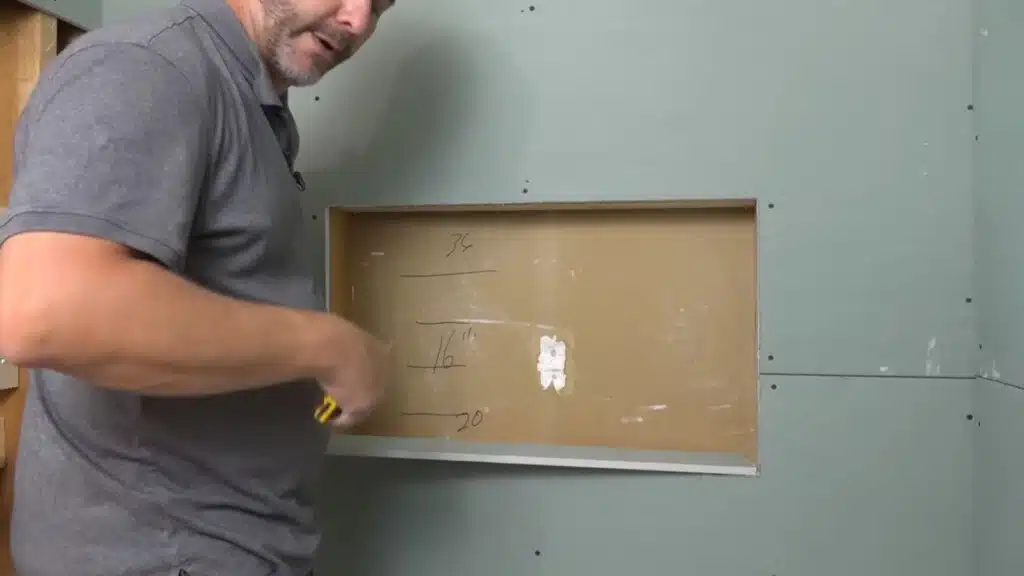
Step 2: Mark Layout With Level Lines
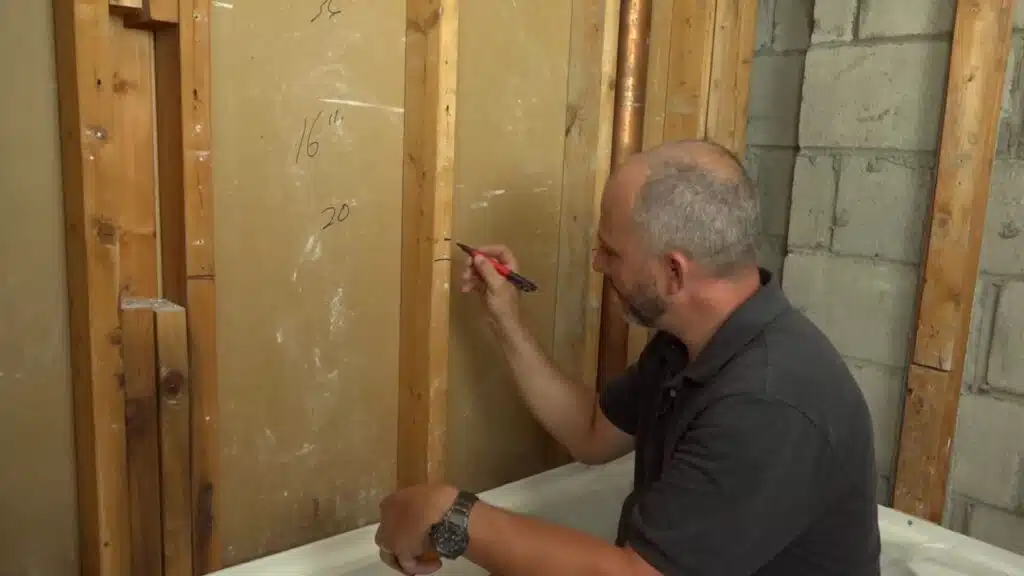
Use a laser level and pencil to mark the niche outline on the wall. Note your finished tile height, then add space for drywall, tile, and thinset.
Add a small “mercy” gap, about one-eighth inch, for fine adjustments later. Keep the bottom practical for reach, especially above tubs. Confirm all lines are square and centered on your tile grid.
Step 3: Frame the Niche With Built-In Slope
Open the wall and add new 2×4 framing around the niche perimeter. Set the bottom 2×4 with a slight inward slope for drainage. Do not rely on the tile alone to create a slope later.
The waterproof layer also needs a slope to prevent pooling. Screw framing tight and flush, because walls are rarely perfectly straight. Check measurements twice before closing anything.
Step 4: Sheath the Niche Before Waterproofing
Cap all exposed wood with moisture and mold-resistant drywall boards. Do not bond liquid membrane directly to bare wood framing. Drywall keeps movement behind the system while the membrane stays stable.
Cut openings neatly with a guide bit or router. Keep corners tight and smooth for easier waterproofing. Leave room for tile thickness, thinset, and clean edges.
Step 5: Apply a Waterproofing System
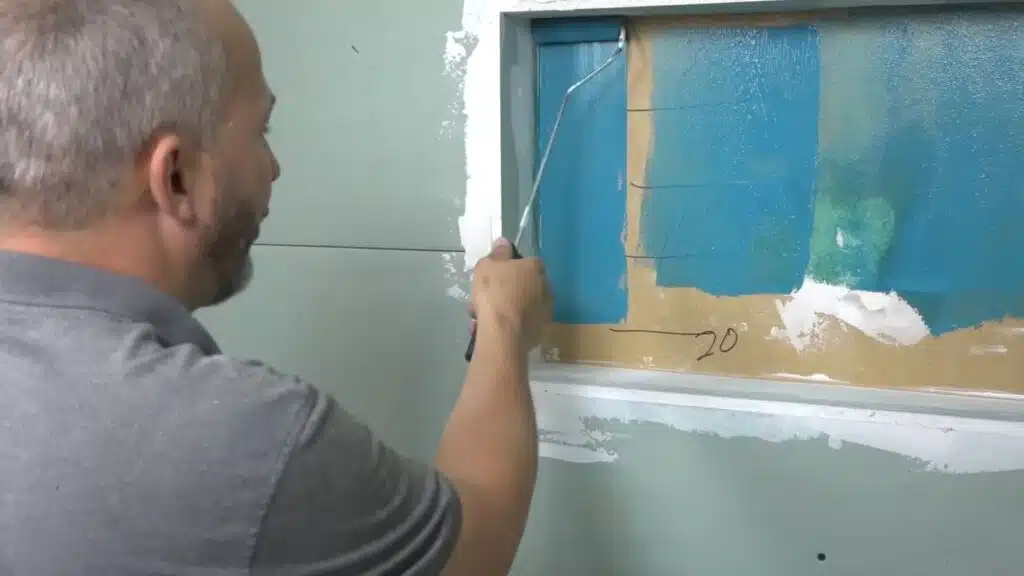
Roll or brush on a liquid waterproofing membrane over all niche surfaces. Products like AquaDefense or RedGard work very well. Apply two generous coats, allowing proper dry time between coats.
Cover corners, edges, and screw heads completely for a continuous seal. Confirm the shelf still holds a slight slope after coating. Now you can set tiles to your layout lines. For more details, what the complete video tutorial by Home RenoVision DIY.
Common Mistakes to Avoid When Installing a Shower Niche
Even experienced DIYers make mistakes when building shower niches that lead to leaks and costly repairs later. Here are the most common mistakes you need to avoid:
- Ignoring waterproofing and slope: Skipping proper waterproofing membranes or forgetting to angle the shelf inward causes water pooling and eventually leads to mold growth.
- Choosing mismatched tiles: Selecting tiles that don’t align with your wall tile grid creates awkward cuts, thin slivers, and an unprofessional appearance.
- Incorrect height or placement: Installing your niche too high or too low makes reaching products difficult during daily showers and reduces practical value.
- Skipping sealing details: Forgetting to seal corners, edges, and grout lines with silicone allows water to seep behind tiles and causes expensive damage.
I’ve seen how avoiding these common errors ensures your shower niche functions beautifully and stays leak-free for years. Taking time to do things right the first time prevents frustrating repairs and protects your investment completely.
Maintenance Tips for a Long-Lasting Shower Niche
I’ve learnt that proper maintenance keeps your shower niche looking fresh and functioning perfectly for years without developing mold or leaks. Here’s how to maintain your shower niche properly:
- Use gentle, non-abrasive cleaners and soft brushes to wipe down your niche weekly and prevent soap scum buildup.
- Keep your bathroom well-ventilated with fans or open windows, and wipe down wet surfaces after showers to stop mold.
- Apply fresh grout sealer once a year to protect against water penetration and staining that weakens your niche structure.
- Check corners, edges, and grout lines every few months for cracks or gaps, then repair them immediately before problems worsen.
Following these simple maintenance habits ensures your shower niche stays beautiful and leak-free for many years ahead. Regular care takes only minutes but saves you from costly water damage and major renovations down the road.
Final Thoughts
Shower niche ideas give you unlimited possibilities to create beautiful, functional storage that matches your bathroom perfectly and lasts forever.
You now understand how to choose the right design, install it properly, and maintain it for long-term success. I hope these creative ideas inspire you to finally build that custom niche you’ve been dreaming about lately.
Remember that proper planning and waterproofing make all the difference between an attractive feature and a costly mistake later.
Start with a design that speaks to your style, then follow the steps carefully for professional results. Share your favorite shower niche ideas or installation tips in the comments below!