I’ll be honest, I never thought much about gutter sizes until water started pooling around my foundation after a heavy storm.
It turns out that choosing the right gutter dimensions is critical for protecting your home from overflow, water damage, and those dreaded foundation problems that can cost a fortune to fix.
If you’re standing in your yard wondering whether your gutters are actually doing their job, you’re in the right place.
I’m going to walk you through everything you need to know about standard gutter sizes, how to measure what you currently have, and the key factors that determine which dimensions your home actually needs.
By the time you finish reading, you’ll have the confidence to make the right choice for your specific situation; no guesswork required.
What are Standard Gutter Sizes?
Most homes use five-inch or six-inch gutters in two main styles: K-style and half-round. K-style gutters hold more water than half-round ones of the same width because of their flat backs and angular shape.
Commercial buildings sometimes use seven or eight-inch gutters, but those are unnecessary for residential properties.
Here’s how they compare:
| Gutter Type | Common Width | Best For | Roof Coverage | Rainfall Suitability | Water Capacity |
|---|---|---|---|---|---|
| K-Style | 5″ | Standard single-story or modest two-story homes | Up to 1,400 sq ft | Light to moderate (under 4″ per hour) | Holds 1.2 gallons per 10 ft |
| K-Style | 6″ | Larger homes, steep roofs, or multi-story properties | 1,400–2,500 sq ft | Moderate to heavy (over 4″ per hour) | Holds 2 gallons per 10 ft |
| Half-Round | 5″ | Historic homes, cottages, older architecture | Up to 1,200 sq ft | Light rainfall areas | Holds 0.9 gallons per 10 ft |
| Half-Round | 6″ | Custom builds, larger historic restorations | 1,200–2,000 sq ft | Moderate rainfall | Holds 1.5 gallons per 10 ft |
Note: K-style gutters handle approximately thirty percent more water than half-round gutters of the same width due to their shape. If you live in an area with frequent downpours, that extra capacity makes all the difference.
Step-by-Step: Measuring Correct Gutter Dimensions
Once you know how roof size, slope, and rainfall affect water flow, it’s time to measure. A few quick calculations will show the load your gutters need to handle and point you toward the right size.
Tools and Materials Required
- Tape or laser measure
- Ladder
- Level or pitch gauge
- House sketch or worksheet
- Local rainfall data
- Safety gear (gloves, sturdy shoes)
- Pencil/marker and notebook
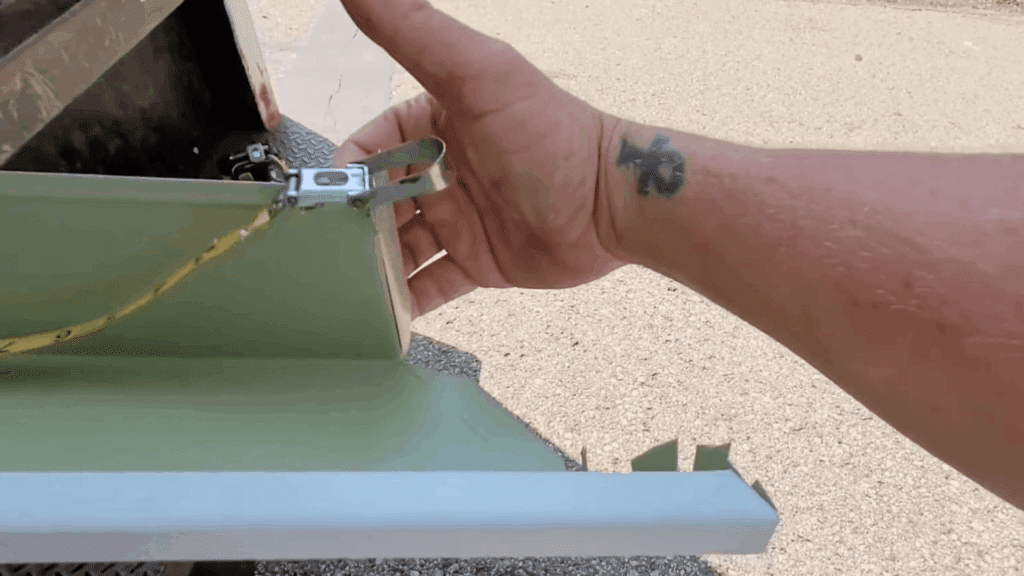
Step 1: Secure the Tape for Measuring
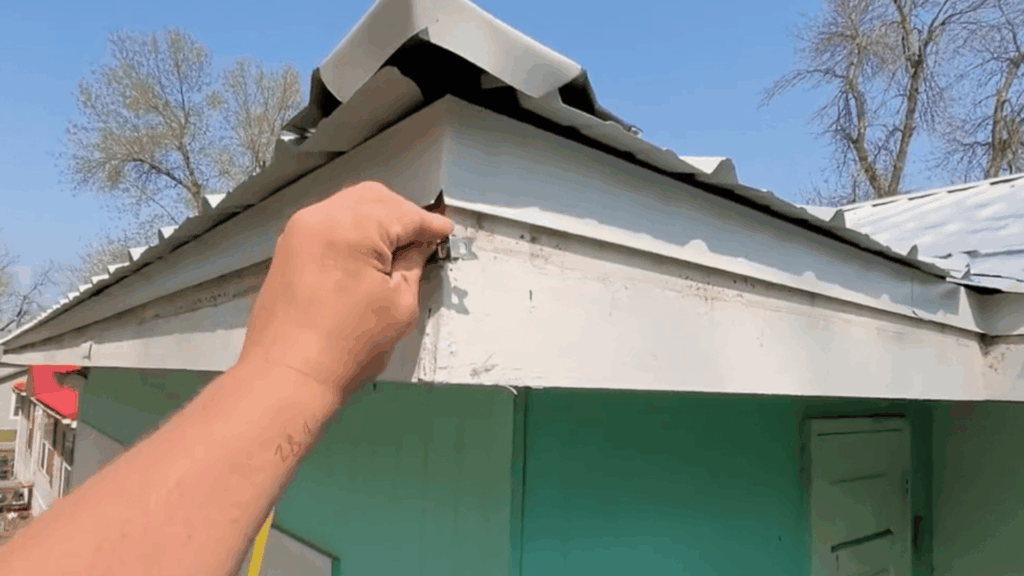
If you’re working alone, fix the tape measure with a small zip screw through the slot so it holds steady. Position the screw high enough for the gutter to cover the hole later.
This method saves time and ensures you can measure long runs without help.
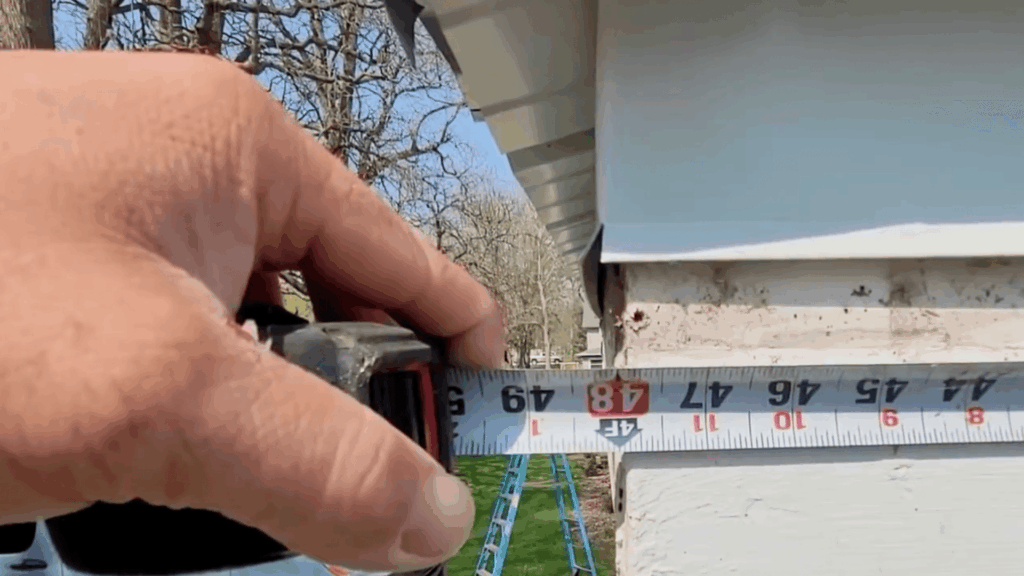
Step 2: Read and Record Measurements

Walk to the opposite end and take the measurement carefully, for example, 26 feet, 7 and ¾ inches in the video. Repeat the number until you write it down, then sketch the gutter run.
Organized notes with clear labels prevent errors when ordering or cutting.
Step 3: Mark Miters, End Caps, and Outlets

Draw out the layout to show inside or outside miters, end caps, and outlet locations. Mark hole punches with an “X” and note distances from the fascia.
Also, write measurements on the face side of the gutter so you know which side is slick and which has the tab. This helps during machine cutting and installation.
Step 4: Adjust for Miters and Measure Sequentially
Custom-cut miters require slight adjustments; add about ⅛ inch on outside miters or leave a small gap on inside miters.
Start measuring from the far-left side of the house and move right to keep pieces in order. This step makes fitting easier and ensures the system flows correctly.
Step 5: Prepare for Cutting and Assembly
Hook the tape into the fascia slit and mark your cut lines directly on the gutter face. Cut carefully so one piece slides behind the next for a tight fit.
A little extra care here prevents gaps, reduces leaks, and gives a cleaner finish during installation.
Here is the YouTube video for a Detailed Overview:
Factors That Determine the Right Gutter Dimensions
Choosing the correct gutter size isn’t a one-size-fits-all decision; several critical factors influence whether your home needs standard 5-inch gutters or larger systems.
Understanding these variables ensures your gutters handle water efficiently and protect your property.
- Roof Size and Pitch: Larger surface areas and steeper slopes collect and channel more water at higher velocities, requiring wider gutters to prevent overflow.
- Regional Rainfall Intensity: Areas with frequent heavy downpours need 6-inch or larger gutters to handle higher water volumes without system overload.
- Gutter Profile Style: K-style gutters hold significantly more water than half-round designs due to their flat back and greater depth.
- Material Gauge and Thickness: Thicker metals like heavy-gauge aluminum, copper, or steel provide better structural support for larger systems and heavier water loads.
- Downspout Proportions: Gutter width must match downspout size—6-inch gutters typically require 3×4-inch downspouts instead of standard 2×3-inch sizes for proper drainage.
While 5-inch gutters suit many applications, upgrading to 6-inch systems when conditions warrant it prevents costly water damage and ensures long-term protection.
Gutter Materials and Their Sizing Impact
Downspouts are just as important as the gutters themselves, since they control how quickly water leaves the system.
The size and number of downspouts should match the dimensions and layout of your gutters and roof. As a rule of thumb:
- Aluminum: Lightweight and the most common choice for 5–6 inch systems.
- Vinyl: Popular for DIY installation and typically available in 5-inch sizes.
- Copper: Heavier, premium option with custom sizes available.
- Steel: Durable for large commercial systems, usually 6–8 inch setups.
Sizing downspouts correctly prevents overflow, reduces strain on the gutter system, and helps protect the foundation from pooling water.
Standard Downspout Sizes & Placement
Correct sizing and placement ensure your downspouts can handle the roof’s runoff without straining the gutter system or causing overflow.
1. Common Sizes
Most homes with average rainfall use 2×3-inch downspouts paired with 5-inch gutters. This size is enough for small to medium roof areas and normal storm conditions.
Larger roofs or regions with heavy rain usually need 3×4-inch downspouts with 6-inch gutters to handle the extra water volume.
Choosing the right match keeps water flowing evenly through the system and prevents backups at the outlet.
2. How Downspout Size Affects Water Flow
A larger downspout can drain more water in less time, which is crucial during intense storms. It lowers the risk of gutters spilling over, protects siding from streaks and leaks, and keeps water away from your foundation.
Correct sizing also reduces pressure on seams and joints, lessening the chance of leaks and extending the life of the whole system.
In high-debris areas, bigger downspouts are less likely to clog with leaves and twigs, making maintenance easier.
3. Best Practices for Spacing and Placement
- Install one downspout every 20–30 feet of gutter run.
- Add extra downspouts at roof valleys or steep slopes where water collects quickly.
- Check that each outlet can handle the expected rainfall to avoid overloading a single downspout.
By planning for these situations, you ensure your gutter system can handle extra challenges without failure.
Gutter Cost Snapshot
Gutter prices vary depending on size, material, and add-ons. Below is a quick comparison of common options to help you budget for installation.
| Type | Average Cost (per linear foot installed) | Notes |
|---|---|---|
| 5-inch seamless aluminum | $6–$12 | Standard choice for most homes; affordable and widely available |
| 6-inch seamless aluminum | $9–$15 | Better for large roofs or heavy rainfall; slightly higher cost |
| Specialty metals (copper, steel) | Higher than $15 | Premium look and durability; can be several times more expensive |
| Add-ons (guards, extra downspouts) | Varies | Raise upfront cost but reduce cleaning and maintenance long-term |
DIY or Professional Installation? DIY is feasible for single-story homes with simple routes, but it needs safety gear and skills. Professional installation guarantees proper size, slope, and stable mounting, especially on complex or tall homes.
Practical Gutter Maintenance Tips
Keeping your gutters clean and in good condition protects your roof, siding, and foundation from water damage. Regular upkeep takes just a little time but can save you from costly repairs later.
1. Clean Regularly: Clean gutters at least twice a year, typically in spring and fall. If your home is surrounded by trees, check them every 2–3 months. Use a scoop or trowel to remove leaves and debris, then flush the gutters with a garden hose to check water flow.
2. Check for Sagging or Leaks: Look for sections that dip or pull away from the fascia board. Tighten loose hangers or replace damaged ones. Run water through the system and watch for leaks or drips along seams and corners. Apply gutter sealant where needed.
3. Keep Downspouts Clear: Make sure downspouts are free of clogs and direct water at least 3–5 feet away from your foundation. If water backs up, detach the lower section and clear it with a plumber’s snake or hose pressure attachment.
4. Trim Nearby Branches: Cut back any overhanging limbs to prevent leaves, twigs, and seeds from landing in your gutters. This also reduces animal nesting and prevents roof damage during storms.
5. Inspect Hardware and Connections: Check all brackets, screws, and hangers for stability. Replace rusted or bent hardware. Make sure end caps, elbows, and joints fit tightly without gaps that could let water escape.
6. Consider Gutter Guards: Installing mesh or solid gutter covers reduces how often you need to clean. They’re especially useful if you have pine trees or frequent leaf buildup.
7. Schedule a Yearly Inspection: Once a year, inspect your gutters after a heavy rain or hire a pro for a full checkup. Professionals can identify early issues, such as improper slope, hidden rust, or small cracks, before they cause major damage.
By staying consistent with these simple checks, you can extend the lifespan of your gutters, keep water flowing properly, and protect your home’s foundation from costly drainage problems.
Final Thoughts
Getting your gutter size right protects your home from water damage, foundation issues, and premature roof deterioration.
While these guidelines help, every home has unique factors that might need custom sizing. That’s where a professional gutter installer becomes invaluable; they assess your specific roof pitch, local rainfall patterns, and drainage needs in ways generic recommendations can’t.
Before committing to installation, use a gutter size calculator or request a professional estimate. It might seem like an extra step, but it’s far easier than dealing with overflow problems later.
Still trying to figure out which size fits your situation? Drop your questions in the comments, and I’ll help you sort through the details.