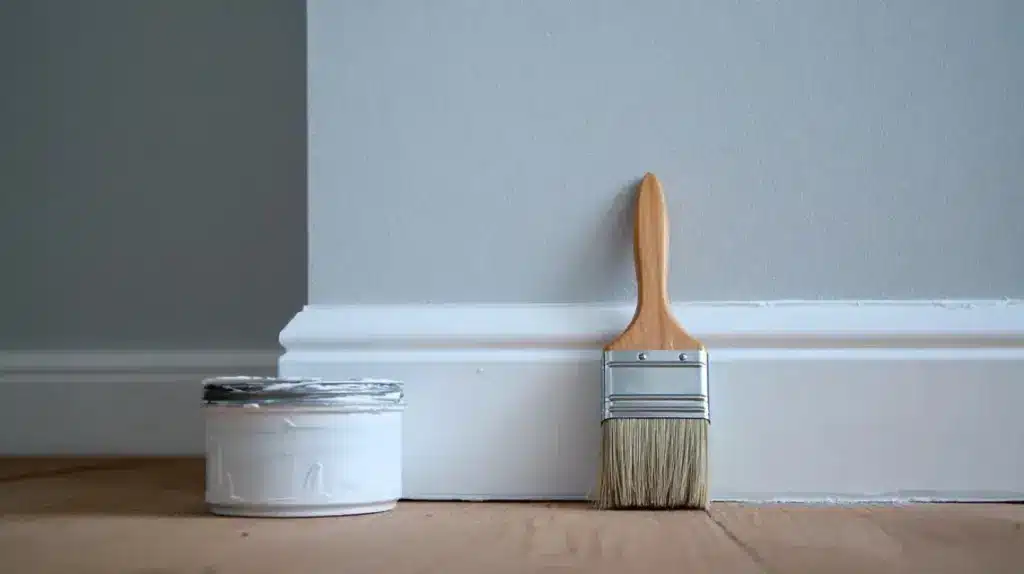
Learning how to caulk trim is one of the easiest and most effective ways to give your home a polished look. Even the smallest gaps where the wall meets the trim can collect dust, let in drafts, and make a freshly painted room look unfinished.
By applying a clean bead of caulk, you not only seal those spaces but also protect surfaces from moisture damage.
In this guide, I’ll cover the tools you need, the steps to follow, and the mistakes to avoid so you can get smooth, professional-looking results.
Why Caulking Trim is Essential
Caulking trim does more than improve how your walls and baseboards look. When you run a clean bead of caulk, it fills the tiny gaps where the wall meets the trim, giving the area a smooth, finished appearance.
Those small lines of sealant also stop dust and dirt from collecting in cracks, which makes cleaning easier over time. Proper caulking blocks air leaks too, reducing drafts and helping rooms stay more comfortable throughout the year.
Additionally, it protects painted surfaces by creating a barrier that prevents moisture from seeping in and damaging the wood or paint. Done right, caulking adds both beauty and durability to any room in your home.
Preparing Trim for Caulking
Good results start with proper preparation. Begin by wiping away dust, dirt, or loose particles from the trim and wall edges using a damp cloth or vacuum. This helps the caulk stick better and last longer.
If you want a sharp, clean line, apply painter’s tape along the edge of the trim where it meets the wall. This step is especially useful for beginners.
For trim that has old caulk or layers of paint, scrape away the loose material with a putty knife before applying new caulk. A smooth, clean surface makes application easier and ensures a polished finish.
How To Caulk Trim
Caulking trim may look tricky, but with the right steps, it’s straightforward. A little patience and the right tools will give your trim a clean, smooth finish. Here’s how to do it the easy way:
Tools and Materials Needed
- Caulk gun
- Caulk tube (paintable preferred)
- Utility knife (for cutting the tip)
- A cup of warm water
- Rag or cloth
- Painter’s tape (optional)
- Backer rod (for wide gaps)
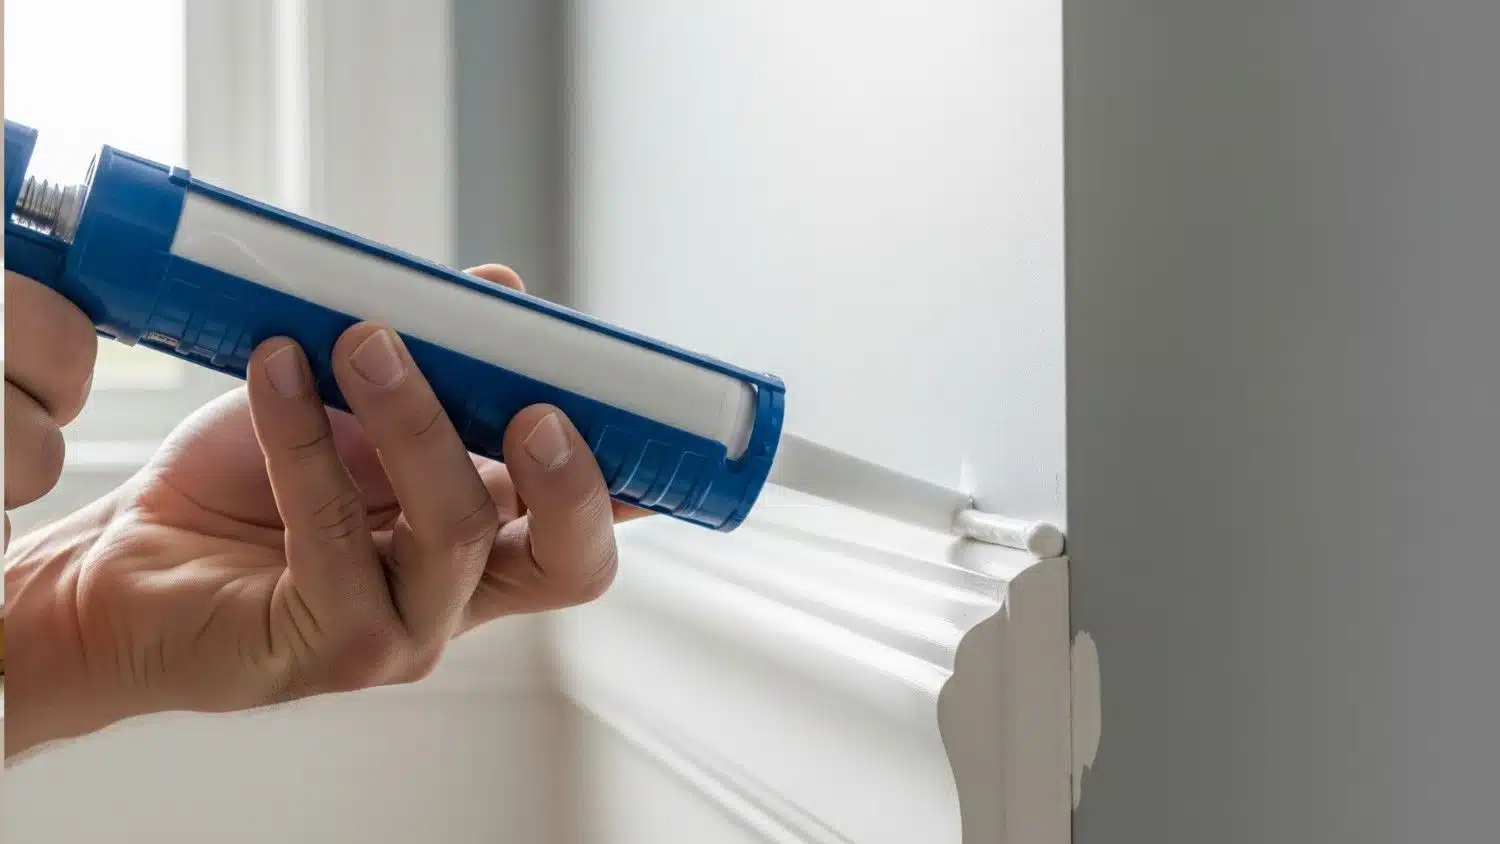
Step 1: Cut the Caulk Tube Tip at a 45° Angle

Start by cutting the caulk tube tip at about a 45-degree angle. The opening shouldn’t be too large, or you’ll end up applying too much caulk and making a mess. If it’s too small, not enough caulk will come out, leaving gaps.
A medium-sized cut gives better control and helps create a neat, even bead. Rotate the tip if needed to adjust angles, especially when working along corners or edges.
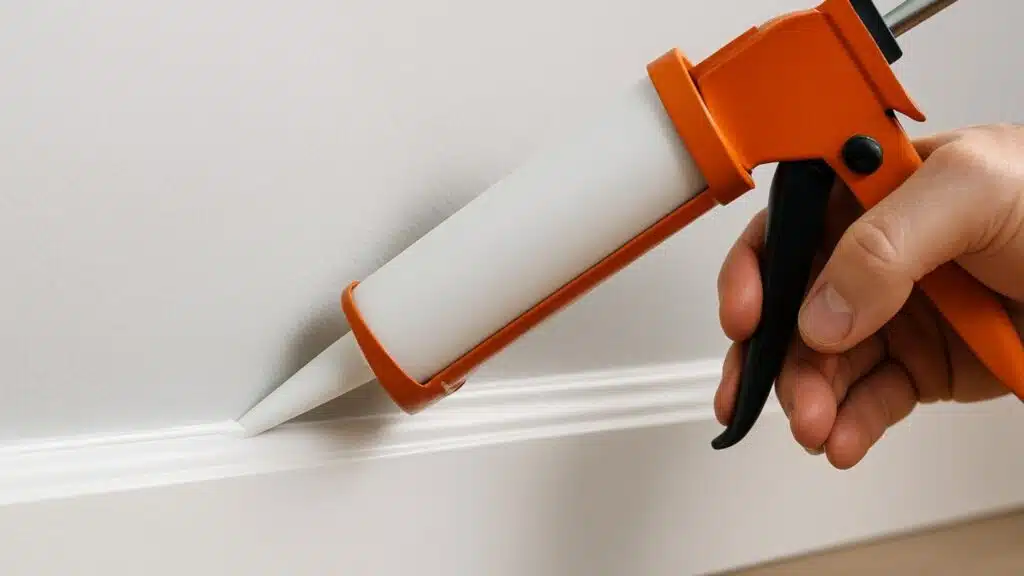
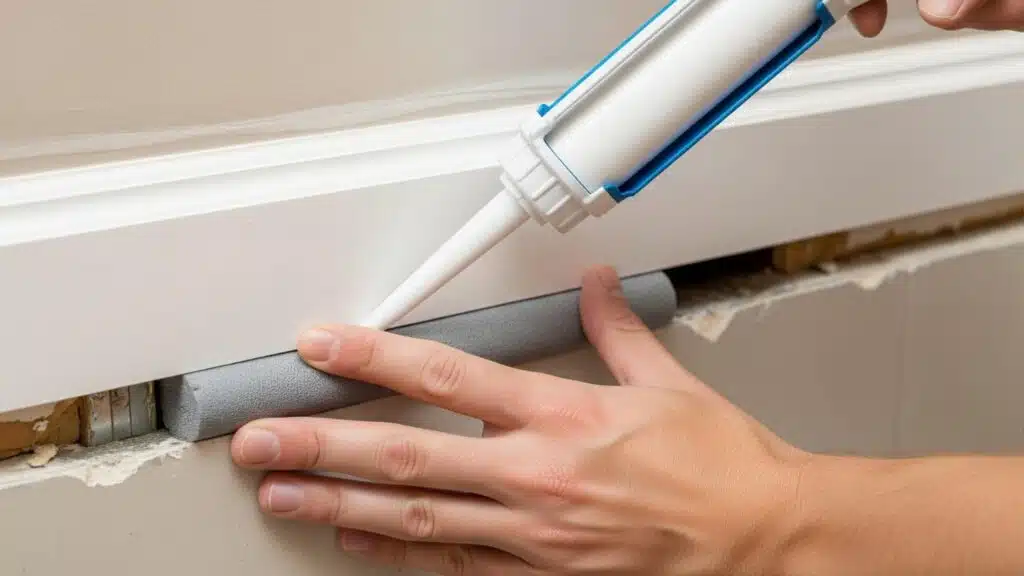
Step 2: Apply a Smooth, Steady Bead

Begin at one end of the trim and squeeze the trigger gently, applying steady pressure as you move the gun along. Work in sections of about two to three feet at a time so you can smooth the caulk before it starts to dry.
Focus on filling gaps evenly without leaving clumps. If your gun gets messy, wipe it off on the rag right away. Keeping tools clean helps maintain a smoother application and reduces later cleanup.
Step 3: Smooth the Caulk with Warm Water
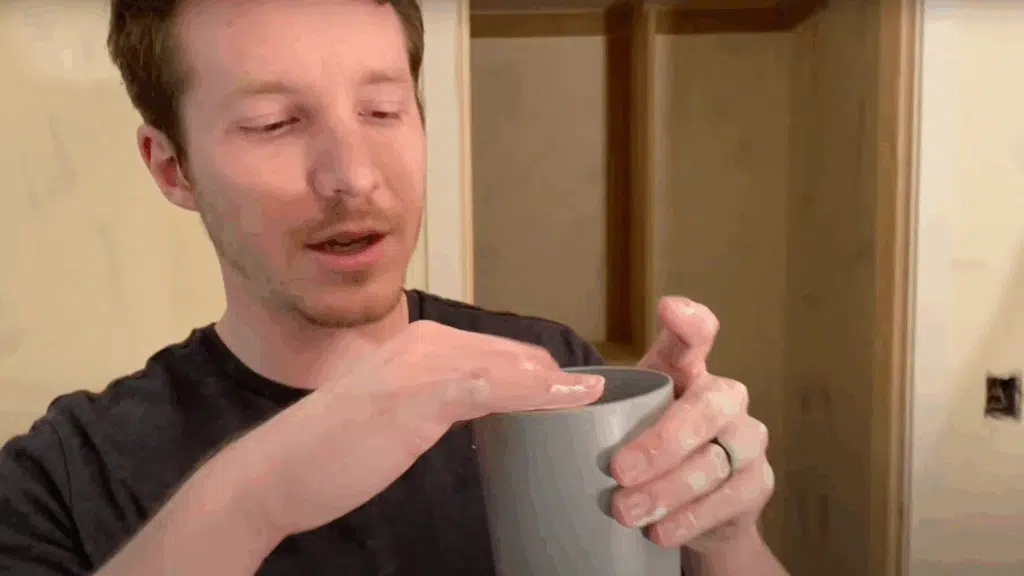
Dip your fingers in the cup of warm water, then use your middle finger to press lightly against the fresh bead. The goal is not to scrape away caulk but to push it into the gap while leaving a clean surface.
Wipe excess onto your rag as needed to avoid smearing. Using three fingers together can help spread caulk evenly and prevent ridges. Keep smoothing until the bead looks uniform and professional.
Step 4: Handle Corners with Care
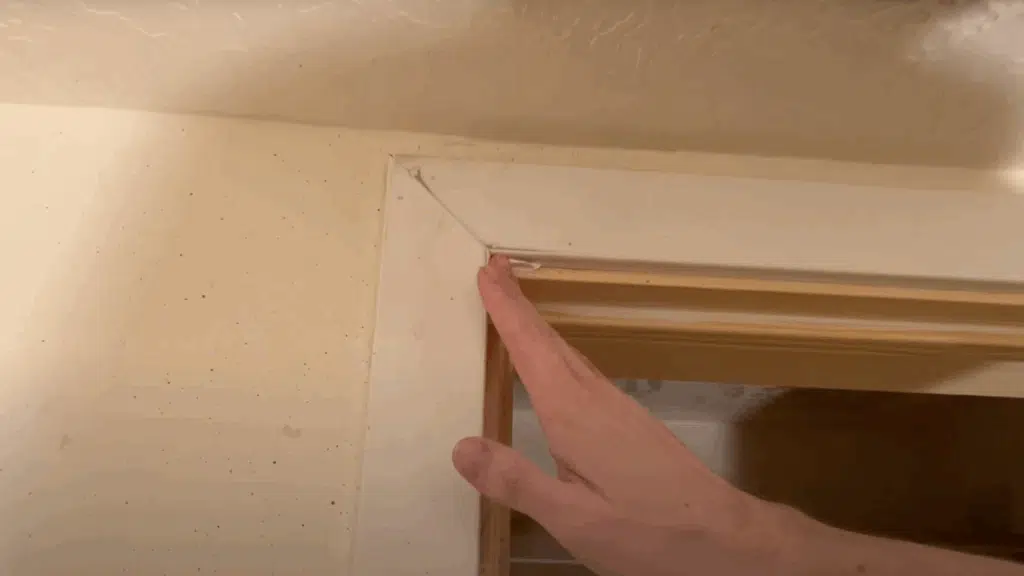
Corners require extra attention since caulk can easily bunch or leave gaps. Rotate the caulk gun tip to get into tight angles, applying small amounts of caulk as you go.
Then dip your finger or pinky into warm water and carefully spread the caulk across both sides of the corner.
Work slowly, pushing caulk into the joint and wiping excess on your rag. Repeat as needed until the corner looks even and smooth without clumps.
For a more detailed walk-through, watch this video:
Best Caulk for Trim
Choosing the right caulk makes all the difference in your results. For trim, paintable caulk is usually the best option because it blends seamlessly with wall color once painted.
Non-paintable caulk is better for areas where the finish doesn’t need matching. Latex caulk is easy to use, dries quickly, and cleans with water, while silicone offers stronger flexibility and moisture resistance but is harder to paint.
Hybrid caulks combine the benefits of both, making them versatile for many projects. A quick comparison chart can help you decide which type works best for your trim needs.
Caulking in Tricky Areas
Not every spot is easy to seal. Corners, edges, and tight spaces can be a challenge, but with the right approach you can still get a clean finish. Here’s how to handle those tricky areas:
Inside and Outside Corners
Corners are often the hardest areas to caulk because the angle makes it easy to leave gaps or excess buildup. To avoid this, apply steady pressure and keep your bead thin.
Smooth the caulk with a damp finger or tool, pulling through the corner in one continuous pass. Starting slightly before the corner ensures the line flows evenly and prevents breaks in the seal.
Large or Uneven Gaps
Not all gaps can be sealed with caulk alone. If the space between the wall and trim is too wide, use a backer rod or filler first. Insert the backer rod into the gap, then apply caulk over it for a smooth finish.
This method saves material, prevents the caulk from sinking, and creates a stronger seal that holds up better over time. It’s especially useful in older homes where walls may not align perfectly with the trim.
Caulking After Painting
Sometimes caulking happens after painting, especially if you missed gaps earlier. The main advantage is that you can see exactly where sealing is needed. The downside is that you’ll likely need to touch up the paint once the caulk dries.
Always use paintable caulk in this situation so the repair blends seamlessly with your walls. Apply a thin line, smooth it carefully, and once dry, lightly paint over for a clean, professional-looking result.
Best Way To Caulk Trim: A Quick Summary
For neat, durable lines, use a small, angled tip. Work in short sections, pushing to fill, then smooth lightly.
- Cut the tip at 45° (small opening).
- Work in 2–3 ft sections.
- Push to fill; don’t scrape.
- Smooth with a damp finger; level any edge ridges.
Pro vs. DIY Approach
Caulking trim can be done in different ways depending on your skill level. Pros move fast, while beginners benefit from tape. Here is the comparison side-by-side:
| Approach | Method | Best For | Drawbacks |
|---|---|---|---|
| Professional | Freehand application with steady bead, no tape. | Experienced painters and carpenters. | Requires steady hands, risk of messy lines. |
| DIY Beginner | Use painter’s tape for clean edges, slower but forgiving. | Homeowners are new to caulking. | Slower process, extra step to remove tape. |
| Balanced | Mix of freehand in easy spots, tape for tricky areas like corners. | DIYers with moderate experience. | Still takes more time than the full pro method. |
Common Mistakes to Avoid
Many caulking mistakes come from rushing or using the wrong technique. Knowing them helps you get cleaner, longer-lasting results. Here are some of the common mistakes to avoid:
- Cutting the tip too large: A wide opening releases too much caulk, creating messy, uneven lines.
- Over-applying caulk: Too much caulk is harder to smooth and wastes material.
- Not smoothing quickly: Caulk begins to skin over fast, making it difficult to achieve a smooth finish.
- Using the wrong caulk type: Choosing non-paintable or unsuitable caulk leads to poor adhesion and weak results.
Troubleshooting and Fixes
Even with careful application, caulk issues can appear over time. Knowing why they happen and how to fix them keeps your trim looking fresh.
- Shrinkage and cracks, why they happen & how to fix: Shrinkage often comes from applying too thin a bead or using low-quality caulk. Cracks can also form if surfaces shift. To fix, remove the damaged section completely and reapply a thicker, even bead.
- Peeling or separating caulk lines: Poor adhesion or dirty surfaces usually cause peeling. Scrape away the failed caulk, clean the area thoroughly, and reapply with paintable caulk.
- Re-caulking without damaging trim: Use a utility knife to carefully cut along the old bead before pulling it away. This keeps paint and trim intact.
Conclusion
Now that you understand how to caulk trim, you can see how such a simple project creates a big impact. Filling in those small gaps instantly improves the appearance of your walls, keeps out dust, and prevents drafts.
With the right tools, careful preparation, and steady application, you can achieve results that look like a professional handled the job. Take your time, smooth as you go, and don’t be afraid to rework mistakes.
For easier DIY guidance, check out my other home improvement projects on the website today!