When I started thinking about making my bathroom easier to use, I quickly realized how challenging it can be. Maybe you’ve felt that the same, tight spaces, narrow doors, and hard-to-reach fixtures can make daily tasks stressful.
A wheelchair accessible bathroom remodel is about more than just following guidelines; it’s about creating safety, comfort, and freedom for you or someone you care about.
In this blog, you’ll learn how to plan layouts, choose the right shower setup, and budget wisely for upgrades that actually make life easier.
By the end, you’ll see how accessible bathroom remodeling can turn your space into one that’s safer, smoother to navigate, and comfortable for everyone.
Why Accessibility Matters
Accessibility changes lives. Imagine a loved one who needs help every time they bathe or use the toilet. A properly designed accessible bathroom restores independence, dignity, and privacy.
For homeowners, it’s more than a kindness; it’s smart planning. An accessible remodel can:
- Prevent falls and injuries
- Allow aging in place
- Boost your home’s resale value
ADA vs. Home Accessibility
Public spaces must comply strictly with the ADA (Americans with Disabilities Act) standards. Homes, however, aren’t legally required to meet ADA specs.
Still, using ADA guidelines as a baseline makes a home safer and easier to use for anyone with mobility needs.
Think of ADA as the gold standard, but feel free to adapt dimensions and materials to match your specific space and lifestyle.
Planning accessible bathroom remodeling early can prevent injuries and support independence long term.
Plan First: Assess User Needs for Accessible Bathroom
A successful accessible remodel starts with a clear understanding. Before spending, measure needs and preferences, not just space dimensions.
| Step | Details |
|---|---|
| Interview the User | Ask about mobility type (manual or power wheelchair, walker, cane), transfer methods, vision or hearing limits, and daily assistance. Understanding these needs guides layout, door width, and fixture placement. |
| Measure the Wheelchair and Turning Needs | Measure width (typically 25–27 inches), turning radius (around 60 inches), and footrest clearance. Leave space for smooth forward and backward movement without scraping walls or fixtures. |
| Make a Wishlist vs. Must-Haves | Create two lists. Must-haves: safety rails, transfer space, reachable controls. Nice-to-haves: finishes, smart features, heated floors. This keeps a balance between safety and appearance while staying on budget. |
Thoughtful planning like this ensures the remodel fits real daily routines, not just standard measurements, saving time, effort, and money.
Wheelchair-Accessible Bathroom Layout and Clearances
A well-planned layout makes movement easy and safe, ensuring clear pathways, adequate space, and practical positioning for every fixture.
1. Minimum Turning Radius for Wheelchair Movement
Plan for a 60-inch (5-foot) open turning circle in the main area of the bathroom. This clearance allows most wheelchairs to move and rotate freely without bumping into walls or fixtures.
If your bathroom is small, you can angle fixtures slightly or design a wet-room layout where the shower floor is level with the rest of the room. That keeps movement smooth and eliminates unnecessary barriers for the user.
2. Door Width for Wheelchair Accessibility
Always aim for a minimum 32-inch clear opening for any bathroom door. This size fits most manual chairs comfortably, but if space allows, go for 36 inches to accommodate larger or powered models.
If you can’t widen the frame, use offset hinges; they add extra inches of clearance without major construction. Wider doors aren’t just convenient; they also reduce strain and make entry and exit safer and smoother for everyday use.
3. Clear Floor Space Requirements Around Fixtures
Every major fixture needs open space for easy approach and transfer.
- Toilet: Leave 48 inches in front and 32–36 inches of side clearance.
- Sink: Allow at least 30 inches of front clearance for wheelchair access.
- Shower: Provide at least 36×36 inches of clear space for safe entry and turning.
These clearances keep movement smooth and reduce obstacles for wheelchair users and caregivers alike.
4. Door Swing Direction for Accessibility and Safety
Install outward-swinging, sliding, or pocket doors instead of traditional inward-opening ones. Outward swings prevent users from getting trapped inside in case of emergencies, and also free up interior space for turning.
Sliding and pocket doors are especially helpful in small bathrooms, saving valuable clearance while maintaining full privacy.
Choose door hardware that’s easy to grip and ensure thresholds stay low and level to avoid tripping or blocking wheelchair movement.
Toilets and Transfer Considerations
Designing the toilet area right makes everyday use safer, easier, and more comfortable for anyone using a wheelchair or mobility aid.
Toilet Height for Easy and Safe Transfers
The best toilet height for most users is between 17–19 inches from the floor to the top of the seat. This range aligns closely with wheelchair seat heights and meets ADA guidance, making side or front transfers smoother and safer.
You can install a comfort-height toilet or use a raised seat adapter. Staying within this height range reduces strain on knees and arms while helping users maintain balance during transfers.
This is one of the most important choices in any handicap bathroom remodel.
Side and Rear Clearances for Lateral Transfers
Clearances around the toilet make a huge difference in safety and usability. Leave 16–18 inches from the wall to the toilet centerline, and provide at least 30–36 inches of open space on one side for wheelchair positioning.
A clear area behind the toilet helps with assisted transfers or the installation of a grab bar. Proper spacing lets the user move smoothly from wheelchair to toilet without twisting awkwardly or bumping nearby fixtures, ensuring independent and confident use.
Wall-Hung vs. Floor-Mount Toilets and Plumbing Notes
Both toilet types can work well, but each has trade-offs. Wall-hung toilets free up floor space, making cleaning easier and giving a more open look. However, they require reinforced walls and carefully aligned plumbing.
Floor-mount toilets are simpler to install and less expensive, but take up more space and can limit transfer angles. If you’re remodeling an older home, check that existing plumbing supports your preferred toilet type before making final design decisions.
Recommended Accessories and Reinforcement for Safety
Safety accessories matter just as much as toilet height. Install reinforced wall framing (2×10 or 2×12 blocking) behind the drywall before adding grab bars; this ensures they support full weight.
Position toilet paper holders within 8–12 inches of the toilet for easy reach. You can also add fold-down grab bars or cushioned back supports for extra balance.
Planning these small details early makes daily use smoother, safer, and more comfortable for everyone.
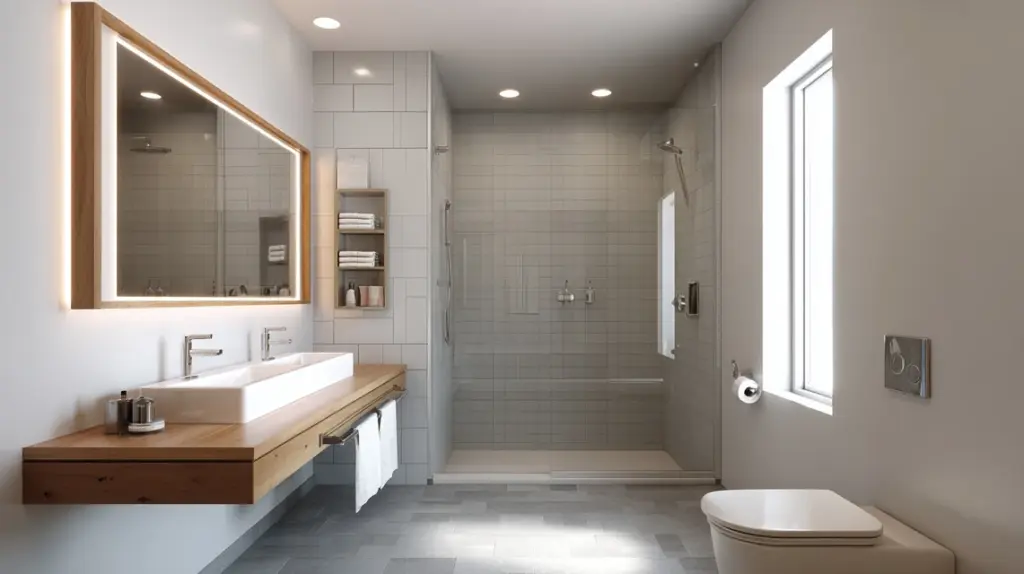
Showers, Tubs, and Bathing Options

Your shower or tub setup defines ease of entry, safety during transfers, and overall comfort for wheelchair users and caregivers alike.
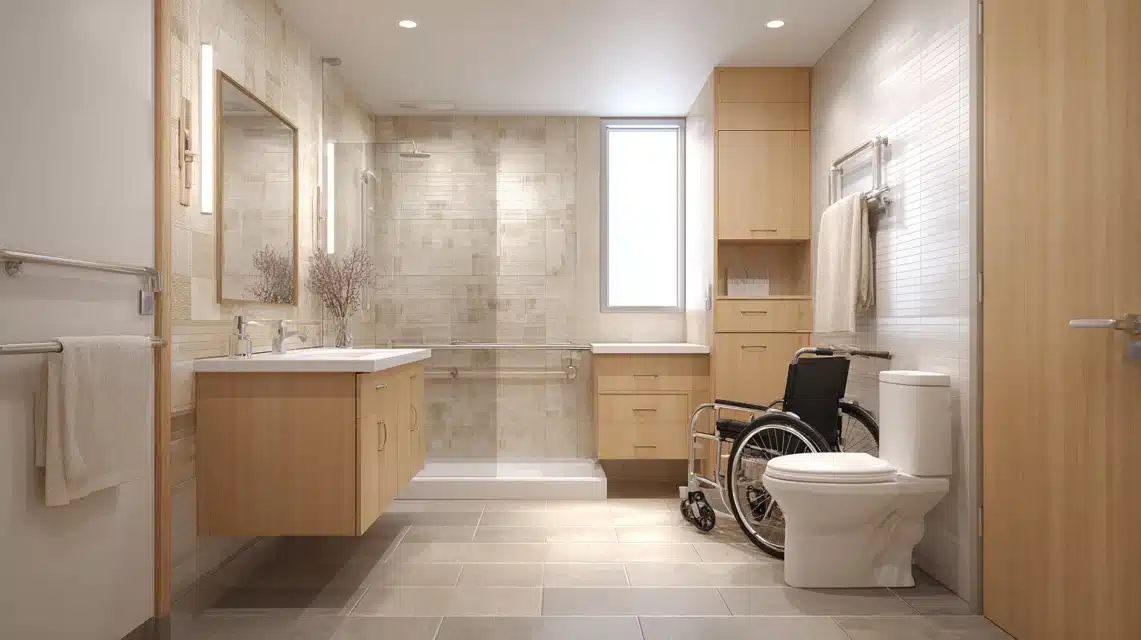
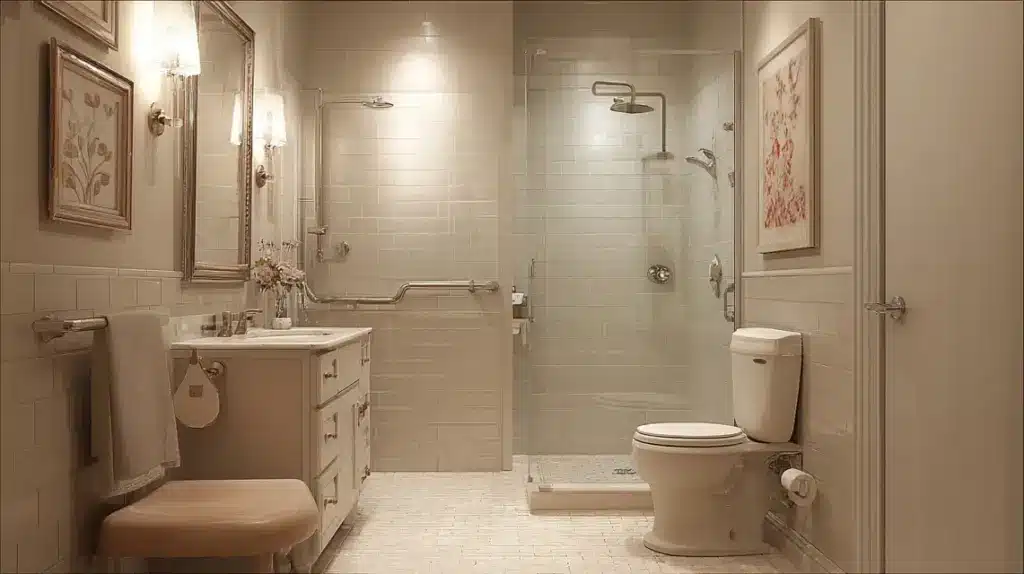
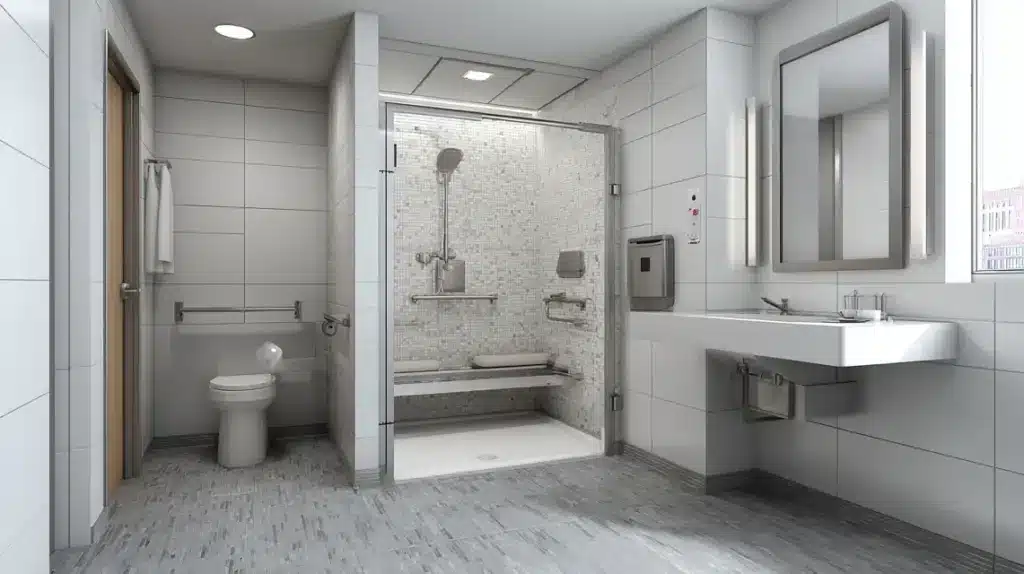
Roll-In (Curbless) Showers: Safe, Modern, and Easy-Access Options
A roll-in shower removes barriers at the entry, allowing seamless wheelchair access and easier cleaning. It features continuous flooring between the bathroom and shower zone for a smooth transition.
To ensure proper drainage, slope the floor about ¼ inch per foot toward a linear drain near the wall. Use matte, slip-resistant tiles or textured vinyl for safety.
Though installation requires expert waterproofing and precise grading, the result is a modern, open, and completely accessible bathing space.
Transfer Showers and Fold-Down Seats vs. Tubs with Transfer Benches
Both transfer showers and tubs with transfer benches serve users who need seated or assisted bathing.
Transfer showers typically measure 36×36 inches and include built-in or fold-down benches for safe side transfers. Tubs use portable benches that allow users to slide across for soaking.
Each option benefits from grab bars, slip-resistant surfaces, and handheld showers for comfort and control. Transfer showers save space, while tubs maintain traditional use, ideal depending on mobility and preference.
Shower Control Placement and Handheld Shower
Position shower controls between 38–48 inches from the floor for easy reach while seated.
Install a handheld showerhead on an adjustable slide bar with a 60-inch flexible hose for versatility. Keep controls within comfortable arm’s reach and opposite the shower entry to prevent direct spray.
Choose lever or push-button handles for easy grip, and include a thermostatic mixing valve to maintain consistent water temperature. These small adjustments enhance safety, independence, and comfort for all users.
Grab Bars, Reinforcement, and Placement

Grab bars are essential for balance and support. Correct placement and wall reinforcement make every bathroom safer and more user-friendly.
- Toilet Grab Bars: Install horizontal grab bars beside and behind the toilet to support transfers and steady movement for seated or standing users.
- Shower Grab Bars: Place vertical bars near the shower entrance and horizontal ones on the back wall for steady entry and body support.
- Tub Area Grab Bars: Mount bars along the tub edge and inner wall to assist stepping in, sitting down, and safely exiting afterward.
- Reinforced Wall Blocking: Add 2×10 or 2×12 wooden backing behind walls before closing them to secure grab bars firmly and prevent loosening.
- Mounting Height and Diameter: Follow ADA guidance, mount bars 33–36 inches above the floor with a 1¼–1½-inch diameter for good grip.
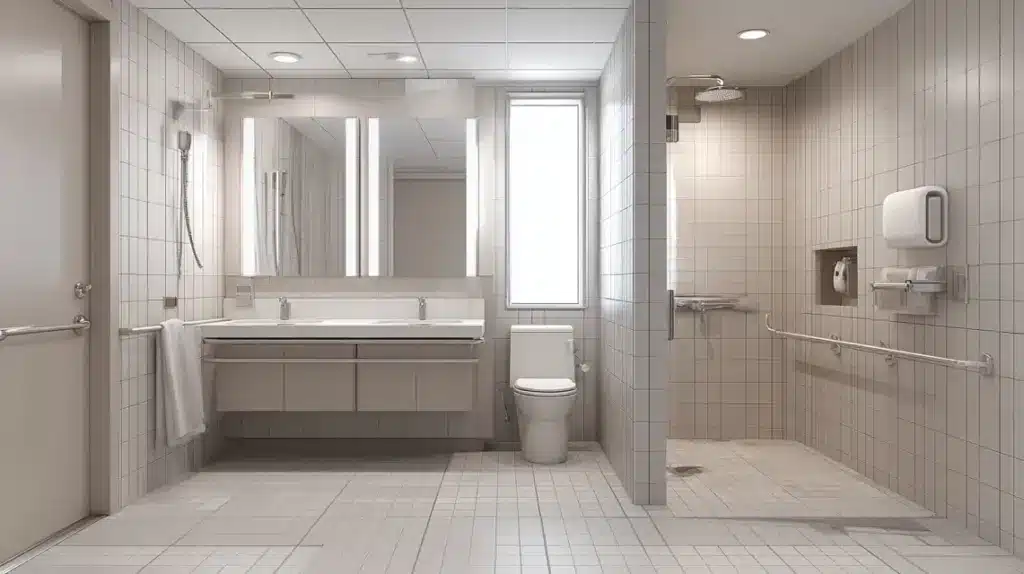
Accessible Flooring & Slip Resistance
Bathroom floors should be stable, slip-resistant, and properly sloped to prevent falls while allowing smooth wheelchair or walker movement in wet conditions.
Level Thresholds and Slip-Resistant Tile Finishes for Safety
Keep all thresholds level to eliminate tripping hazards, especially at shower entries. A no-step or curbless threshold allows easy wheelchair access and safer foot traffic.
Use tactile, slip-resistant tiles with matte finishes or fine textures to prevent slipping when wet. Choose tiles rated for wet areas (with a coefficient of friction above 0.42).
Add beveled transitions if small height changes are unavoidable. This approach ensures smoother movement and minimizes the risk of accidents for both seated and standing users.
Flooring Transitions and Proper Drainage Slope for Stability
Smooth transitions between flooring materials prevent wheels from catching and improve safety for those with limited balance. Keep floor level changes under ½ inch wherever possible.
When sloping toward drains, maintain a gentle ¼ inch per foot gradient to direct water flow without causing instability. Too steep a slope makes wheelchairs tilt uncomfortably, while too flat leaves puddles.
Choose linear drains for even water removal and ensure all surfaces stay slip-resistant even when slightly wet.
Heated Floors for Comfort, Dryness, and Additional Slip Prevention
Heated floors add comfort and safety to accessible bathrooms. They keep tiles warm, help evaporate water faster, and reduce moisture buildup that can cause slips.
Radiant heating systems are compatible with waterproof underlayments, making them suitable for wet environments. These floors also reduce the need for throw rugs, which often become hazards.
For energy efficiency, use programmable thermostats to maintain consistent warmth. Overall, heated floors enhance comfort and safety while supporting a cleaner, drier, and more accessible space.
Doors, Hardware & Thresholds in Accessible Bathrooms
The right doors and hardware improve accessibility, prevent accidents, and make movement easier for wheelchair users and caregivers throughout the bathroom.
Lever Handles and Automatic Door Openers for Effortless Use

Lever handles are much easier to operate than traditional knobs, especially for users with limited hand strength or arthritis. Choose handles that require minimal grip and pressure.
Automatic door openers or push-button systems can add convenience in bathrooms used by multiple people. These systems ensure independence while reducing physical strain.
Always verify that electronic openers comply with safety standards and include manual override options in case of power failure.
Sliding and Pocket Doors for Space Efficiency

Sliding and pocket doors are great solutions for smaller bathrooms where every inch counts. They eliminate the need for inward or outward door clearance, allowing extra space for wheelchairs or walkers.
Choose sturdy tracks that run smoothly and stay flush with the floor to prevent tripping hazards. For privacy, include soft-close systems or magnetic latches.
Proper alignment and accessible handles make these doors both functional and user-friendly for everyone in the household.
Low Thresholds and Safe Doorway Transitions

Keep thresholds as low and smooth as possible to prevent tripping or blocking wheelchair movement. Aim for a beveled threshold of ½ inch or less, in accordance with local accessibility codes.
Ensure transitions between different flooring types remain level and slip-resistant.
For exterior doors or bathrooms near outdoor areas, use weatherproof seals to prevent water from entering. These small adjustments make entry smoother, safer, and more comfortable for all users, regardless of mobility level.
Small Details that Matter for Any Accessible Bathroom
- Towel Bars: Install towel bars within 36–44 inches from the floor for easy reach while seated or standing.
- Toilet Paper: Mount holders 8–12 inches from the toilet’s front edge for a comfortable and safe reach.
- Soap Dispensers: Keep soap dispensers at sink height, no higher than 40 inches, to ensure easy access from a wheelchair.
- Mirrors: Angle or lower mirrors so users can see clearly while seated without straining or leaning forward.
- Storage: Place shelves or drawers between 30–48 inches high to stay within a natural reach zone for daily essentials.
- Hooks: Use large, rounded hooks installed at 44–48 inches for hanging robes, towels, or mobility aids.
- Electrical Outlets: Position outlets between 15–48 inches above the floor for wheelchair accessibility and reduced bending strain.
- Trash Bin Placement: Keep a small bin near the sink or toilet area, away from pathways, to avoid blocking walkways.
Permits, Codes, & when Ada Specs Apply for Accessible Bathroom
Understanding codes and permits keeps your remodel compliant and safe. Even though the ADA primarily applies to public spaces, using its dimensions as a reference helps ensure safe, practical layouts in private homes.
Most residential projects must comply with local building codes, such as the International Residential Code (IRC) and the International Plumbing Code (IPC), which address fixture spacing, venting, and accessibility.
Some areas also adopt parts of the International Building Code (IBC) for larger remodels. Always check with your local building department before beginning work.
Permits are typically required for plumbing, electrical, and wall reinforcement. Even if ADA isn’t mandatory, following ADA/Access Board standards greatly enhances safety, usability, and long-term value for your accessible bathroom.
Cost & Budget Planner for Accessible Bathroom Remodel
Budgeting for accessibility upgrades depends on scope, materials, and local labor rates.
| Category | Details / Recommendations |
|---|---|
| Typical Price Ranges | A minor retrofit with grab bars and wider doors costs $2,500–$7,000. A full gut remodel ranges $15,000–$35,000, while a new accessible build can reach $30,000–$60,000, depending on finishes and plumbing changes. |
| Major Cost Drivers | High costs often come from moving plumbing lines, reinforcing walls, installing roll-in showers, and widening doorways. Custom cabinetry, waterproof flooring, and electrical upgrades also raise expenses. Hiring an experienced accessibility contractor reduces costly design mistakes. |
| Ways to Save | Try a phased remodel, completing essential safety upgrades first. Use off-the-shelf fixtures instead of custom ones. Check state or local grants, veterans’ programs, or disability assistance funds for financial help. Smart planning can cut 20–30% off total costs. |
Accessible Bathroom Remodeling: DIY vs. Hiring a Professional
Knowing when to DIY and when to bring in experts ensures your remodel is both safe and code-compliant.
Basic upgrades like installing grab bars or swapping faucets can be DIY-friendly if you’re comfortable with tools.
However, any work involving plumbing, electrical wiring, wall reinforcement, or structural changes should be handled by licensed professionals.
Accessibility specialists or certified contractors understand ADA-based dimensions, turning radii, and safe installation methods. They also manage permits and inspections.
While DIY projects save money, improper waterproofing or slope errors can create long-term issues. Hiring a trained contractor guarantees your accessible bathroom meets safety standards, functions efficiently, and adds value to your home.
Accessible Bathroom Design Ideas and Styles
An accessible bathroom can be both practical and attractive. The right style improves mobility, safety, and daily comfort without sacrificing modern appeal.
Modern Minimalist Accessible Bathroom
A modern minimalist layout focuses on open floor space, sleek lines, and clutter-free design. Choose wall-mounted sinks, floating vanities, and roll-in showers with frameless glass to create easy movement zones.
Neutral colors and matte tiles enhance visibility and reduce glare. Hidden storage keeps essentials nearby without blocking access.
Lever handles, touchless faucets, and subtle lighting help maintain functionality while keeping the space clean, bright, and inviting for users with varying mobility needs.
Aging-in-Place Style
An aging-in-place bathroom combines classic design with built-in safety. Think comfort-height toilets, sturdy grab bars disguised as towel rails, and warm task lighting around mirrors.
Use soft, non-slip flooring and soothing neutral tones to make the space welcoming and calm. Add a walk-in shower with a fold-down seat and handheld sprayer for convenience.
This design ensures long-term independence and comfort for aging adults who plan to stay in their homes safely and confidently.
Small-Bathroom Wheelchair Solutions (Space-Saving Layouts)
Small bathrooms can still be highly functional with thoughtful design choices. Install pocket doors to save swing space and wall-hung toilets to open the floor area.
Corner sinks and roll-in showers with linear drains make every inch count. Use fold-down shower benches and sliding mirrors for added flexibility. Bright lighting and contrasting finishes improve visibility in tight spaces.
With smart placement, you can achieve a fully accessible layout even in compact bathrooms.
Reddit Review: Wheelchair-Friendly Bathroom Remodel (r/Remodel)

A Reddit user named Zorgi23 shared his heartfelt remodel story after his wife became wheelchair-bound following a stroke.
He designed and built a wheelchair-accessible bathroom with a wide curbless shower, a handmade wood vanity, and cedar wall paneling to match their rustic home.
Reviewer Mentions:
- u/Sad_Birthday_9805 called it a “beautiful renovation and act of love” that gave his wife back comfort and control.
- u/alpinechick88 suggested moving the toilet paper holder for easier access.
- Flat-Ad-20 and Lower_Ad_5532 recommended adding or adjusting grab bars near the toilet for better support.
- u/Elad-1961 praised the “awesome shower size and layout” for easy wheelchair maneuvering.
- teddybear65 emphasized that proper handrail placement was essential for safety.
- u/Valhallaback_Girl and u/Low_Bar9361 expressed emotional support, calling it “a wonderful story and beautiful remodel.”
Overall, the r/Remodel community admired the craftsmanship, thoughtful design, and emotional devotion behind the project, proving that accessibility can be both functional and full of heart.
Conclusion
Designing a bathroom that’s safe, practical, and easy to use takes careful planning, but it makes a lasting difference.
You’ve seen how the right layout, fixtures, and details can create comfort, safety, and independence for everyone. Even one thoughtful upgrade, like a roll-in shower or wider doorway, can completely change daily life.
The goal isn’t just to meet standards but to create a space that truly works for you.
If you’re ready to take the next step, keep checking my other blogs on accessible bathroom remodeling for more design ideas, real-life examples, and helpful tips to guide your next project.