Want to upgrade your plain walls but worried that a DIY board and batten wall project sounding too complicated?
Many homeowners avoid this project because they assume it requires advanced carpentry skills or professional installation help. I’ll walk you through building a DIY board and batten wall step-by-step.
Board and batten is a wall treatment using vertical strips of wood attached over horizontal boards for dimension. This classic design adds instant character and makes any room feel more expensive and carefully designed.
You’ll learn exactly what materials to buy, how to measure and install boards correctly, and creative styling ideas. Change your space with just basic tools and one free weekend of work. Let’s get started.
Why Should You Build a Board and Batten Wall?
A DIY board and batten wall costs much less than hiring professionals or buying expensive wallpaper for similar results.
You get a custom, high-end look without spending thousands of dollars on complicated wall treatments or installations.
This wall style adds instant depth and dimension to plain, boring walls that feel flat and uninspiring. The vertical lines create visual interest and make your ceilings appear taller than they actually are.
Board and batten works beautifully in modern, rustic, farmhouse, or transitional interior design styles without feeling outdated. Best of all, this project takes just one weekend to complete with basic tools.
Materials and Tools You’ll Need
Gathering all your materials before starting saves time and prevents frustrating trips to the hardware store mid-project. Here’s what you need and what it typically costs:
| Material | Cost (USD) |
|---|---|
| 1×3 primed pine (per 16-ft board) | $10 to $15 |
| 1×6 primed pine (per 8-16 ft board) | $14 to $45 |
| 1×2 primed pine (per 12 ft board, optional ledge trim) | $5 to $10 |
| Two-inch brad nails (per box) | $5 to $15 |
| Nail hole filler or spackle (per container) | $3 to $10 |
| Paintable trim caulk (per tube) | $5 to $15 |
| Primer for unprimed wood (per gallon) | $15 to $40 |
| Interior paint (satin or eggshell, per gallon) | $25 to $60 |
| Painter’s tape (per roll) | $5 to $15 |
| Floor protection (plastic sheeting, per roll) | $10 to $30 |
| Scrap wood (varies, small pieces for spacing) | $0 to $10 (usually leftover or scrap) |
These costs are estimated and may vary depending on your location, lumber quality, brand choices, and current market prices.
How to Build a DIY Board and Batten Wall
Building a board and batten wall involves careful measuring, strategic board placement, and finishing touches for a polished look. Following these steps ensures your wall looks professional and stays secure for years ahead.
Step 1: Measure, Plan, And Set Your Spacing

Start by measuring your wall carefully and writing the exact numbers down. Measure your boards too, since 1×3 boards are actually 2.5 inches wide.
Use an online wainscoting or board and batten layout calculator to plan your spacing accurately. Once you know the distance between battens, cut a wooden spacer that matches it. This spacer keeps every vertical board evenly spaced as you work.
Step 2: Install First Verticals And Level The Top Board

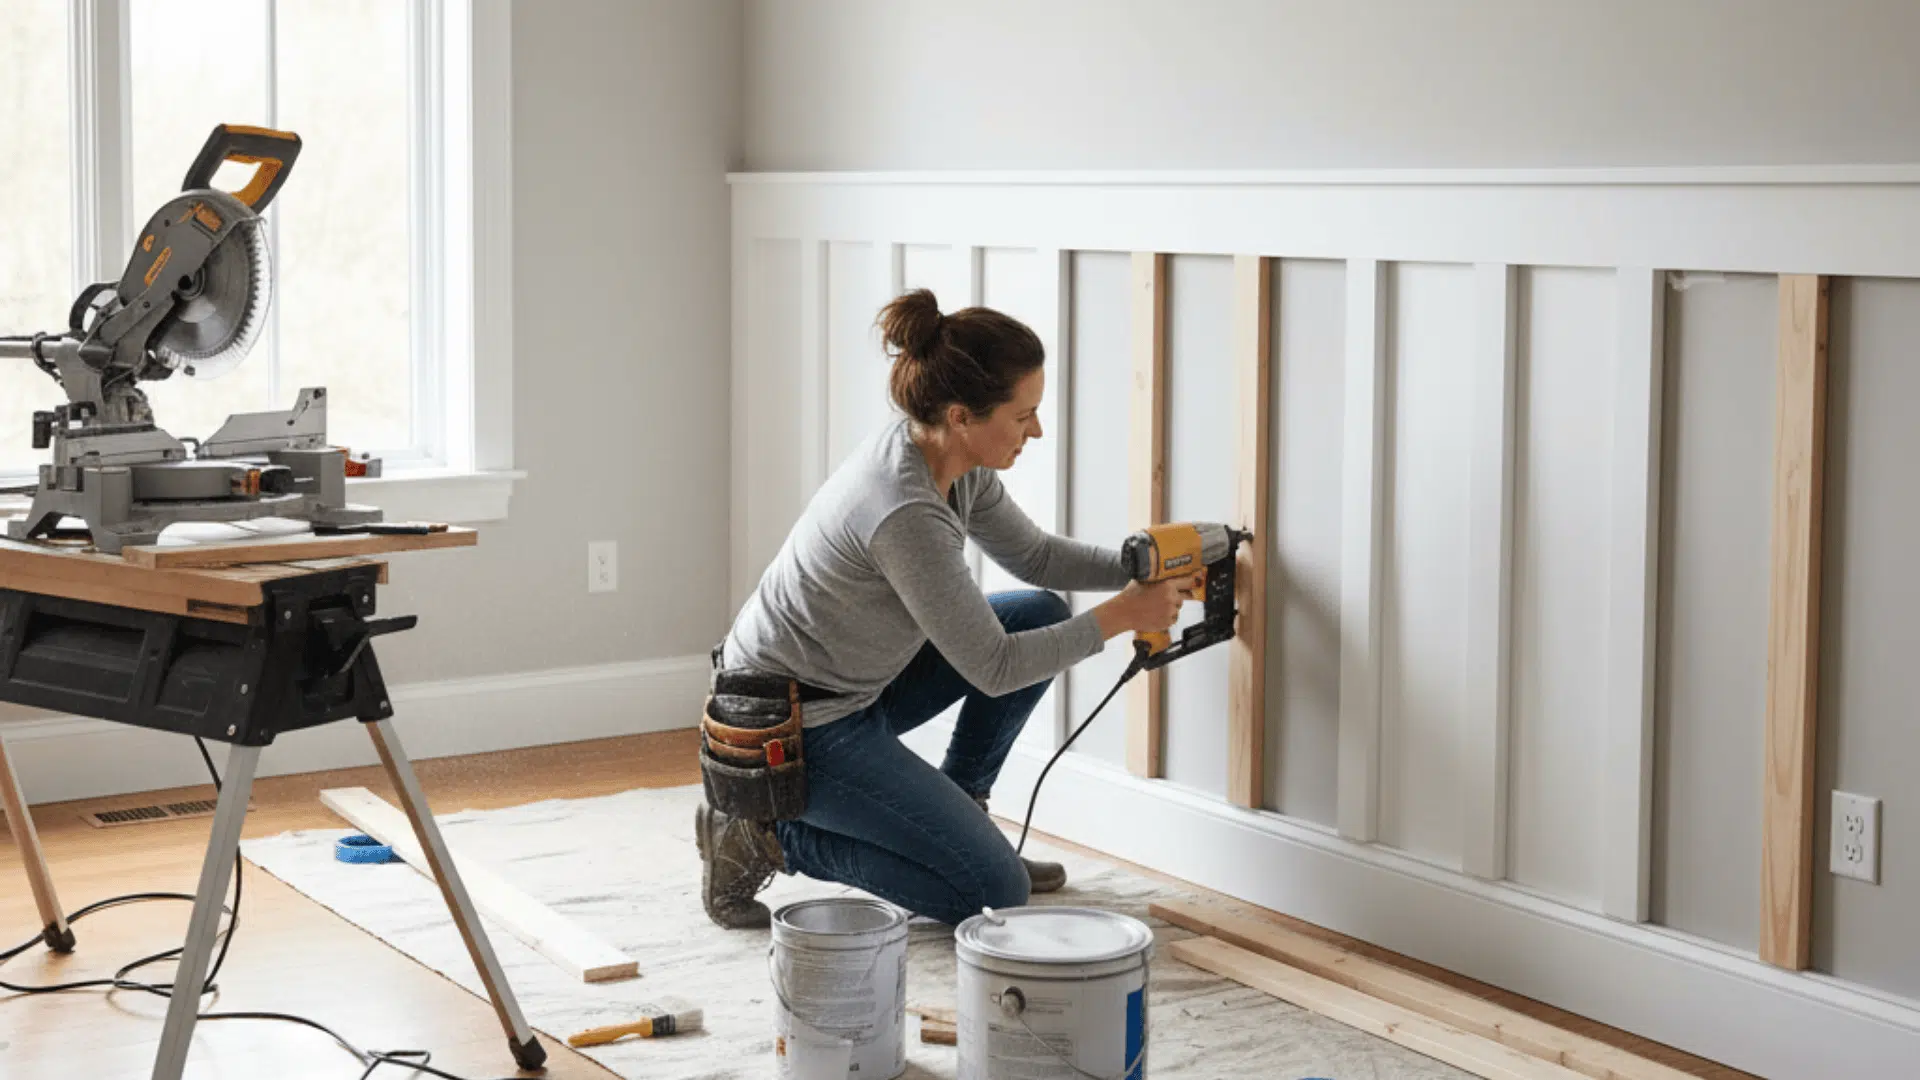
Begin by installing the farthest right and farthest left vertical boards first. These act as your guides for the rest. Then, measure and place your top horizontal board across them.
Use a level to make sure it’s straight before nailing it into place. If it’s slightly off, lift one side gently. Fill any small gaps later with nail filler for smooth, clean seams.
Step 3: Cut And Install The Remaining Vertical Boards

Pick your desired wall height; 48 inches works great since 8-foot boards can be cut in half with no waste. Floors aren’t always level, so measure each spot individually. Cut and test-fit one or two boards at a time before nailing.
Handle windows or corners by adjusting lengths as needed. Use your spacer for consistent gaps and work carefully along the entire wall.
Step 4: Fill And Caulk For a Smooth Finish

Start by filling every nail hole and seam with spackle or wood filler. Use a putty knife to spread it evenly and let it dry completely. Once dry, lightly sand to smooth rough spots.
Next, caulk all the seams where boards meet the wall using paintable trim caulk. Run your finger along the bead to smooth it out, then wipe away extra caulk for clean lines.
Step 5: Prime And Paint For a Professional Look

After filling and caulking, apply primer to any unprimed wood, especially new pine or trim pieces. Once it’s dry, protect nearby floors and edges with painter’s tape. Use a roller for large sections and a brush for corners and edges.
Apply two coats of your chosen paint color for best coverage. When the final coat dries, remove tape for a crisp, polished finish.
For more details, watch the complete video tutorial by MrsAshleyFrence.
Best Paint Colors for Board and Batten Interior Walls
Choosing the right paint color makes your board and batten wall stand out and complement your room perfectly. Here are popular color choices and tips for selecting the best finish:
- Trending colors like sage green, navy blue, charcoal gray, and soft white create gorgeous board and batten walls.
- Darker tones add drama and sophistication to large rooms while making bold design statements that catch attention.
- Lighter tones open up small spaces and make rooms feel brighter, airier, and more welcoming throughout the day.
- Choose paint finishes based on room type, using satin for bedrooms and semi-gloss for high-traffic hallways and entryways.
Your color choice changes the entire mood and feeling of your room instantly and dramatically. Experiment with samples on your wall before committing to a final color decision for best results.
Common Mistakes to Avoid When Building a Board and Batten Wall
Many DIY builders make preventable errors that affect how their finished board and batten wall looks and lasts. Avoid these common pitfalls to ensure your project turns out professional and polished:
- Forgetting to check for level alignment: Always use a level when installing boards or your wall will look crooked and unprofessional.
- Skipping caulk or filler: Leaving gaps between boards and walls creates an unfinished look that ruins the entire project’s appearance.
- Using the wrong type of wood or paint finish: Unprimed wood or incorrect paint finishes cause problems like warping, peeling, or poor coverage.
- Overcrowding battens or uneven spacing: Too many boards make walls feel busy, while uneven gaps look sloppy and poorly planned.
Taking extra time to avoid these mistakes ensures your board and batten wall looks intentional and well-crafted. Careful planning and attention to detail make the difference between amateur and professional-looking results every time.
Creative Ideas for Board and Batten Interior Walls
Board and batten walls work beautifully in different rooms but require unique design approaches for each space. Here’s how to style board and batten to maximize function and visual appeal in every room:
1. Entryway

Your entryway sets the tone for your entire home and needs both style and practical storage solutions. These board and batten design ideas make your entrance functional and welcoming:
- Install sturdy wall hooks directly onto the vertical battens for hanging coats, bags, and umbrellas within easy reach.
- Add a floating shelf above the board and batten for displaying decor, keys, or small plants beautifully.
- Place a bench or storage ottoman below the wall to create a complete, functional mudroom-style landing zone.
These additions turn your entryway into a practical space that welcomes guests while keeping clutter organized. The board and batten provides both beauty and purpose right at your front door daily.
2. Dining Room

Dining rooms benefit from board and batten walls that add elegance and create an intimate atmosphere for meals. Change your dining space with these sophisticated design approaches:
- Extend board and batten to chair rail height for a classic wainscoting look that protects walls from damage.
- Add photo frame molding within the batten sections to create elegant, traditional paneling with extra dimension and detail.
- Install wall sconces between battens to provide lighting that highlights the texture and creates an intimate dining ambiance.
These design choices upgrade your dining room into a sophisticated space perfect for entertaining family and guests. Board and batten creates an upscale backdrop that makes every meal feel more special and memorable.
3. Living Room

Living rooms need focal points and flexible spaces for displaying your personality through decor and accessories. These board and batten ideas help you create a curated, cohesive look:
- Frame your television or fireplace with board and batten to create an attractive focal point that draws attention.
- Hang framed artwork or family photos on the vertical battens using photo hanging strips for easy placement.
- Install floating shelves between battens to display books, plants, or decorative objects at varying heights for interest.
Pairing board and batten with thoughtful accessories makes your living room feel curated and intentionally designed throughout. The wall treatment provides the perfect backdrop for beautifully showcasing your personal style and favorite belongings.
4. Bedroom

Bedrooms should feel peaceful and personalized while offering both comfort and subtle style without overwhelming the space. Create a restful retreat with these board and batten bedroom ideas:
- Create an accent wall behind your bed using board and batten instead of a traditional headboard for drama.
- Add narrow floating shelves on battens beside the bed for holding lamps, books, or nighttime essentials conveniently.
- Install soft LED strip lighting behind the top horizontal board to create a gentle, relaxing glow for ambiance.
These bedroom ideas combine style with comfort to make your space feel like a peaceful retreat. Board and batten add a sense of structure while keeping the room calm and inviting for restful sleep.
Final Thoughts
You now have everything needed to create a beautiful DIY board and batten wall that alters any room. This affordable project delivers dramatic results without requiring professional skills or thousands of dollars in materials and labor.
Remember that careful measuring and patient installation make the biggest difference between amateur and polished results.
Taking time with spacing, leveling, and finishing details ensures your wall looks intentionally designed rather than hastily assembled.
I hope this helps you add structural details that bring value and beauty to your home affordably. Share your DIY board and batten wall progress or questions in the comments below!